|
AAA
|
These are events that the system generates when failed or invalid attempts happen to authenticate, authorize, or use up resources
in the network, when AAA is configured.
|
109001-109035
113001-113027
|
|
BotNet
|
These events get logged when a user attempts to access a malicious network, which might contain a malware-infected host, possibly
a BotNet, or when the system detects traffic to or from a domain or an IP address in the dynamic filter block list.
|
338001-338310
|
|
Failover
|
These events get logged when the system detects errors in stateful and stateless failover configurations or errors in the
secondary firewall unit when a failover occurs.
|
101001-101005, 102001, 103001-103007, 104001-104004, 105001-105048
210001-210022
311001-311004
709001-709007
|
|
Firewall Denied
|
These events get generated when the firewall system denies traffic of a network packet for various reasons, ranging from a
packet drop because of the security policy to a drop because the system received a packet with the same source IP and destination
IP, which could potentially mean an attack on the network.
Firewall Denied events may be contained in a NetFlow and may be reported with NetFlow event IDs as well as syslog IDs.
|
106001, 106007, 106012, 106013, 106015, 106016, 106017, 106020, 106021, 106022, 106023, 106025, 106027
|
|
Firewall Traffic
|
These are events that get logged depending on the various connection attempts in the network, user identities, time stamps,
terminated sessions, and so on.
Firewall Traffic events may be contained in a NetFlow and may be reported with NetFlow event IDs as well as syslog IDs.
|
106001-106100, 108001-108007, 110002-110003
201002-201013, 209003-209005, 215001
302002-302304, 302022-302027, 303002-303005, 313001-313008, 317001-317006, 324000-324301, 337001-337009
400001-400050, 401001-401005, 406001-406003, 407001-407003, 408001-408003, 415001-415020, 416001, 418001-418002, 419001-419003,
424001-424002, 431001-431002, 450001
500001-500005, 508001-508002
607001-607003, 608001-608005, 609001-609002, 616001
703001-703003, 726001
|
|
IPsec VPN
|
These events are logged in an IPsec VPN-configured firewall when mismatches occur in IPsec security associations or when the
system detects an error in the IPsec packets it receives.
|
402001-402148, 602102-602305, 702304-702307
|
|
NAT
|
These events are logged in a NAT-configured firewall when NAT entries are created or deleted and when all the addresses in
a NAT pool are used up and exhausted.
|
201002-201013, 202001-202011, 305005-305012
|
|
SSL VPN
|
These events are logged in an SSL VPN-configurated firewall when WebVPN sessions get created or terminated, user access errors,
and user activities.
|
716001-716060, 722001-722053, 723001-723014, 724001-724004, 725001-725015
|
|
NetFlow
|
These events are logged around the IP network traffic as network packets enter and exit the interfaces, timestamps, user identities,
and the amount of data transferred.
|
0, 1, 2, 3, 5
|
|
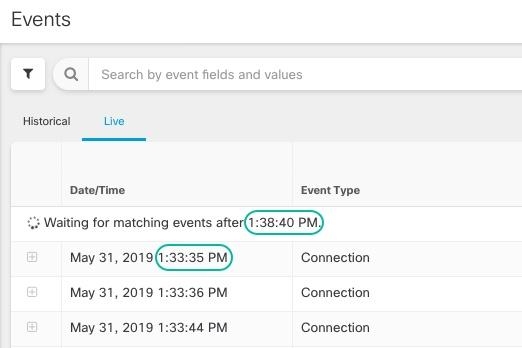
Connection
|
You can generate events for connections as users generate traffic that passes through the system. Enable connection logging
on access rules to generate these events. You can also enable logging on Security Intelligence policies and SSL decryption
rules to generate connection events.
Connection events contain data about the detected sessions. The information available for any individual connection event
depends on several factors, but in general includes:
-
Basic connection properties: timestamp, source and destination IP address, ingress and egress zones, the device that handled
the connection, and so on.
-
Additional connection properties discovered or inferred by the system: applications, requested URLs, or users associated with
the connection, and so on.
-
Metadata about why the connection was logged: which configuration handled the traffic, whether the connection was allowed
or blocked, details about encrypted and decrypted connections, and so on.
|
430002, 430003
|
|
Intrusion
|
The system examines the packets that traverse your network for malicious activity that could affect the availability, integrity,
and confidentiality of a host and its data. When the system identifies a possible intrusion, it generates an intrusion event,
which is a record of the date, time, type of exploit, and contextual information about the source of the attack and its target.
Intrusion events are generated for any intrusion rule set to block or alert, regardless of the logging configuration of the
invoking access control rule.
|
430001
|
|
File
|
File events represent files that the system detected, and optionally blocked, in network traffic based on your file policies.
You must enable file logging on the access rule that applies the file policy to generate these events.
When the system generates a file event, the system also logs the end of the associated connection regardless of the logging
configuration of the invoking access control rule.
|
430004
|
|
Malware
|
The system can detect malware in network traffic as part of your overall access control configuration. AMP for Firepower can
generate a malware event, containing the disposition of the resulting event, and contextual data about how, where, and when
the malware was detected. You must enable file logging on the access rule that applies the file policy to generate these events.
The disposition of a file can change, for example, from clean to malware or from malware to clean. If AMP for Firepower queries
the AMP cloud about a file, and the cloud determines the disposition has changed within a week of the query, the system generates
retrospective malware events.
|
430005
|
|
Security Intelligence
|
Security Intelligence events are a type of connection event generated by the Security Intelligence policy for each connection
that is blocked or monitored by the policy. All Security Intelligence events have a populated Security Intelligence Category
field.
For each of these events, there is a corresponding "regular" connection event. Because the Security Intelligence policy is
evaluated before many other security policies, including access control, when a connection is blocked by Security Intelligence,
the resulting event does not contain the information that the system would have gathered from subsequent evaluation, for example,
user identity.
|
430002, 430003
|


 ) - connectivity established with all sensors, and
  ) - connectivity established with some sensors, or
  ) - connectivity lost with all configured sensors, and
  ) > Sensors.
 ) next to an observation type to view all logged observations of that type.
 ) next to an alert type and select low, medium, or high to change the priority.
 .
.


 . Click the pin icon
  to pin the


 Feedback