Configuring the Remediation Module

The following section provides the steps for configuring the remediation module.

Configure

To configure the remediation module installed on the FMC, complete the following procedure:

Procedure


Step 1

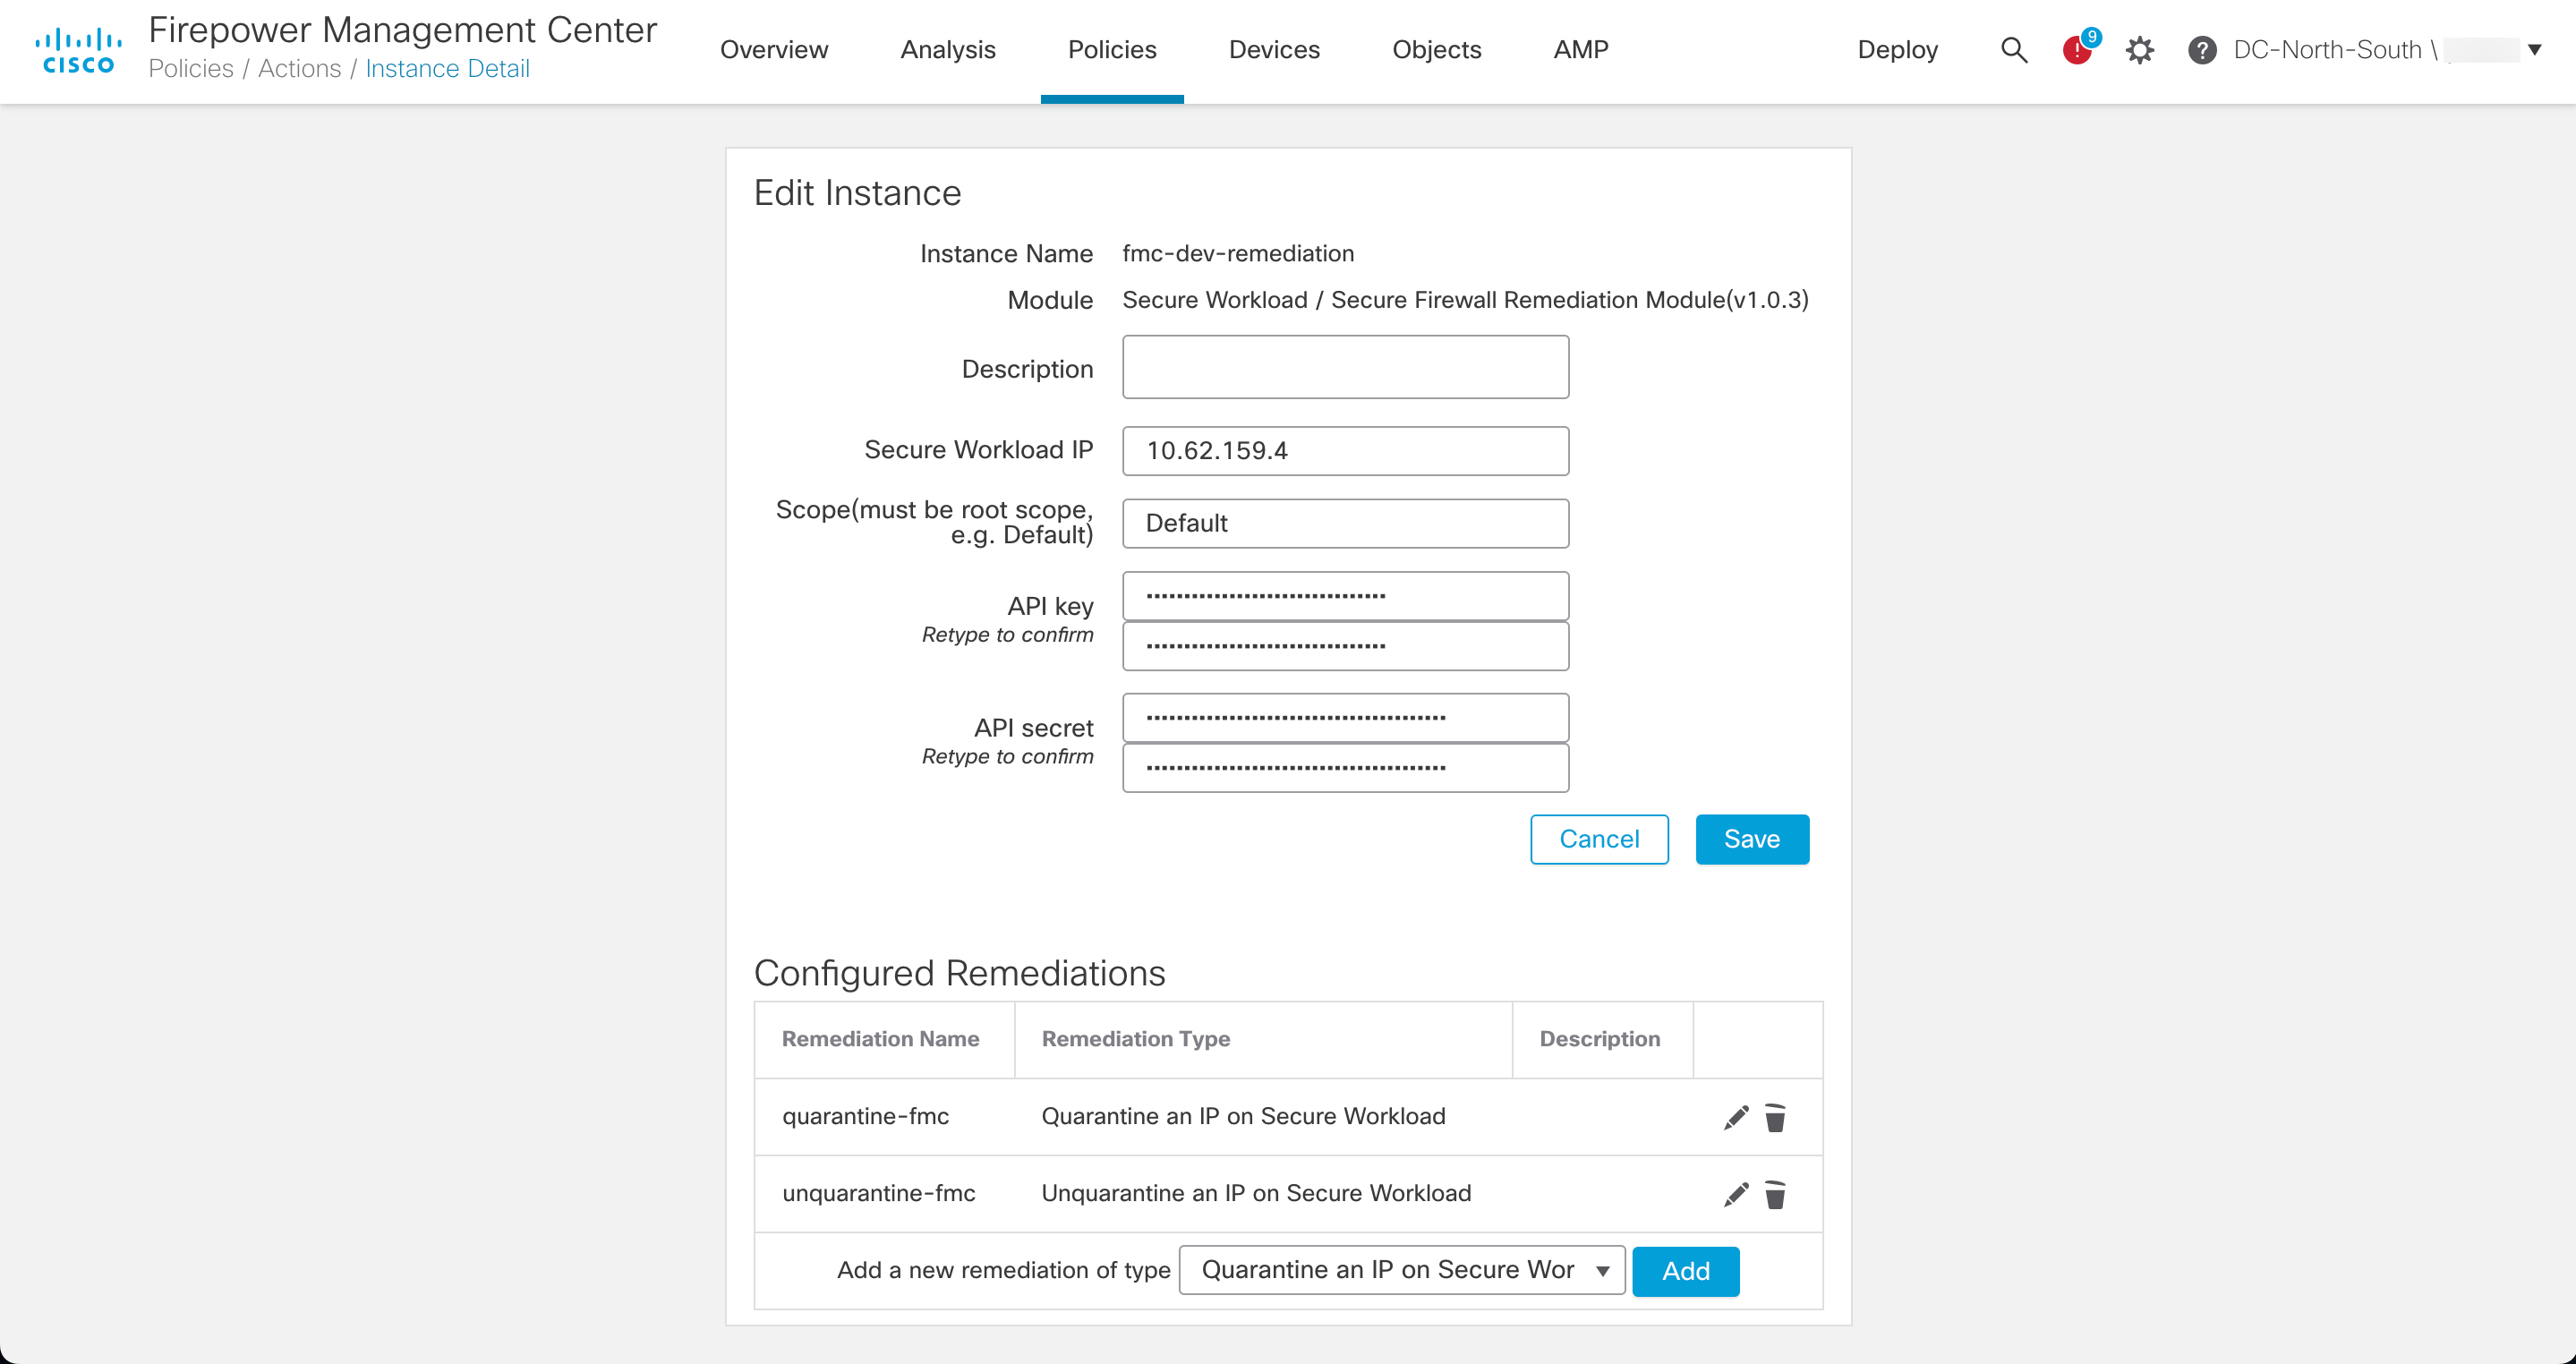
In FMC, create an instance of the remediation module for each Secure Workload cluster in your network:

  1. Navigate to Policies > Actions > Instances.

  2. Select the remediation module in the drop-down list, and click Add.

  3. Enter an Instance Name (in this example, fmc-dev-remediation).

  4. Enter the Secure Workload server's IP address, API key, API secret, and scope containing the potentially offending host. Click Create.

    Note 

    The API key and secret are not validated against the Secure Workload server at this point. The API key and secret must first be created in Secure Workload by a site admin, customer support, or a root scope owner role. Copy that information for use here. For more details, see Related Documentation.

  5. Under Configured Remediations, select a type of remediation (in this example, Quarantine an IP on Secure Workload), and click Add to add a new remediation.

  6. Enter a Remediation Name (in this example, quarantine-fmc), and click Create.

  7. The remediation you just configured then shows up in the table. Click Save.

Step 2

Configure an access control policy (in this example, rem-policy):
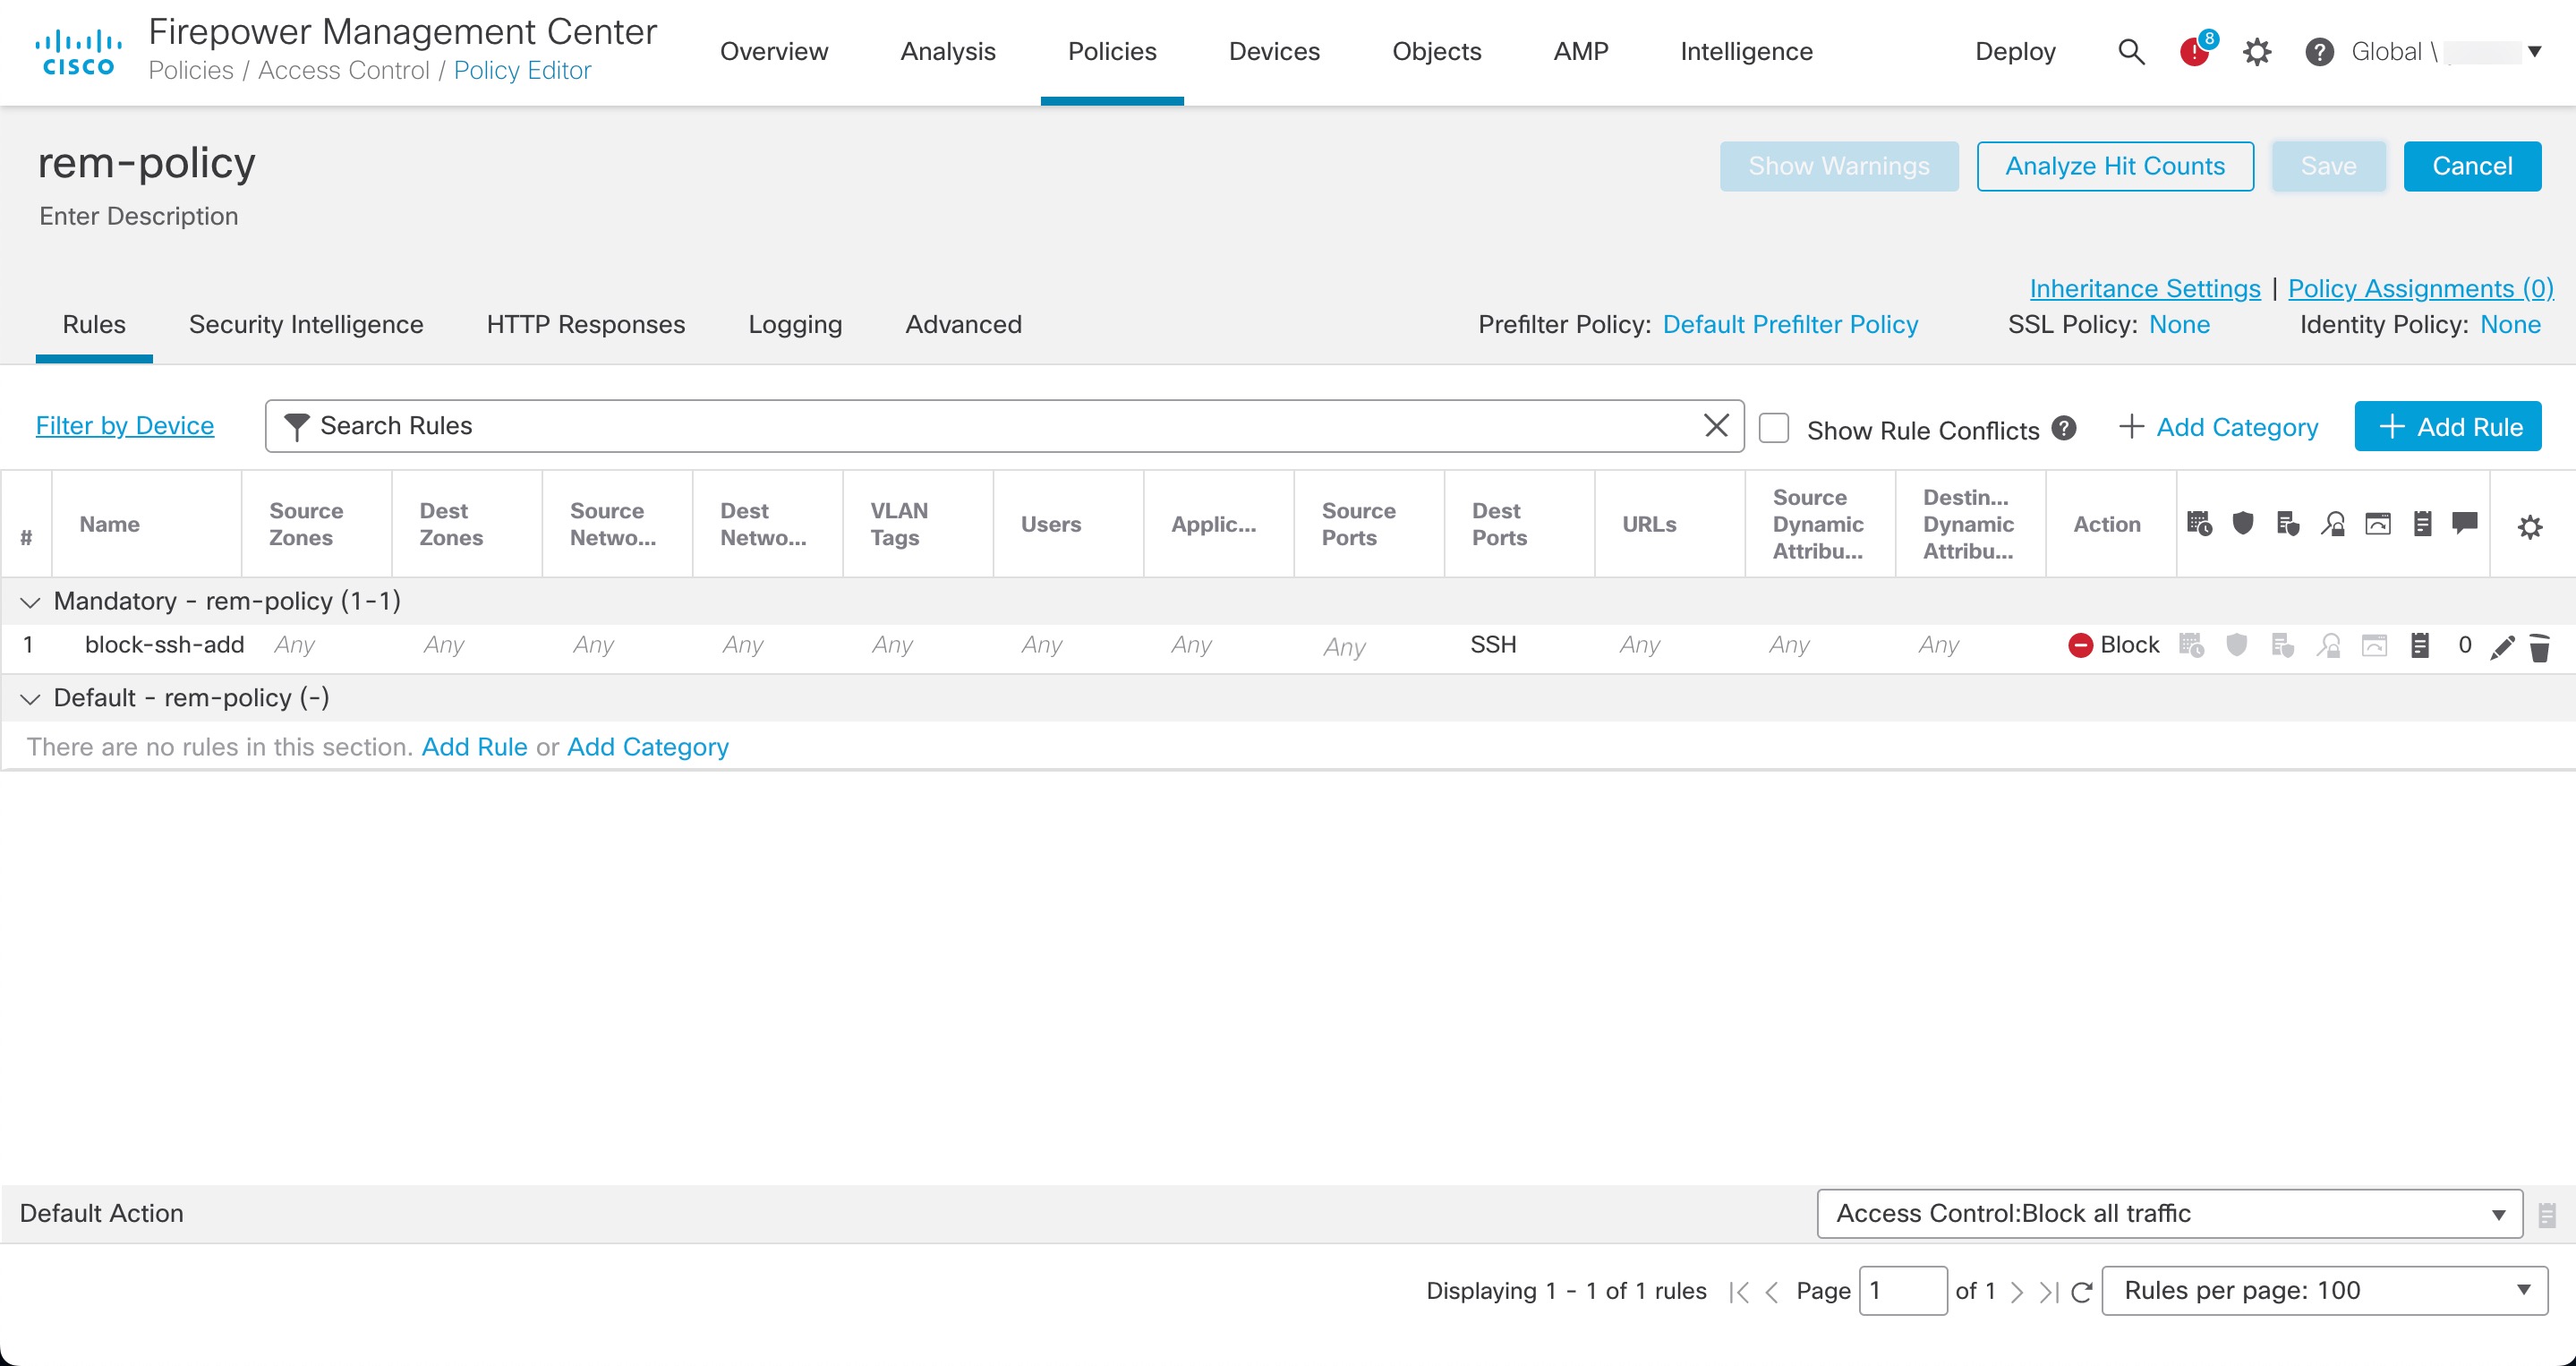
  1. Navigate to Policies > Access Control and click the Edit icon of the access control policy to add rules.

  2. Click Add Rule and enter a name (for example, block-ssh-add-tag).

  3. Select Block for the Action.

  4. On the Ports tab, select SSH from the list of protocols for the destination port.

  5. On the Logging tab, select Log at Beginning of Connection.

    Important 

    Ensure that logging is enabled on the access rule, so that the FMC receives event notifications, and click Add

  6. Click Save.

Step 3

Configure a correlation rule:

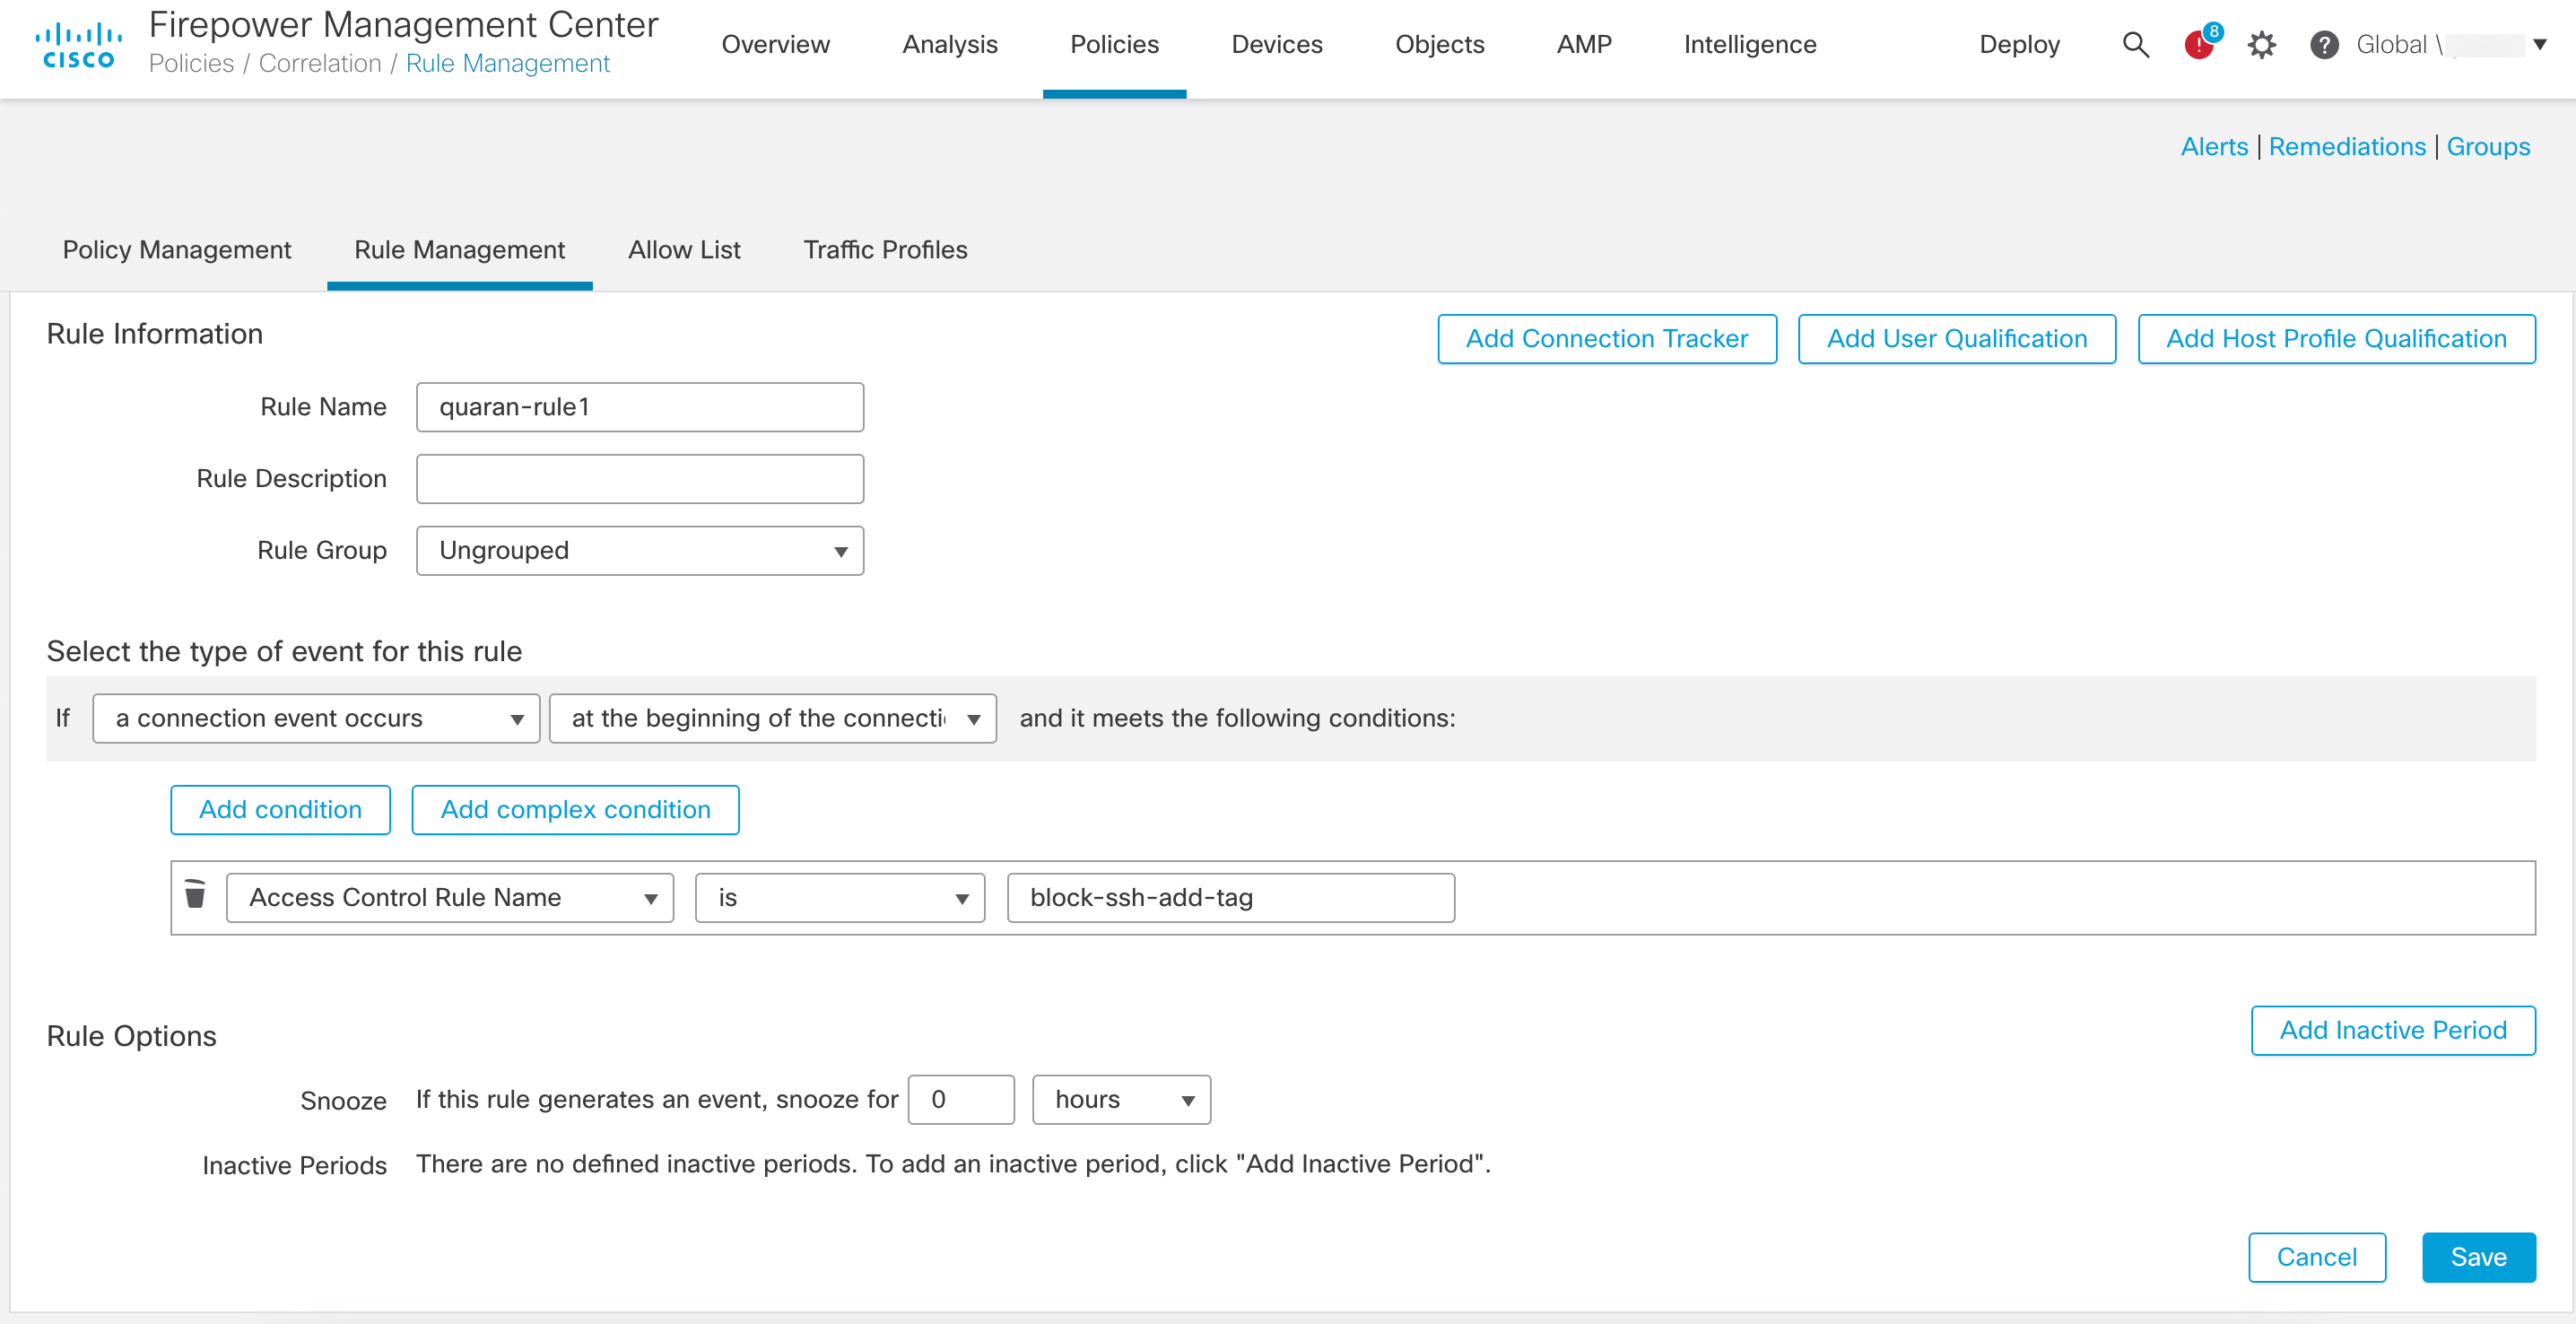
  1. Navigate to Policies > Correlation > Rule Management.

  2. Click Create Rule.

  3. Enter a Rule Name (in this example, quaran-rule1) and description (optional).

  4. In the Select the type of event for this rule section, select a connection event occurs and at either the beginning or the end of the connection.

  5. Click Add condition, and change the operator from OR to AND.

  6. In the drop-down list, select Access Control Rule Name, is, and enter the name of the access control rule that you previously configured in Step 2 (in this example, block-ssh-add-tag).

  7. Click Save.

Step 4

Associate the instance of the remediation module as a response with a correlation rule:

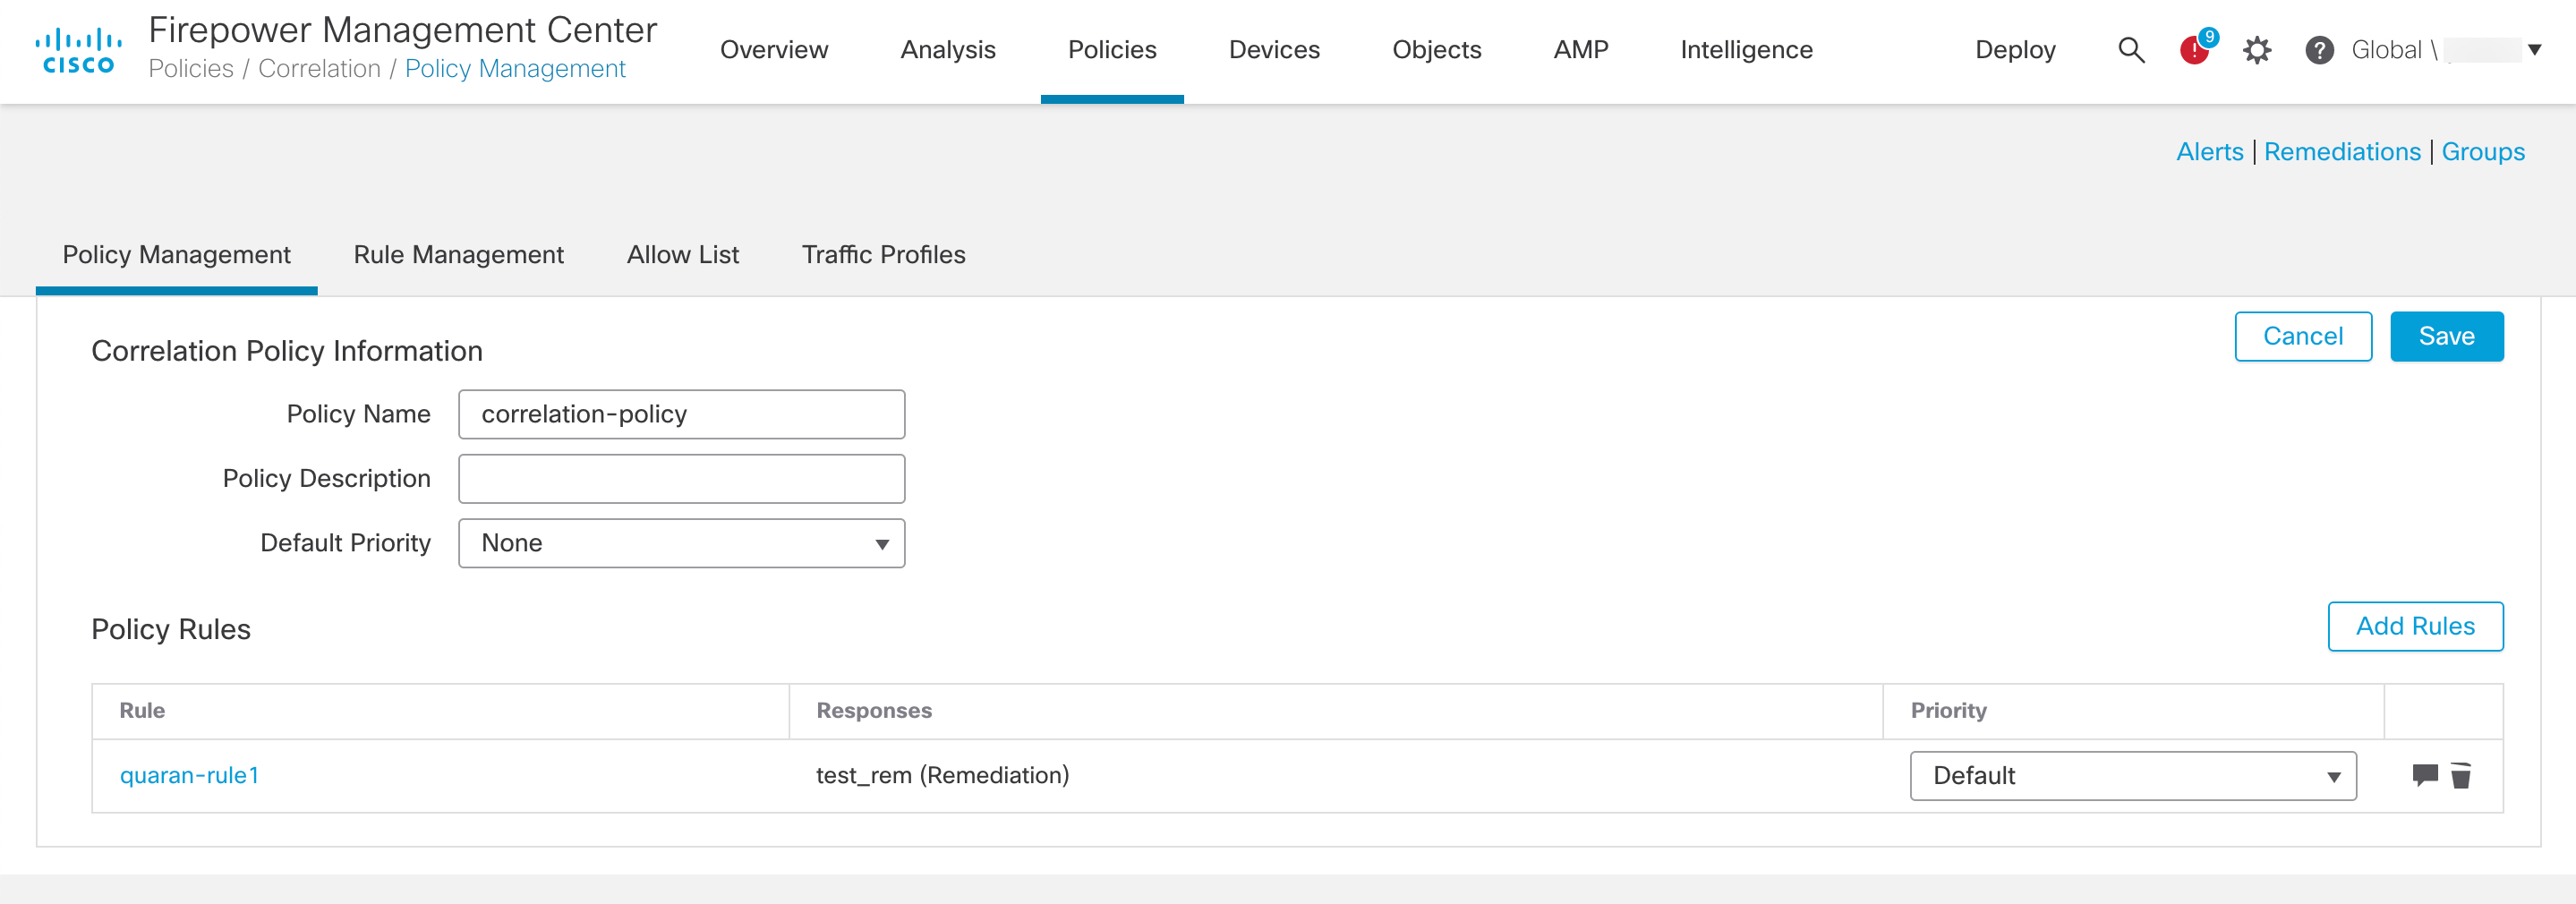
  1. Navigate to Policies > Correlation > Policy Management.

  2. Click Create Policy.

  3. Enter a Policy Name (in this example, correlation-policy) and description (optional).

  4. From the Default Priority drop-down list, select a priority for the policy. Select None to use rule priorities only.

  5. Click Add Rules, select the correlation rule you previously configured in Step 3 (in this example, quaran-rule1), and click Add.

  6. Click the Responses icon next to the rule and assign a response (in this example, test_rem) to the rule. Click Update.

  7. Click Save.