Initial Network Configuration

This chapter provides instructions for completing the initial network configuration using the Admin TUI (Text-mode UI). It includes the following topics:

Power On and Boot Up Appliance

Once you have connected the server peripherals, network interfaces, and power cables, turn on the Secure Malware Analytics M5 Appliance and wait for it to boot up. The Cisco screen is briefly displayed.

Figure 1. Cisco Screen During Bootup

The Admin TUI is displayed on the console when the server has successfully booted up and connected.
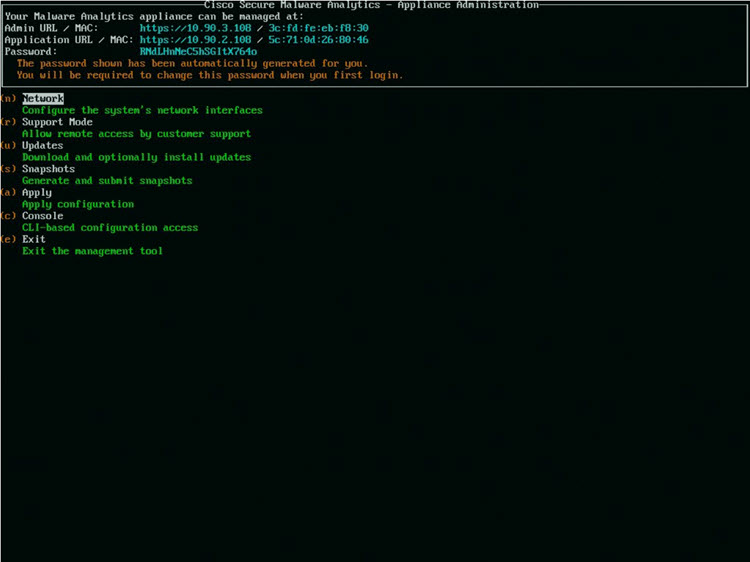
Figure 2. Admin TUI

The Admin URL shows as unavailable because the network interface connections are not yet configured and the Admin UI cannot be reached yet to perform this task.


Important

The Admin TUI displays the initial administrator Password, which will be needed to access and configure the Admin UI later in the configuration. Make a note of the Password in a separate text file (copy and paste).


Configure Network Using Admin TUI

The initial network configuration is completed in the Admin TUI. The basic configuration, once completed, allows access to the Admin UI, where you can complete additional configuration tasks.


Note

For DHCP users, the following steps assume that you are using static IP addresses. If you are using DHCP to obtain your IP addresses, see the Cisco Secure Malware Analytics Appliance Administration Guide.


Procedure


Step 1

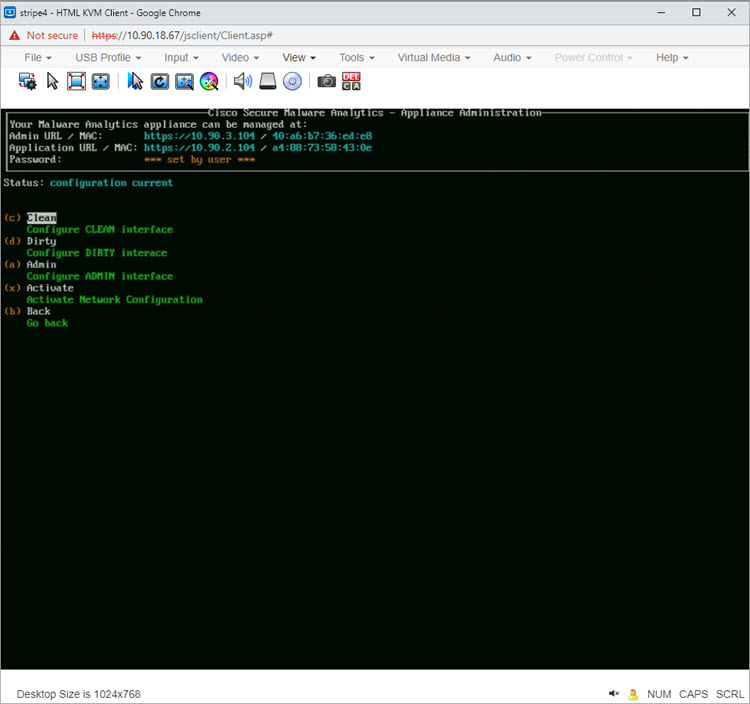
On the Admin TUI, select NETWORK. The Status: configuration current screen appears.

Figure 3. Admin TUI - Network Configuration Console
Step 2

Select Clean. The Network Config - CLEAN Interface screen appears.

Step 3

Complete the blank fields according to the settings provided by your network administrator.

Step 4

Select Save.

Step 5

Select Dirty. The Network Config - Dirty Interface Interface screen appears.

Step 6

Complete the blank fields according to the settings provided by your network administrator.

Step 7

Select Save.

Step 8

Select Admin. The Network Config - ADMIN Interface Interface screen appears.

Step 9

Complete the blank fields according to the settings provided by your network administrator.

Step 10

Select Save.

Step 11

Select Activate. To activate the configuration.


What to do next

The next step in the Secure Malware Analytics Appliance setup is to complete the remaining configuration tasks using the Admin UI, as described in Admin UI Configuration.