Initial Network Configuration

This chapter provides instructions for completing the initial network configuration using the TGSH Dialog. It includes the following topics:

Power On and Boot Up Appliance

Once you have connected the server peripherals, network interfaces, and power cables, turn on the Threat Grid M5 Appliance and wait for it to boot up. The Cisco screen is briefly displayed.

Figure 1. Cisco Screen During Bootup

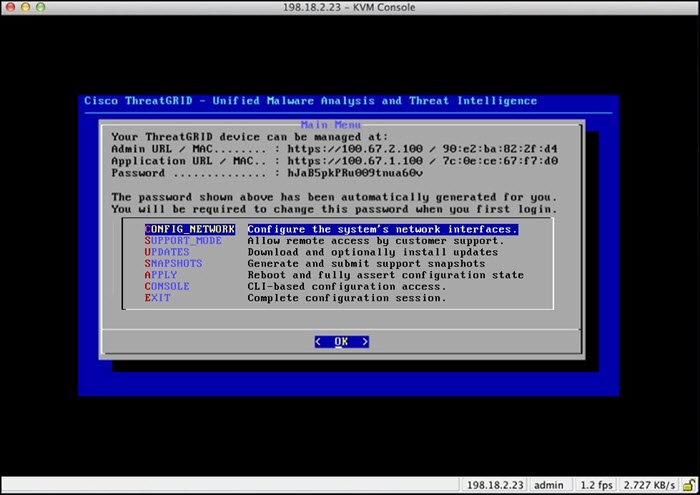
The TGSH Dialog is displayed on the console when the server has successfully booted up and connected.

Figure 2. TGSH Dialog

The Admin URL shows as unavailable because the network interface connections are not yet configured and the Admin UI cannot be reached yet to perform this task.


Important

The TGSH Dialog displays the initial administrator Password, which will be needed to access and configure the Admin UI later in the configuration. Make a note of the Password in a separate text file (copy and paste).


Configure Network Using TGSH Dialog

The initial network configuration is completed in the TGSH Dialog. The basic configuration, once completed, allows access to the Admin UI, where you can complete additional configuration tasks.


Note

For DHCP users, the following steps assume that you are using static IP addresses. If you are using DHCP to obtain your IP addresses, see the Cisco Threat Grid Appliance Administration Guide.


Procedure


Step 1

On the TGSH Dialog, select CONFIG_NETWORK. The Network Configuration console opens.

Figure 3. TGSH Dialog - Network Configuration Console
Step 2

Complete the blank fields according to the settings provided by your network administrator for the Clean, Dirty, and Admin interfaces.

Step 3

Change DHCP Enabled to N.

Note 

You need to backspace over the old character before you can enter the new one.

Step 4

Leave the Configure Non-Default Routes field set to the default N (unless additional routes are needed).

Step 5

If your network is using a DNS name for the Clean network, enter the name in the DNS Name field.

Step 6

Leave the Dirty network DNS Name field blank.

Figure 4. Network Configuration In-Progress (Clean and Dirty)
Figure 5. Network Configuration In-Progress (Admin)
Step 7

After you finish entering all the network settings, tab down and select Validate to verify your entries.

If errors occur, fix the invalid values and select Validate again.

After validation, the Network Configuration Confirmation page displays the entered values.

Figure 6. Network Configuration Confirmation
Step 8

Select Apply to apply your configuration settings.

After the configuration settings are applied, details about the changes are displayed.

Figure 7. Network Configuration - List of Changes Made
Step 9

Select OK.

The Network Configuration console refreshes again and displays the entered IP addresses.

Figure 8. IP Addresses

You have completed the network configuration of your Threat Grid Appliance.

Note 

The URL for the Clean interface is not active until the Admin UI configuration is complete.


What to do next

The next step in the Threat Grid Appliance setup is to complete the remaining configuration tasks using the Admin UI, as described in Admin UI Configuration.