AC Power Supply
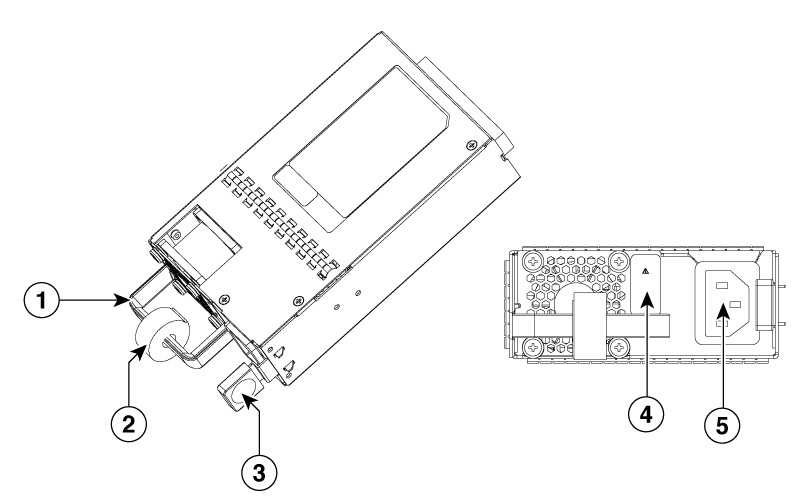
The Cisco VG410 Voice Gateway supports a PWR-VG410-250WAC AC power supply. The following images display the AC power supply.


|
1 |
Handle |
|
2 |
Velcro strap |
|
3 |
Latch tab |
|
4 |
Status LED |
|
5 |
Power socket |
Removing the AC Power Supply
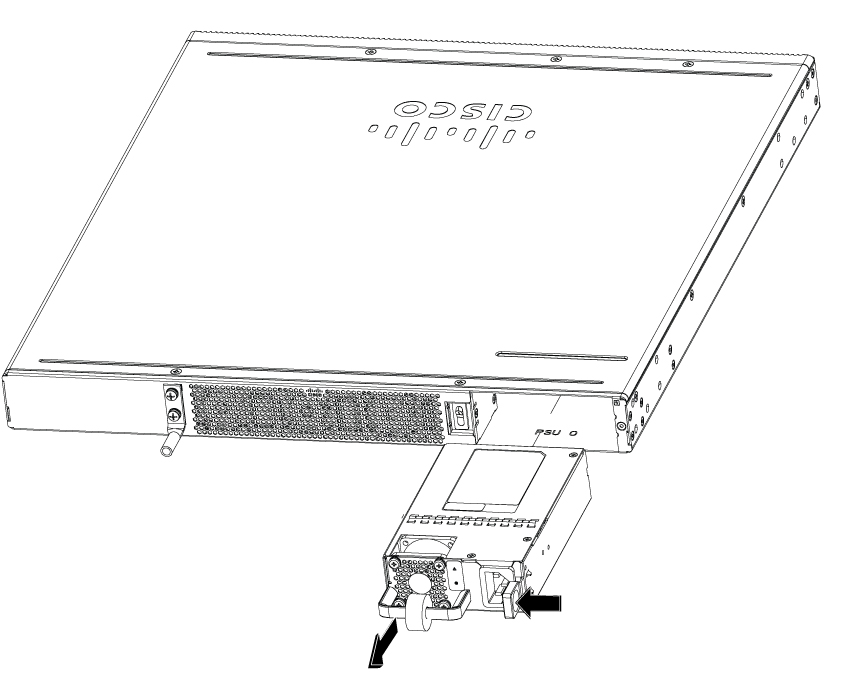
To remove an AC power supply from the voice gateway, perform these steps:
Procedure
|
Step 1 |
Read the safety warnings section of this document. |
|
Step 2 |
Shut down the device before removing the power supply. |
|
Step 3 |
If in use, remove the Velcro strap securing the power supply cable to the power supply latch. 
|
|
Step 4 |
Remove the AC power cord from the power socket. |
|
Step 5 |
Depress the power supply latch and use the handle to pull the supply out of the device. 

|
Replacing the AC Power Supply
To replace or install an AC power supply into the device, perform these steps:
Procedure
|
Step 1 |
Use the handle to push the power supply into the router. The power supply latch should provide an audible click when the supply is fully seated. |
|
Step 2 |
Install the AC power cord into the power socket on the power supply. |
|
Step 3 |
If used, reapply the Velcro strap around the power cord and the power supply latch. |
|
Step 4 |
If the device was turned off, turn the power back on to the device. |
 Feedback