Configure Ethernet Ports of Cisco Business Wireless Access Point in Mesh Mode
Available Languages
Objective
The objective of this document is to show you how to configure the Ethernet ports of a Cisco Business Wireless (CBW) Access Point (AP) in Mesh mode.
Applicable Devices | Firmware Version
- 140AC (Data Sheet) | 10.4.1.0 (Download latest)
- 141ACM (Data Sheet) | 10.4.1.0 (Download latest)
- 142ACM (Data Sheet) | 10.4.1.0 (Download latest)
- 143ACM (Data Sheet) | 10.4.1.0 (Download latest)
- 145AC (Data Sheet) | 10.4.1.0 (Download latest)
- 240AC (Data Sheet) | 10.4.1.0 (Download latest)
Introduction
If you are looking to configure the Ethernet ports of your CBW AP, you have come to the right place! The CBW APs support the latest 802.11ac Wave 2 standard for higher performance, greater access, and higher-density networks. They deliver industry-leading performance with highly secure and reliable wireless connections, for a robust, mobile end-user experience.
Port setting configuration sets direction of data transmission and flow control of the data. Ethernet interfaces can be configured either as access ports or trunk ports. Trunks carry the traffic of multiple VLANs over a single link and allow you to extend VLANs across the network.
If you are ready to configure the Ethernet ports of your CBW AP, let’s get started!
Modifying AP Port Configuration to Access/Trunk Mode
Beginner Help
This toggled section highlights tips for beginners.
Logging In
Log into the Web User Interface (UI) of the Master AP. To do this, open a web browser and enter https://ciscobusiness.cisco. You may receive a warning before proceeding. Enter your credentials.You can also access the Master AP by entering https://[ipaddress] (of the Master AP) into a web browser.
Tool Tips
If you have questions about a field in the user interface, check for a tool tip that looks like the
following: ![]()
Trouble locating the Expand Main Menu icon?
Navigate to the menu on the left-hand side of the screen, if you don’t see the menu button, click
this icon to open the side-bar menu.
Cisco Business App
These devices have companion apps that share some management features with the web user interface. Not all features in the Web user interface will be available in the App.
Frequently Asked Questions
If you still have unanswered questions, you can check our frequently asked questions document. FAQ
Step 1
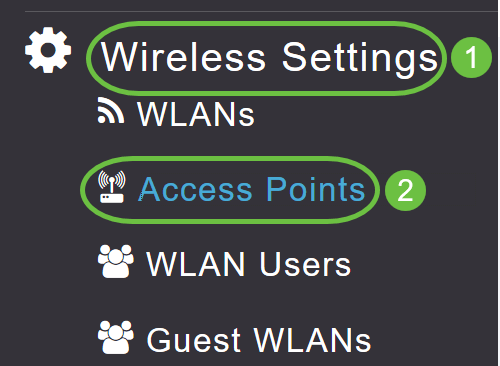
Go to Wireless Settings > Access Points.
Step 2
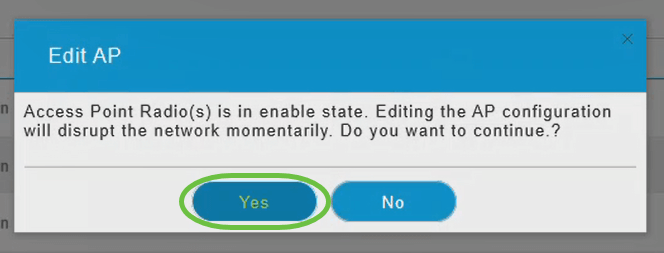
Click Edit icon of the AP that you want to configure.

You will see the following pop-up window. Click Yes to continue.
Step 3
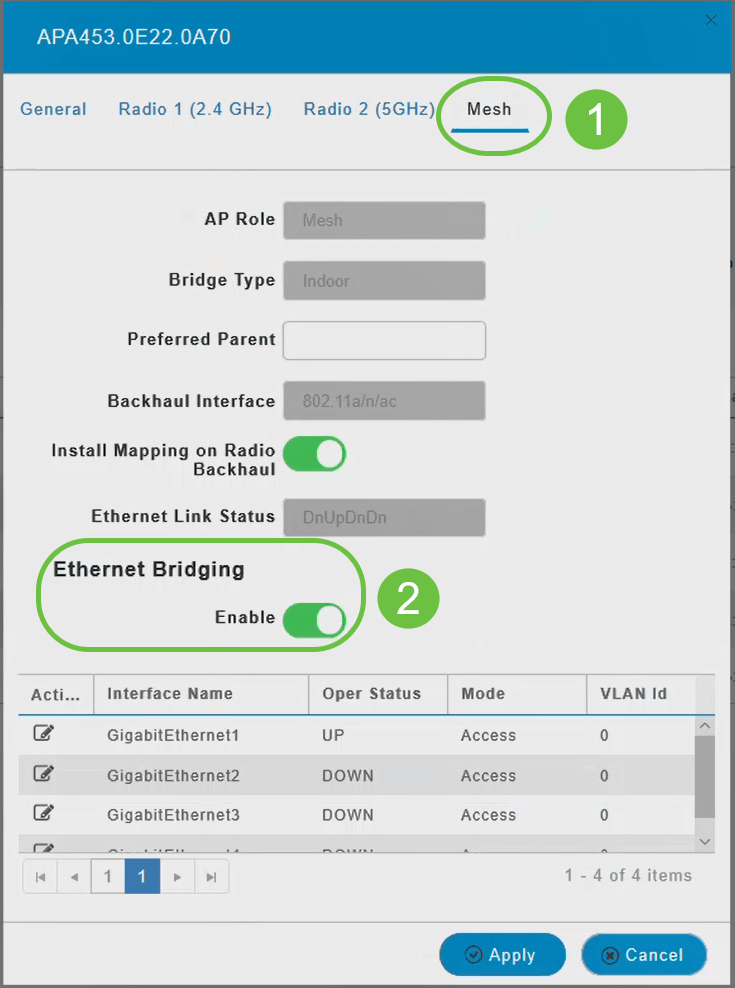
In the new pop-up window, navigate to the Mesh tab. Ensure that Ethernet Bridging is enabled.
Step 4
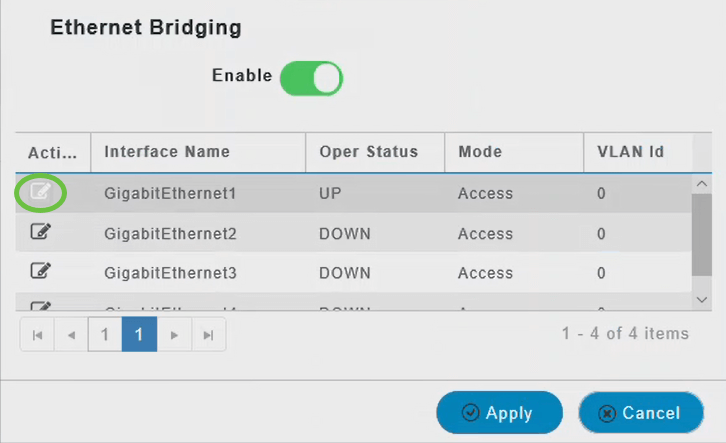
Click Edit in the Port table. This is available when Ethernet Bridging is enabled.
Step 5
To configure an Ethernet interface as an Access port, in the Mode tab, select Access from the drop-down menu.
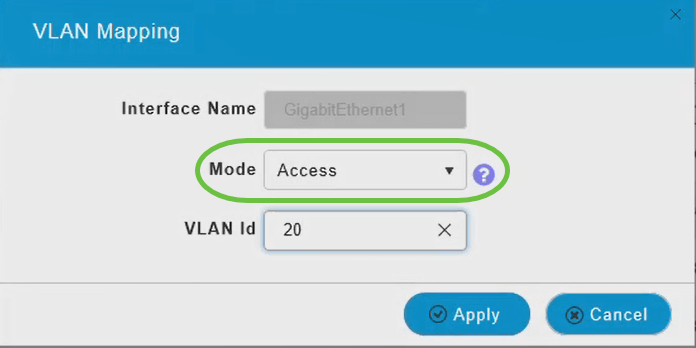
An access port can have only one VLAN configured on the interface; it can carry traffic for only one VLAN.
Step 6
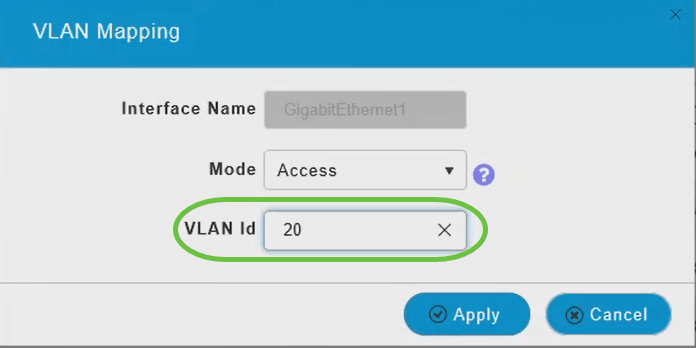
In the VLAN Id field, specify the VLAN.
Step 7
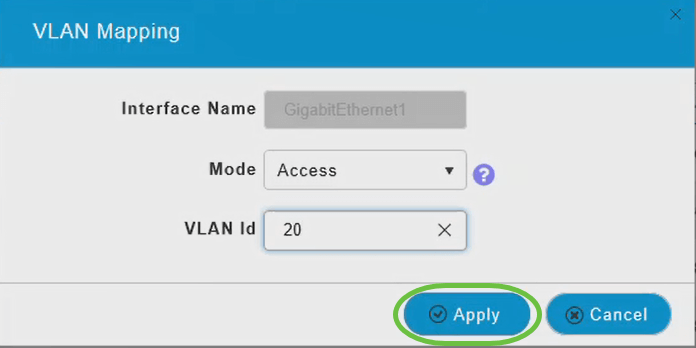
Click Apply.
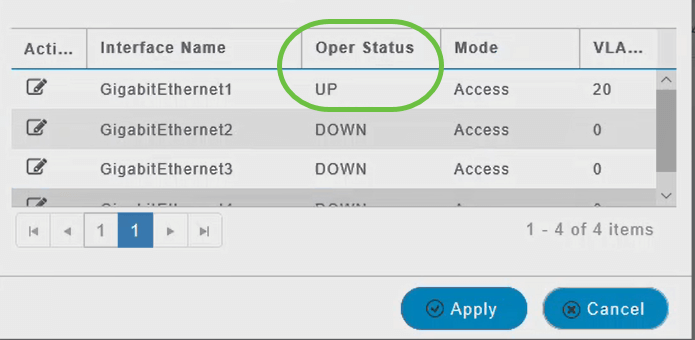
The Operational Status changes to UP when an Ethernet port is connected to a client.
Step 8
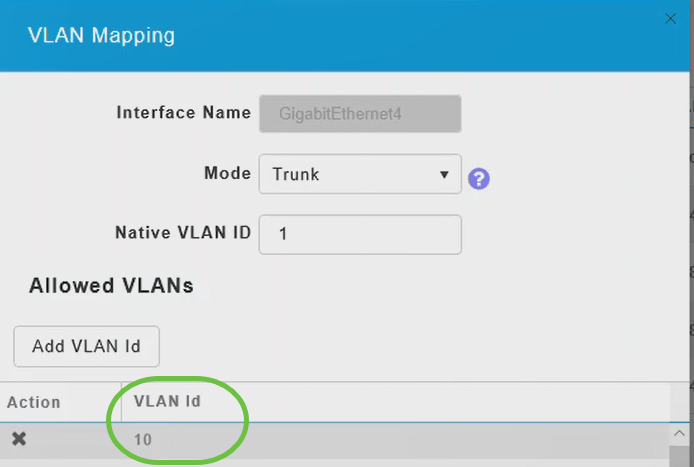
To configure an Ethernet interface as a Trunk port, in Mode section, select Trunk from the drop-down menu.
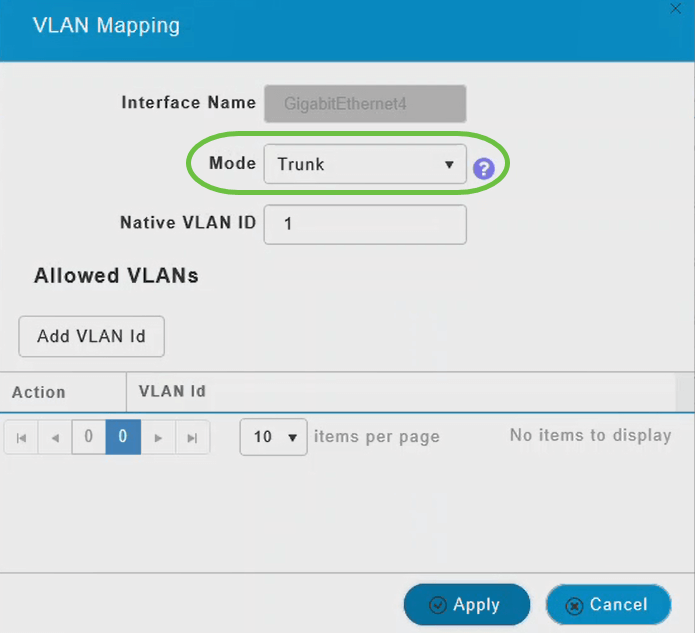
A trunk port can have two or more VLANs configured on the interface; it can carry traffic for several VLANs simultaneously.
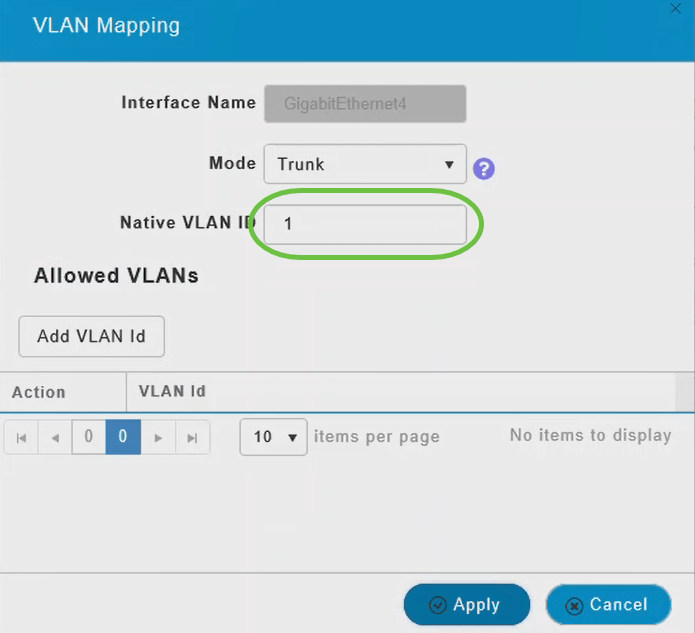
Step 9
Enter the Native VLAN ID. The default native VLAN is 1.
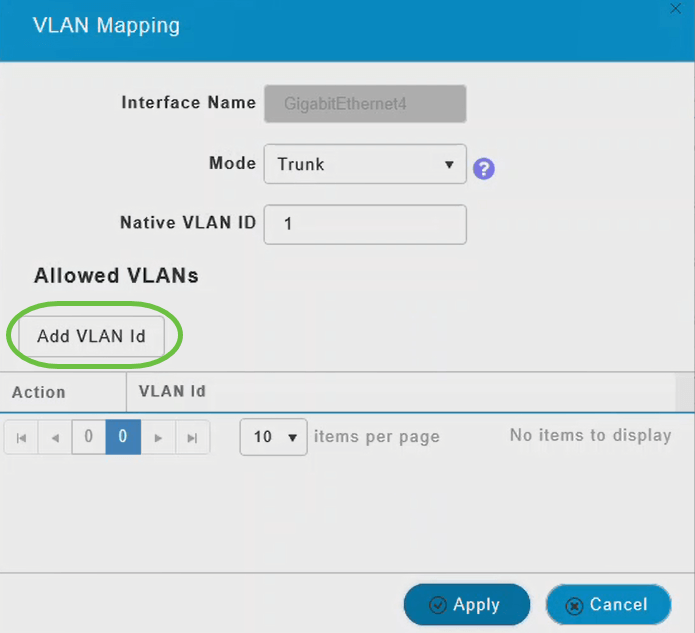
Step 10
Click Add VLAN Id to add other VLANs to the trunk port.
Step 11
Enter the VLAN Id and click Apply.
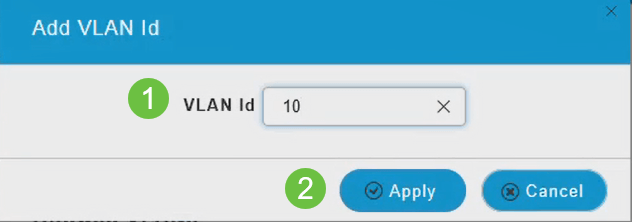
The VLAN added will appear under the VLAN Id tab.
Step 12
Click Apply.
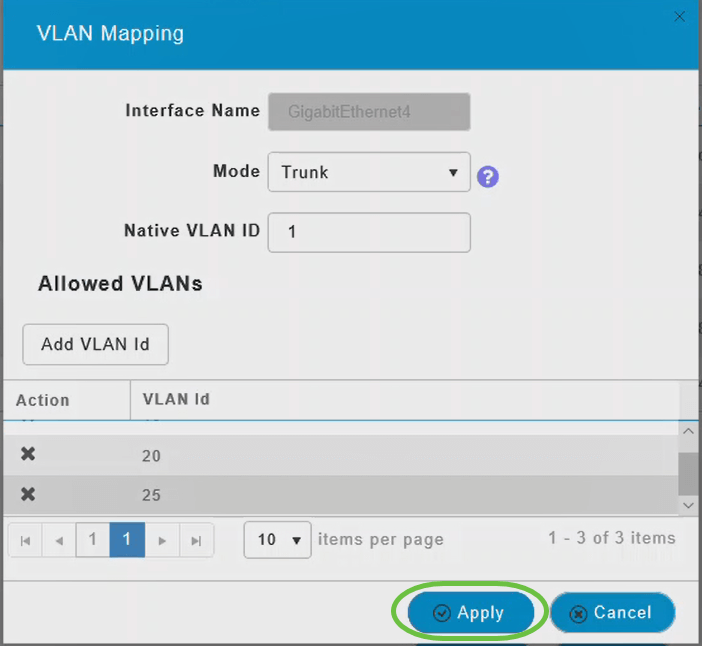
This configuration has to be performed on every access point individually. The configurations are also saved in each individual device and not in the controller configuration.
There you have it! You have now successfully completed configuring the Ethernet ports of your CBW APs in Mesh mode. For more advanced configurations, refer to the Cisco Business Wireless Access Point Administration Guide.