簡介
本文說明如何使用存取點(AP)封包擷取功能。
必要條件
需求
思科建議您瞭解以下主題:
- 對無線控制器的命令列介面(CLI)或圖形使用者介面(GUI)訪問。
- FTP伺服器
- .pcap檔案
採用元件
- 9800 WLC v16.10
- AP 3700
- FTP伺服器
本文中的資訊是根據特定實驗室環境內的裝置所建立。文中使用到的所有裝置皆從已清除(預設)的組態來啟動。如果您的網路運作中,請確保您瞭解任何指令可能造成的影響。
背景資訊
該功能僅適用於Cisco IOS® AP(如AP 3702),因此在Cisco IOS® XE 17.3版之後不再使用。
此解決方案已由採用Cisco DNA Center(DNAC)的智慧捕獲取代,或者作為將AP設定為監聽器模式的替代方案。
AP資料包捕獲功能使您能夠輕而易舉地在空中執行資料包捕獲。啟用此功能後,所有指定無線資料包和幀的副本會通過無線從/到AP傳送到特定無線MAC地址,或從/到AP傳送到特定無線MAC地址,並轉發到檔案傳輸協定(FTP)伺服器,您可以在此伺服器上將其下載為.pcap檔案,然後使用首選資料包分析工具開啟該檔案。
啟動資料包捕獲後,客戶端所關聯的AP會在FTP伺服器上建立新的.pcap檔案(確保為FTP登入指定的使用者名稱具有寫入許可權)。如果客戶端漫遊,新AP將在FTP伺服器上建立新的.pcap檔案。如果客戶端在服務集識別符號(SSID)之間移動,則AP會保持資料包捕獲處於活動狀態,這樣當客戶端與新SSID關聯時,您就可以看到所有管理幀。
如果您在開放式SSID上進行擷取(無安全性),您可以看到資料封包的內容,但如果使用者端與受保護的SSID(受密碼保護的SSID或802.1x安全性)關聯,那麼資料封包的資料部分將會加密,且無法以明文顯示。
組態
網路圖表
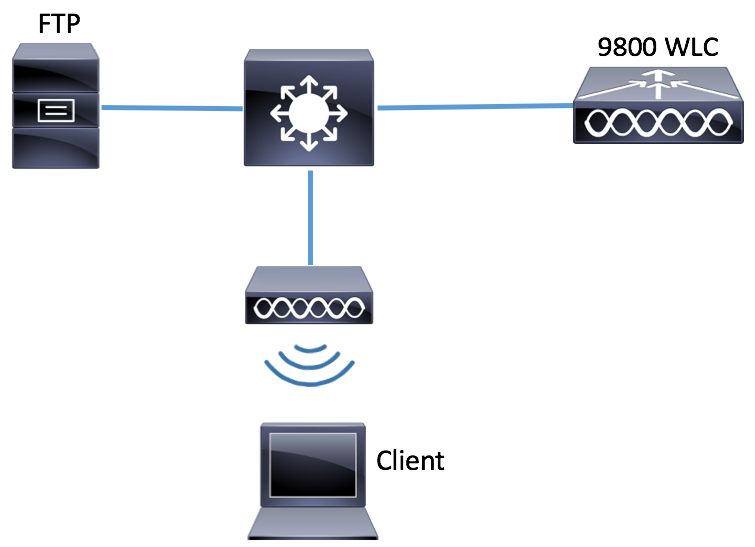
組態
在配置之前,請檢查哪些AP是無線客戶端可以連線到的AP。
步驟 1.驗證與無線客戶端可用於連線的AP關聯的當前站點標籤。
GUI:
導覽至Configuration > Wireless > Access Points。

CLI:
# show ap tag summary | inc 3702-02

3702-02 f07f.06e1.9ea0 default-site-tag default-policy-tag default-rf-tag No Default
步驟 2.檢查與該站點標籤關聯的AP加入配置檔案。
GUI:
導航到Configuration > Tags & Profiles > Tags > Site > Site Tag Name。
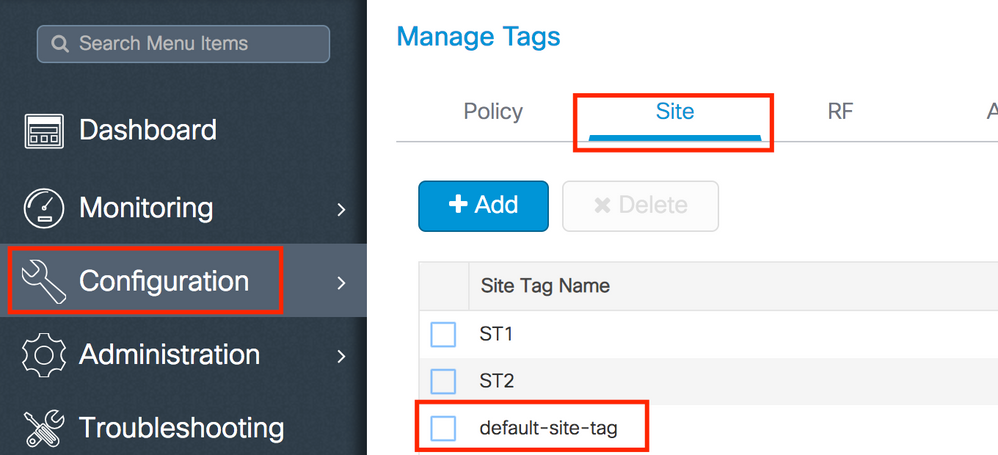
記下關聯的AP加入配置檔案。
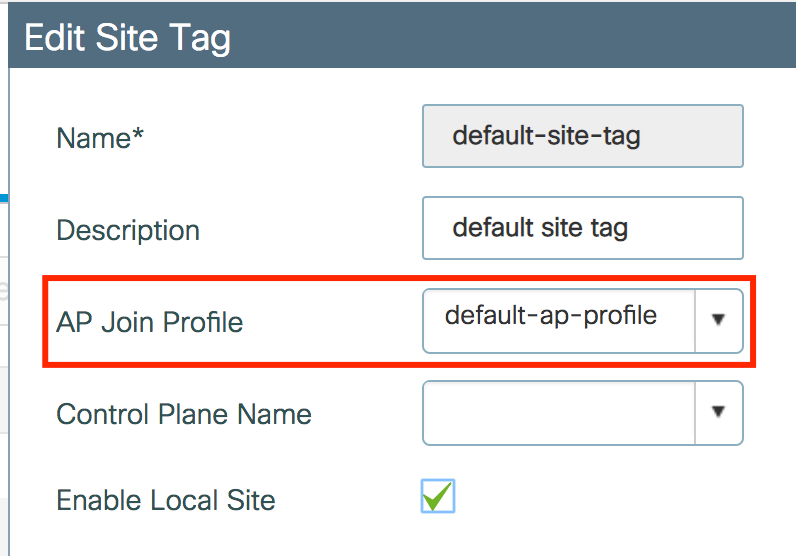
CLI:
# show wireless tag site detailed default-site-tag

Site Tag Name : default-site-tag
Description : default site tag
----------------------------------------
AP Profile : default-ap-profile
Local-site : Yes
Image Download Profile: default-me-image-download-profile
步驟 3.在AP加入配置檔案中新增資料包捕獲設定。
GUI:
導航到Configuration > Tags & Profiles > AP Join > AP Join Profile Name > AP > Packet Capture,然後新增新的AP Packet Capture Profile。

為資料包捕獲配置檔案選擇名稱,並輸入AP傳送資料包捕獲到的FTP伺服器詳細資訊。此外,請確保選擇要監控的資料包型別。
緩衝區大小= 1024-4096
持續時間= 1-60
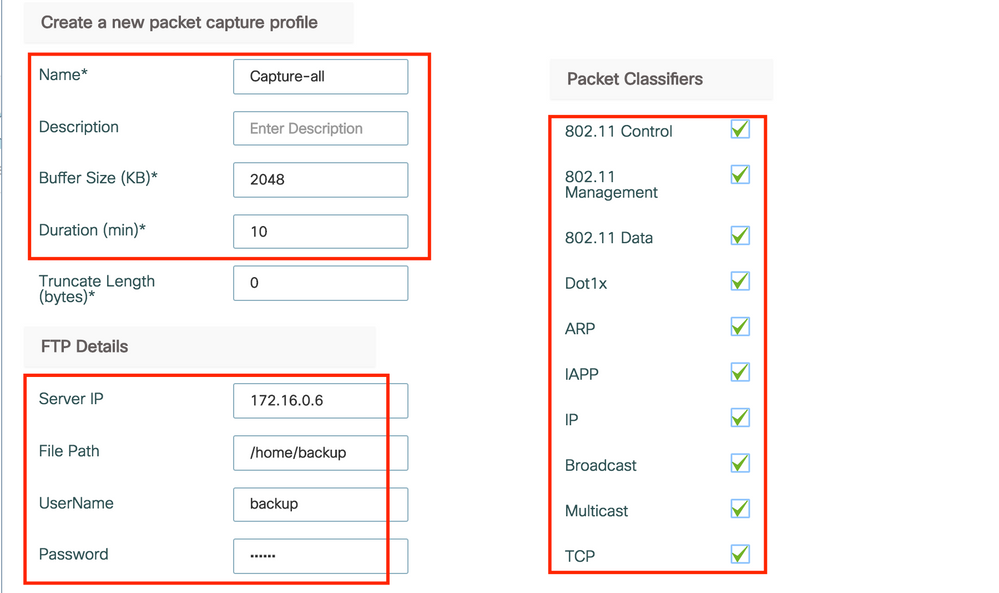

儲存捕獲配置檔案後,按一下Update & Apply to Device。

CLI:
# config t
# wireless profile ap packet-capture Capture-all
# classifier arp
# classifier broadcast
# classifier data
# classifier dot1x
# classifier iapp
# classifier ip
# classifier tcp
# ftp password 0 backup
# ftp path /home/backup
# ftp serverip 172.16.0.6
# ftp username backup
# exit

# ap profile default-ap-profile
# packet-capture Capture-all
# end
# show wireless profile ap packet-capture detailed Capture-all

Profile Name : Capture-all
Description  :
---------------------------------------------------
Buffer Size       : 2048 KB
Capture Duration  : 10 Minutes
Truncate Length   : packet length
FTP Server IP     : 172.16.0.6
FTP path          : /home/backup
FTP Username      : backup

Packet Classifiers
  802.11 Control  : Enabled
  802.11 Mgmt     : Enabled
  802.11 Data     : Enabled
  Dot1x           : Enabled
  ARP             : Enabled
  IAPP            : Enabled
  IP              : Enabled
  TCP             : Enabled
  TCP port        : all
  UDP             : Disabled
  UDP port        : all
  Broadcast       : Enabled
  Multicast       : Disabled
步驟 4.確保您想要監控的無線客戶端已經與任何SSID以及分配了標籤的AP之一相關聯,其中AP加入配置檔案與資料包捕獲設定相關聯,否則無法啟動捕獲。
提示:如果要對客戶端無法連線到SSID的原因進行故障排除,您可以連線到正常工作的SSID,然後漫遊到出現故障的SSID,捕獲將跟蹤該客戶端並捕獲其所有活動。
GUI:
導覽至Monitoring > Wireless > Clients。

CLI:
# show wireless client summary | inc e4b3.187c.3058

e4b3.187c.3058 3702-02 3 Run 11ac
步驟 5.開始捕獲。
GUI:
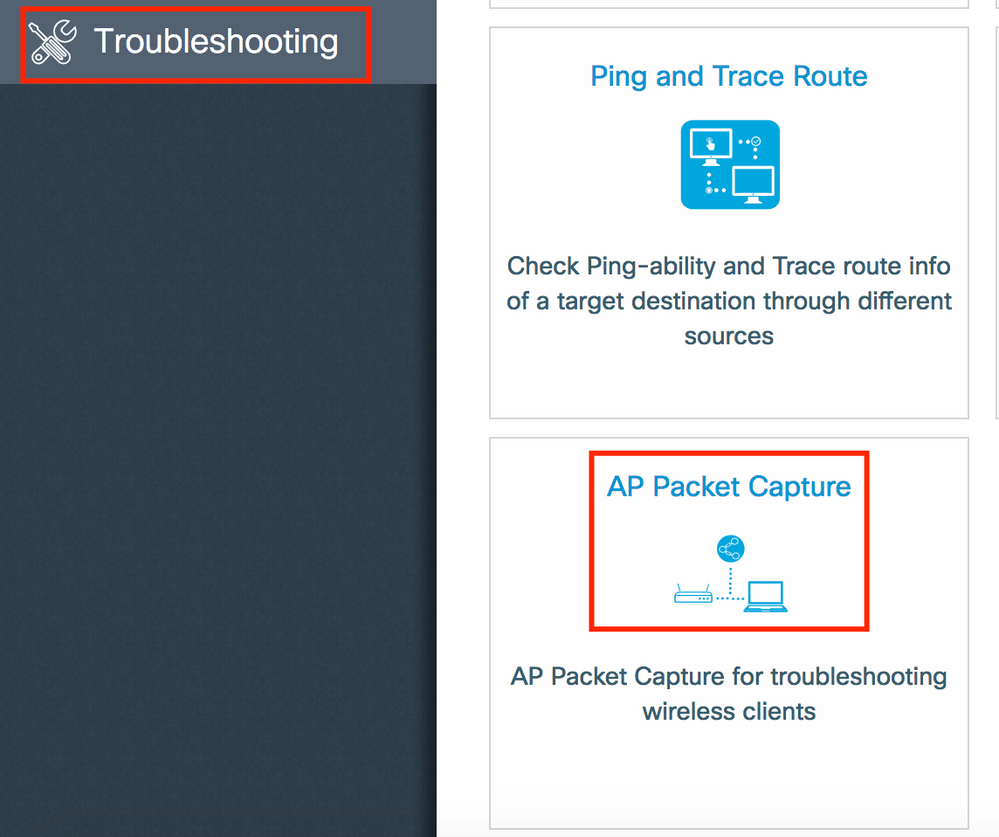
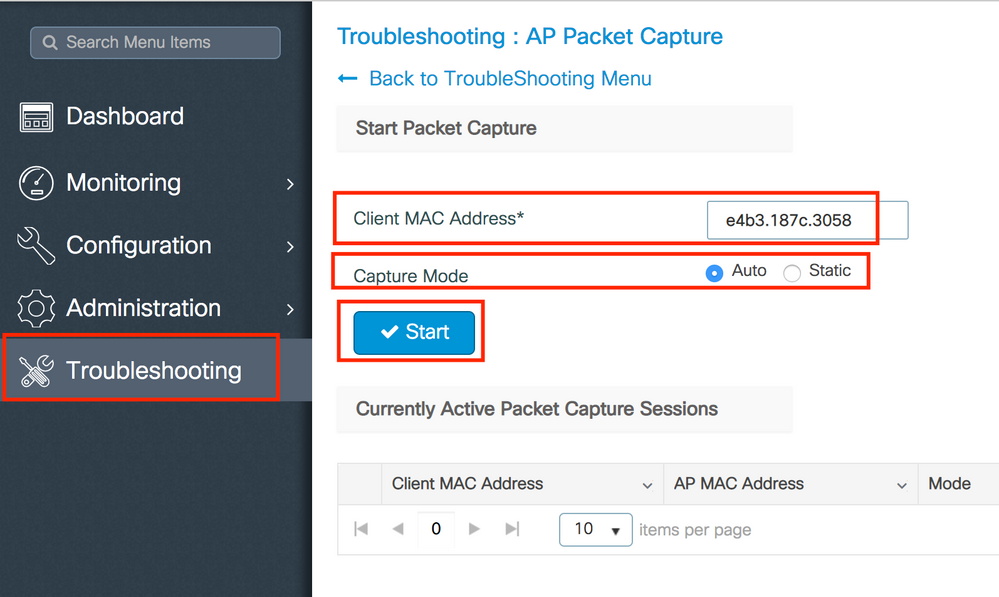
導覽至Troubleshooting > AP Packet Capture。
輸入要監控的客戶端的mac地址並選擇Capture Mode。 自動錶示無線客戶端連線的每個AP自動建立一個新的.pcap檔案。 Static允許您選擇一個特定的AP來監控無線客戶端。
使用Start開始捕獲。
然後,您可以看到擷取的目前狀態:

CLI:
# ap packet-capture start <E4B3.187C.3058> auto
步驟 6.停止捕獲。
捕獲所需行為後,通過GUI或CLI停止捕獲:
GUI:


CLI:
# ap packet-capture stop <E4B3.187C.3058> all
步驟 7.從FTP伺服器收集.pcap檔案。
您必須找到名為<ap-name><9800-wlc-name>-<##-file><day><month><year>_<hour><minute><second>.pcap的檔案。

步驟 8.您可以使用首選的資料包分析工具開啟該檔案。

驗證
您可以使用這些命令來驗證資料包捕獲功能的配置。
# show ap status packet-capture

Number of Clients with packet capture started : 1

Client MAC      Duration(secs)   Site tag name            Capture Mode
-------------------------------------------------------------------------
e4b3.187c.3058  600              default-site-tag         auto
# show ap status packet-capture detailed e4b3.187c.3058

Client MAC Address    : e4b3.187c.3058
Packet Capture Mode   : auto
Capture Duration      : 600 seconds
Packet Capture Site   : default-site-tag

Access Points with status
AP Name                   AP MAC Addr     Status
----------------------------------------------------
APf07f.06e1.9ea0          f07f.06ee.f590  Started
疑難排解
使用以下步驟對此功能進行故障排除:
步驟 1.啟用調試條件。
# set platform software trace wireless chassis active R0 wncmgrd all-modules debug
步驟 2.重現該行為。
步驟 3.檢查當前控制器時間,以便能夠及時跟蹤日誌。
# show clock
步驟 4.收集日誌。
# show logging process wncmgrd internal | inc ap-packet-capture
步驟 5.將日誌條件設定為預設值。
# set platform software trace wireless chassis active R0 wncmgrd all-modules notice
註意:在故障排除會話之後,請務必設定日誌級別,以避免生成不必要的日誌。


 意見
意見