簡介
本文檔介紹如何將Cisco XDR與Secure Firewall 7.2上的Cisco Secure Firewall整合進行整合和故障排除。
必要條件
需求
思科建議瞭解以下主題:
- Firepower Management Center (FMC)
- 思科安全防火牆
- 映像的可選虛擬化
- 安全防火牆和FMC必須獲得許可
採用元件
- 思科安全防火牆 — 7.2
- Firepower管理中心(FMC)- 7.2
- 安全服務交換(SSE)
- Cisco XDR
- 智慧授權入口網站
- 思科威脅回應(CTR)
本文中的資訊是根據特定實驗室環境內的裝置所建立。文中使用到的所有裝置皆從已清除(預設)的組態來啟動。如果您的網路運作中,請確保您瞭解任何指令可能造成的影響。
背景
7.2版包括安全防火牆與Cisco XDR和Cisco XDR協調整合方式的更改:
| 功能 |
說明 |
| 改進了Cisco XDR整合和Cisco XDR協調。 |
We have streamlined the SecureX integration process. Now, as long as you already have a SecureX account, you just choose your cloud region on the new Integration > SecureX page, click Enable SecureX, and authenticate to SecureX. The option to send events to the cloud, as well as to enable Cisco Success Network and Cisco Support Diagnostics, are also moved to this new page. When you enable SecureX integration on this new page, licensing and management for the systems's cloud connection switches from Cisco Smart Licensing to SecureX. If you already enabled SecureX the "old" way, you must disable and re-enable to get the benefits of this cloud connection management. Note that this page also governs the cloud region for and event types sent to the Secure Network Analytics (Stealthwatch) cloud using Security Analytics and Logging (SaaS), even though the web interface does not indicate this. Previously, these options were on System > Integration > Cloud Services. Enabling SecureX does not affect communications with the Secure Network Analytics cloud; you can send events to both. The management center also now supports SecureX orchestration—a powerful drag-and-drop interface you can use to automate workflows across security tools. After you enable SecureX, you can enable orchestration.
|
請參閱7.2完整發行說明以檢查此發行版中包含的所有功能。
設定
在開始整合之前,請確保您的環境中允許這些URL:
美國地區
- api-sse.cisco.com
- eventing-ingest.sse.itd.cisco.com
歐盟地區
- api.eu.sse.itd.cisco.com
- eventing-ingest.eu.sse.itd.cisco.com
亞太及日本地區
- api.apj.sse.itd.cisco.com
- eventing-ingest.apj.sse.itd.cisco.com
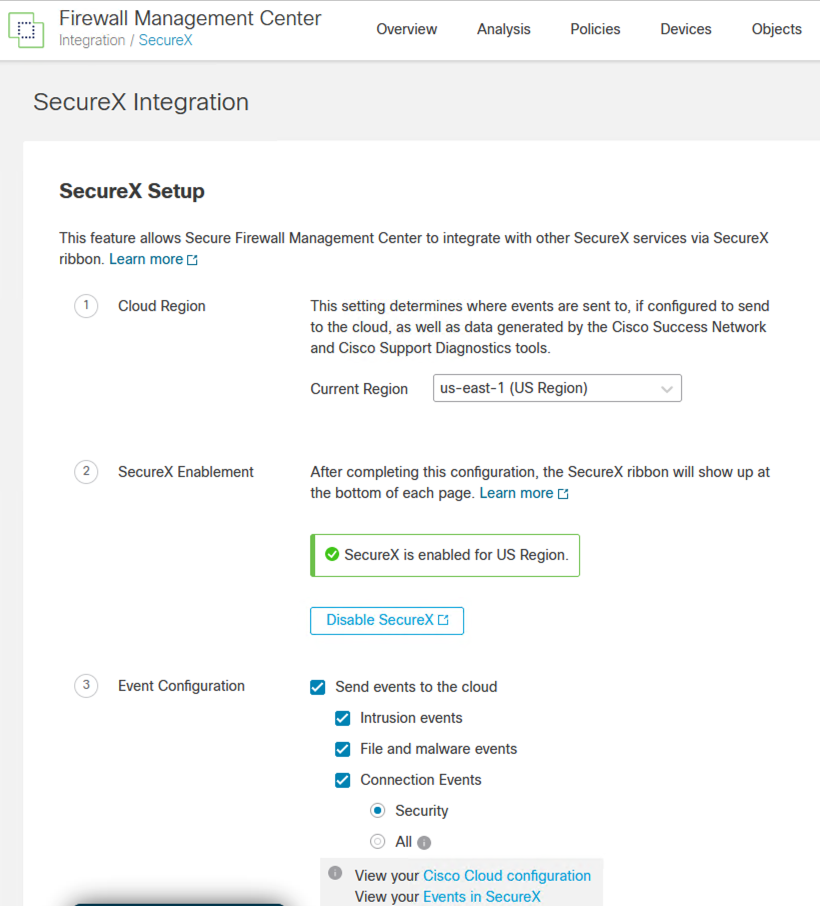
步驟1.啟動整合日誌到FMC。轉至Integration>Cisco XDR,選擇要連線的區域(美國、歐盟或APJC),選擇要轉發到Cisco XDR的事件型別,然後選擇Enable Cisco XDR:
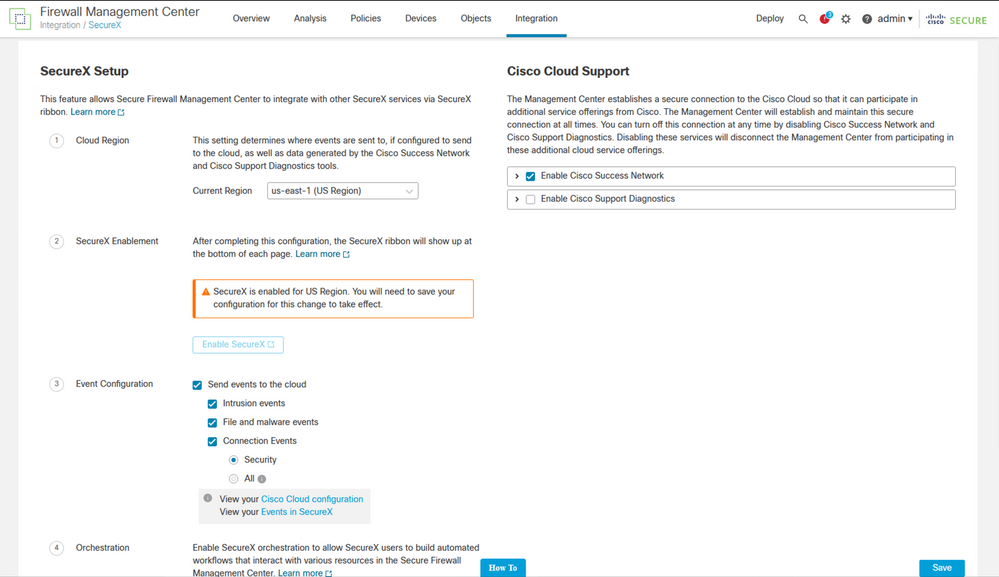
請注意,在您選擇之前,不會應用這些更改 Save .
步驟2.選擇「儲存」後,系統會將您重定向至您的Cisco XDR帳戶中授權您的FMC(您需要在此步驟之前登入到Cisco XDR帳戶),選擇Authorize FMC:
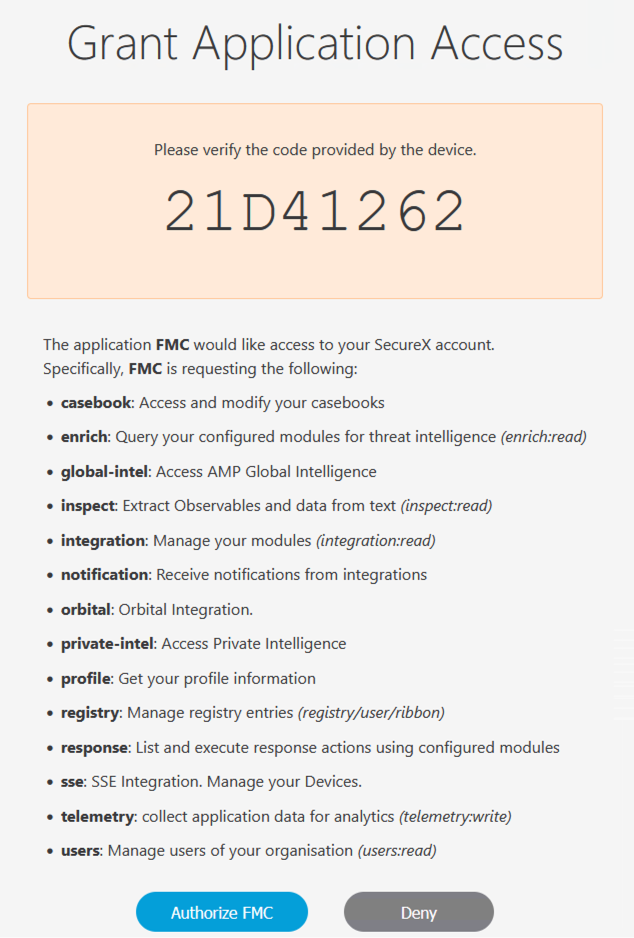
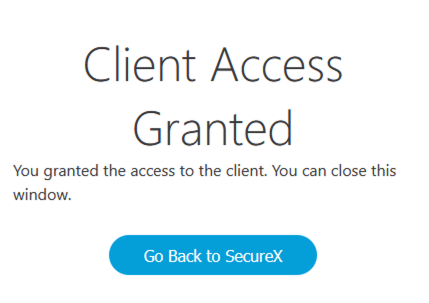
步驟3.一旦授權被授予,系統會將您重新導向到Cisco XDR:
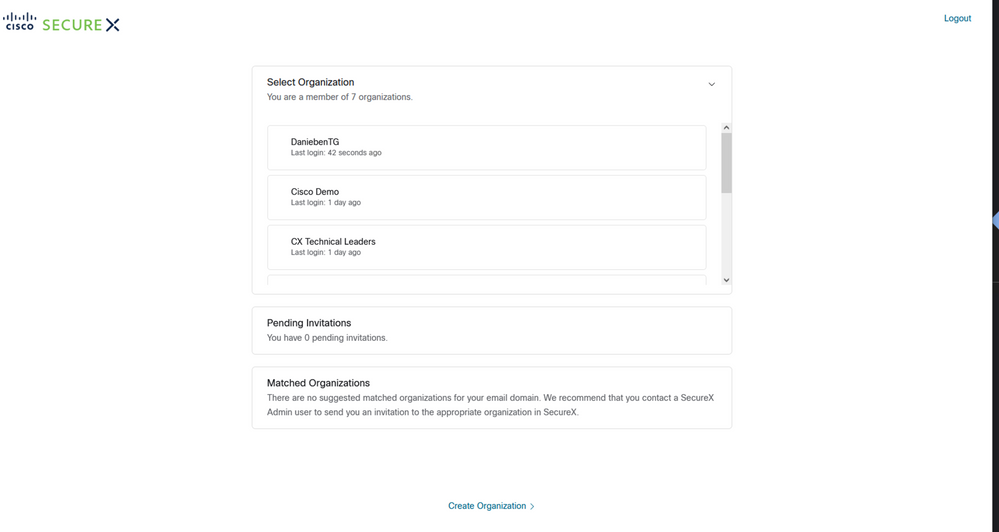
如果您有多個組織,則會顯示Cisco XDR登入頁,以選擇要整合FMC和安全防火牆裝置的組織:
步驟4.選擇Cisco XDR組織後,系統再次將您重定向到FMC,您必須收到顯示整合成功的消息:
驗證
整合完成後,可以從頁面底部展開Ribbon:
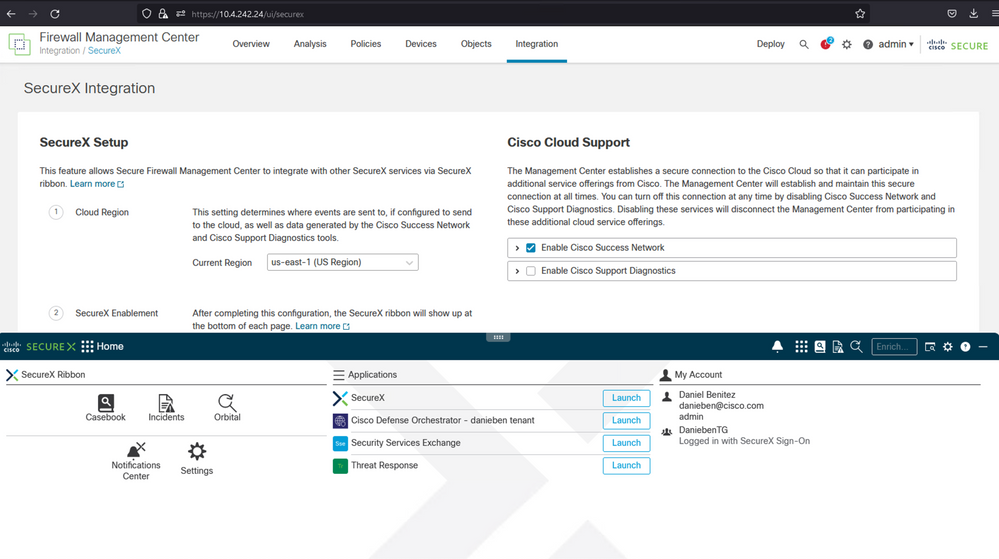
在Ribbon上啟動Security Services Exchange,然後在Devices下必須看到剛剛整合的FMC和安全防火牆:
