Microsoft Outlook Shows Incorrect User Presence Status
Available Languages
Contents
Introduction
This document describes a problem encountered in Microsoft Outlook where the user "Presence" icons show incorrect information or do not show any information at all. A solution to the problem is also provided.
Prerequisites
Requirements
Cisco recommends that you have knowledge of these topics:
- Microsoft Outlook 2010 and 2013
- Cisco Jabber or Cisco Unified Personal Communicator
Components Used
The information in this document is based on these software and hardware versions:
- Microsoft Outlook 2010
- Cisco Jabber for Windows Release 9.x
The information in this document was created from the devices in a specific lab environment. All of the devices used in this document started with a cleared (default) configuration. If your network is live, make sure that you understand the potential impact of any command.
Problem
The user "Presence" icons in Microsoft Outlook do not show information, show intermittent information, or show incorrect information.
Solution
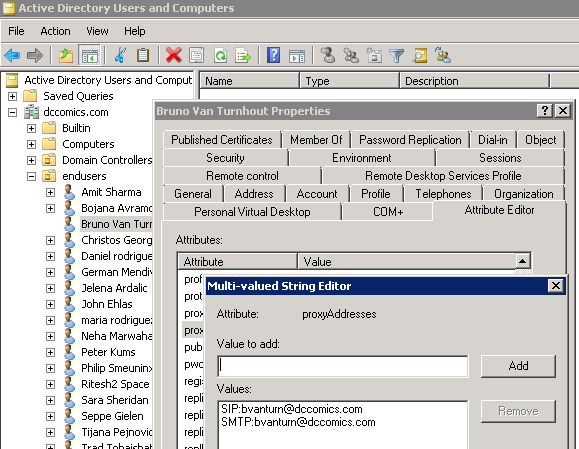
Ensure that the proxyAddresses field is populated for each Unified Communications (UC) user, and that the SIP address refers to the Instant Message (IM) address of the user on Cisco Unified Presence (CUP). This must be formatted as:
SIP:<cupuserid>@<presencedomain>
From the Active Directory (AD), edit the attribute of each UC user in order to update the proxyAddresses field with the SIP address of the user. This can be done manually with the ADSchemaWizard.exe included with the administration utility, or via script.
Update Manually
You can update the field manually from the Attribute Editor included with AD 2008:
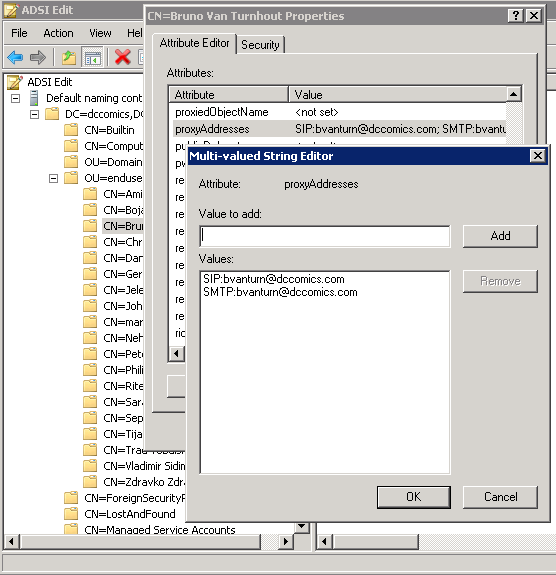
This can also be done with any version of AD through the adsiedit.msc utility, which is run from Start > Run on the AD server.
Another way to complete the process is through the use of the ADSchemaWizard.exe utility, which is found in the Cisco Jabber for Windows Administration Package. This utility performs an update of the users and adds the SIP address field. This is not limited to UC users only. Run the utility first with the option "Generate import file to manually import" in order to ensure that you are satisfied with the changes the wizard performs in AD.
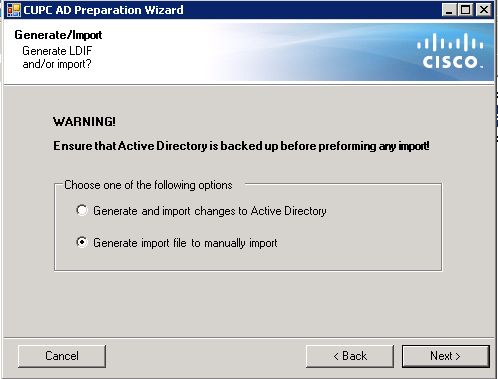
Once the process is complete, open the ldif file with an editor and review the proposed changes. Ensure that the SIP addreses are in the correct format (SIP:<cupuserid>@<presencedomain>). If you are satisfied with the changes, run the wizard again with the "Generate and import changes to Active Directory" option, or manually import the generated ldif file.
Update with Script
You can also update the field with the use of external scripting utilities. Refer to the documentation of the utilities for more information on how to perform this task.
Once the proxyAddresses fields are updated in AD, the Microsoft Exchange server loads the changes and updates the address books. This takes place automatically but can take some time. Refer to your Microsoft Exchange Administrator if this needs to be expedited. In order to complete this in a lab environment, on a Microsoft Exchange 2010 server, use these PowerShell commands:
Update the global address list:
Get-GlobalAddressList | Update-GlobalAddressList
Update the offline address book:
Get-OfflineAddressBook | Update-OfflineAddressBook
Let the Client Access Server know that there is an updated offline address book:
Get-ClientAccessServer | Update-FileDistributionService
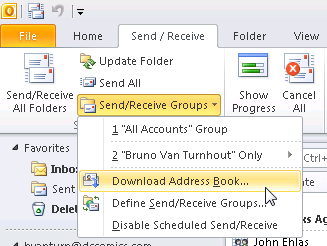
Once complete, restart the Microsoft Outlook client so it pulls in the new information. In order to download the new address book files, choose Send/Receive > Send/Receive Groups > Download Address Book.
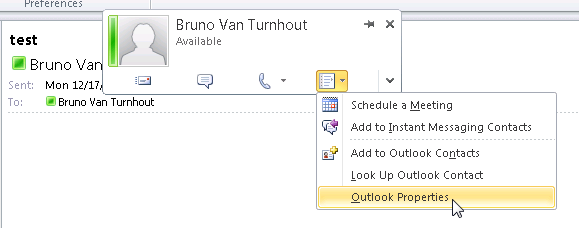
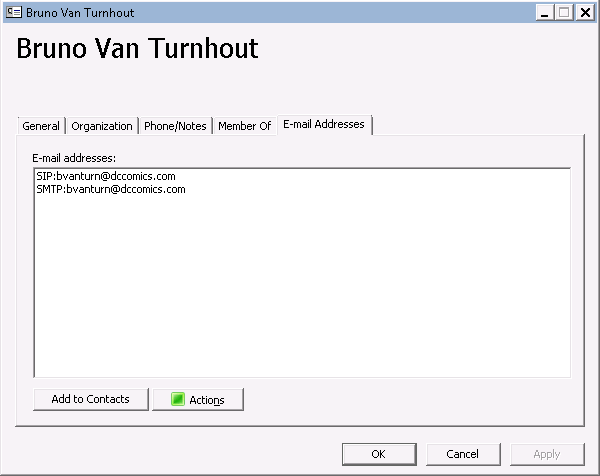
After the address book is properly updated, verify that the contacts have the correct SIP address. Choose a contact, view the Outlook Properties, and from the E-mail Addresses tab, verify that the correct SIP address is listed.
Revision History
| Revision | Publish Date | Comments |
|---|---|---|
1.0 |
19-Jul-2013 |
Initial Release |
Contact Cisco
- Open a Support Case

- (Requires a Cisco Service Contract)
 Feedback