Introduction
This document describes the procedure for customers to manually migrate from Cloud Connected PSTN to Cisco Calling Plan.
Prerequisites
Requirements
Cisco recommends that you have knowledge of these topics:
- Webex Calling
- Control Hub
- PSTN services offered for Webex Calling customers
- Customer must have Cloud Connected PSTN service
Component Used
The information in this document was created from the devices in a specific lab environment. All the devices used in this document started with a cleared (default) configuration. If your network is live, ensure that you understand the potential impact of any command.
Background Information
Customers are open at any time to change their PSTN provider and migrate their service to a Cisco Calling Plan.
Per the Get started with the Cisco Calling Plans document, migration from Cloud Connected PSTN to Cisco Calling Plan must be done manually since Self Service is not available yet for this option.
Cisco PSTN Team
If you encounter difficulties with porting or requesting numbers while setting up a Cisco Calling Plan location, our Cisco PSTN team is dedicated to offering support.
Cisco PSTN team can assist with:
- Porting
- Any issue related to your acquired numbers
- Ordering new numbers
Procedure
When a new location is created and being assigned to a PSTN Connection, connections are completely linked to the location and can not be disassociated from it, unless the location is deleted.
Since Cisco Calling Plan is becoming the new provider, admins are unable to merely modify the connection at their location; they must create a new one instead.
On the other hand, current location numbers belong to a Cloud Connected PSTN carrier and to continue in used, numbers have to be ported out to the new carrier, Cisco in this case.
To initiate the migration process, proceed with the next steps.
Step 1. Create a new location.
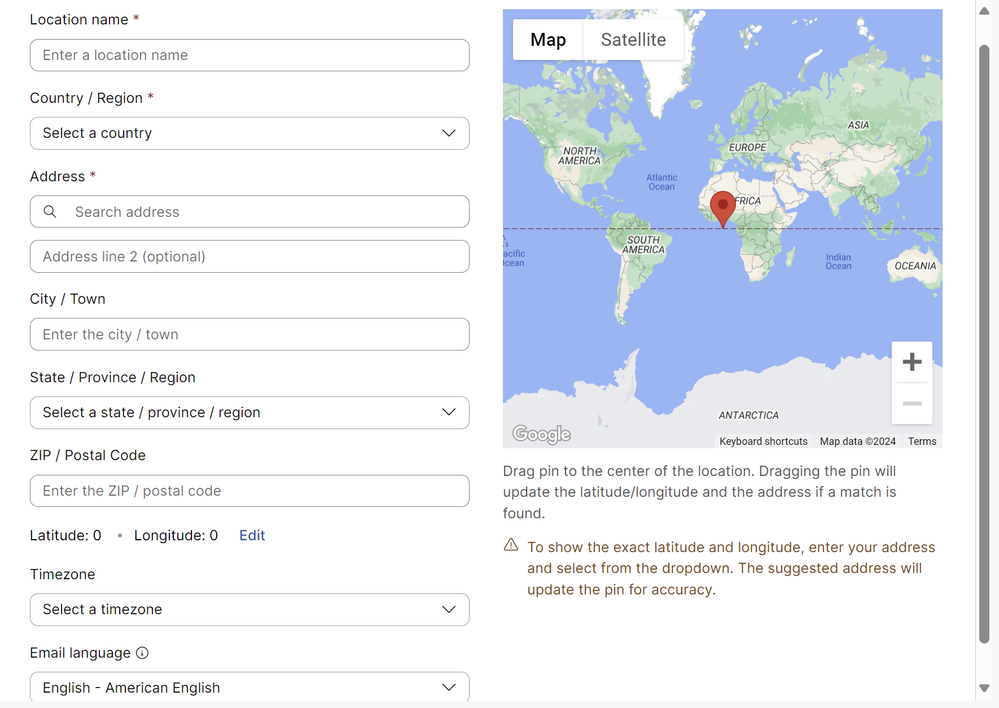
- Navigate to Locations > Manage locations > Select your preferred option. For this example, Create manually is selected.
- The next screen is displayed where you enter information such as Location name, Country, Address, and so on.
 Create a Location Screen
A screen confirming the creation of your new location is displayed.
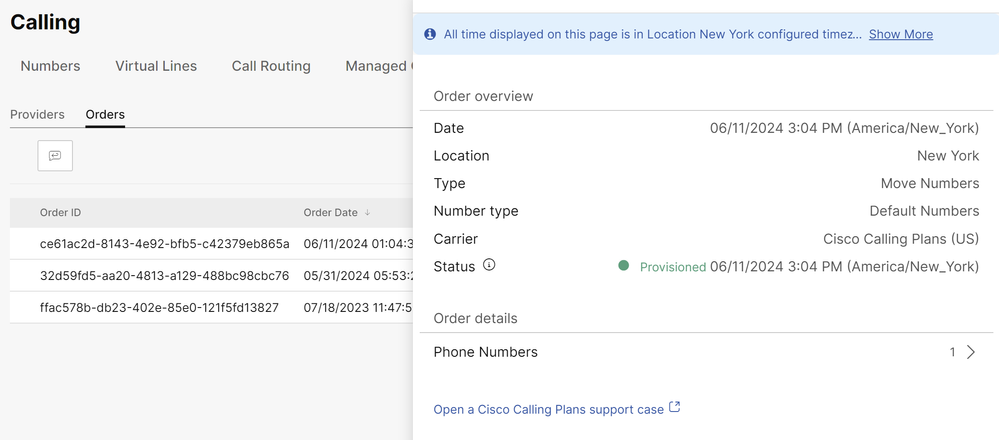
Step 2. Navigate to Services > Calling > PSTN > Orders and click in a previous order.
Step 3. Click the Open a Cisco Calling Plans support case link.
 Orders page in Control Hub.
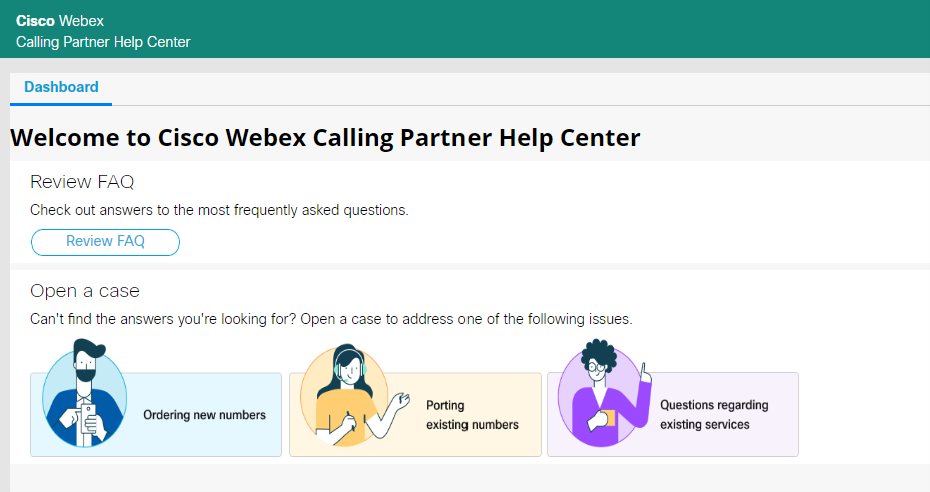
You get redirected to the Webex Calling Partner Help Center page:
 Cisco Webex Calling Partner Help Center home page.
Step 4. Select Porting existing numbers.
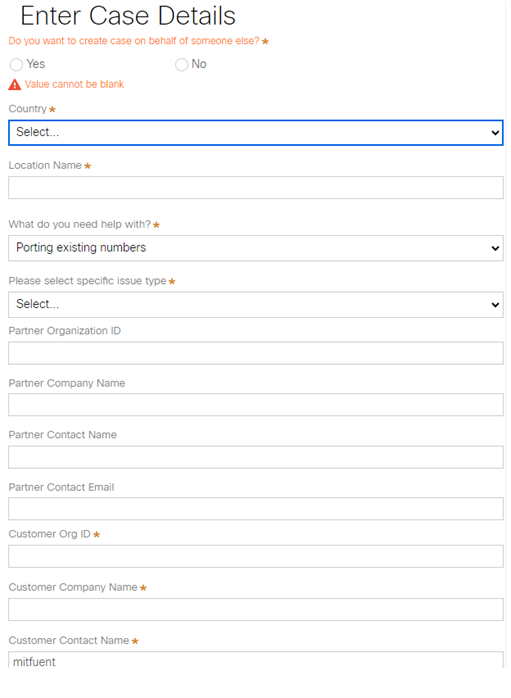
Step 5. Fill the required information in the new box opened and submit your request.
 Case Details for a case with Cisco PSTN team.
Our Cisco PSTN team is going to reach out to offer additional support during the number porting process.

Caution: Please note that any porting procedure involves a service interruption, since numbers are transferred from one carrier to another and the location in your Control Hub changes. This necessitates scheduling a Maintenance Window or a specific date for porting. Our PSTN team is ready to help throughout the process to minimize the impact as much as possible.


 Feedback