Introduction
This document describes the steps needed to upgrade from Evaluation License to DNA Subscription License (Essentials/Advantage/Premier).
Cisco Catalyst 9000 License Upgrade - Offline Method
When a new switch comes online, it boots up with the Evaluation Network License, which is valid for 90 days. During this time period, the switch needs to communicate with Cisco Smart Software Manager (CSSM). As the CSSM server is based in Cisco’s cloud, internet connectivity is needed, for the switch to reach Cisco’s cloud.
However, this is not permitted in some customer’s networks, such as the Financial and Banking sectors, or some customers’ secure environments, that do not have access to the internet (AirGap environment).
In such cases, customers and partners would need to rely on offline methods of Installing the DNA License.
This document relies on DNA Center acting as the License Manager. It is important that DNA Center be connected to the Internet so that it can collect information of ALL the licenses the customer has purchased via their SMART ACCOUNT/VIRTUAL ACCOUNT. Once DNA Center has this information, it can be taken offline, and the rest of the steps can all be performed without DNA Center and Switches connecting to the Internet.
1. DNA Center was connected to the Internet, and it communicated with the CSSM server to gather information on the customers' licenses. The customer has 53 licenses (48 Essential and 5 Advantage).
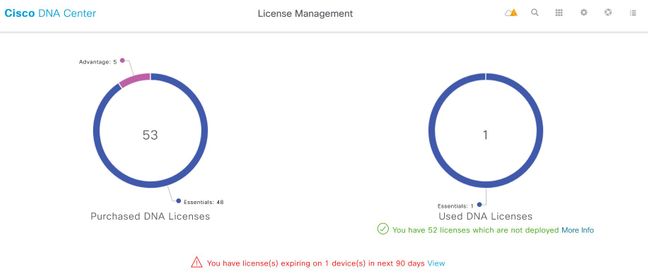
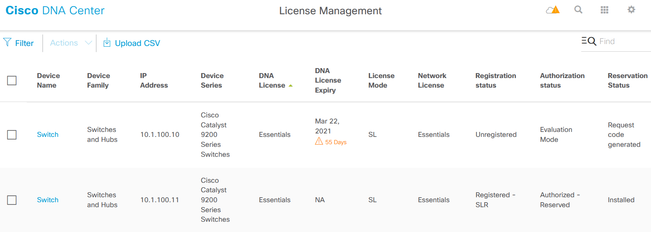
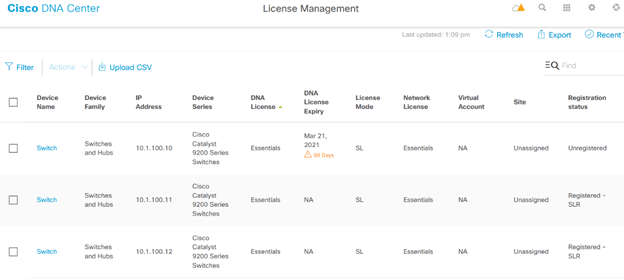
In the ‘License Management’ App of DNA Center, navigate to All Licenses. You will get a summary of all the devices managed by DNA Center, and their License status. The Registration Status and Authorization Status fields show the status of the DNA license, whether the device is running in Eval mode or DNA subscription mode. You need to see the Registered-SLR and Authorized state of the devices as shown in the image.
2. For DNA Center to manage the switch, the switch should be in DNA Center’s Inventory list. If it is not already there, then this can be achieved by 1. Plug n Play process, which is done via DHCP. Or 2. Manually configure the switch with an IP address, enable a password and a local username/password. DNA Center uses this information in the Discovery process, to locate the newly configured switch.
3. Once the switch shows up in the DNA Centers Inventory. Navigate to License Manager > All Licenses. Select the switch or devices that you need to add the DNA License to as shown in the image.

4. Then navigate to Actions, select Manage License Reservation, then Enable License Reservation. Select Specific License Reservation, click Continue to Generate the Request Code as shown in the image.

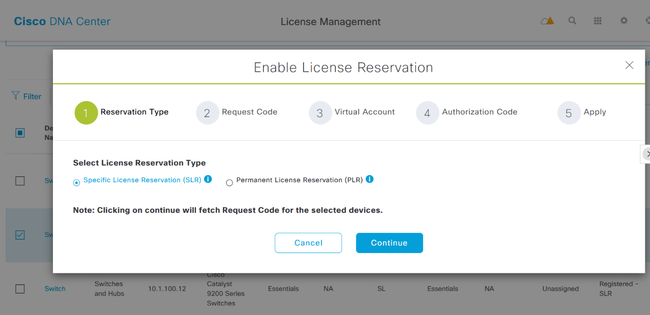
5. At this stage, DNA Center will log in to the switch, and generate a Request Code from the switch. Once the request code is generated, click Export the CSV file.
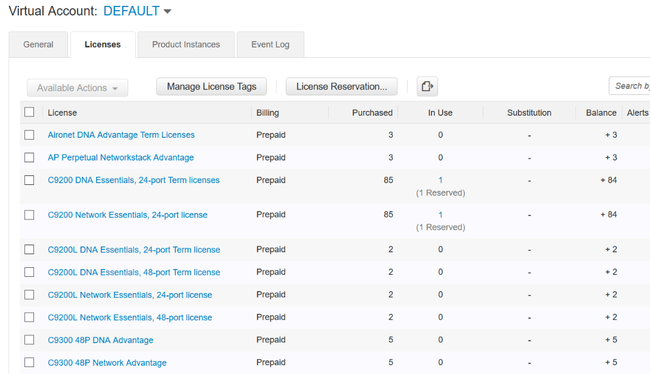
6. Login with Cisco Smart Software Manager (CSSM). You will see all the DNA licenses purchased by the customer. This image shows an example of a customer’s smart account as shown In the image.
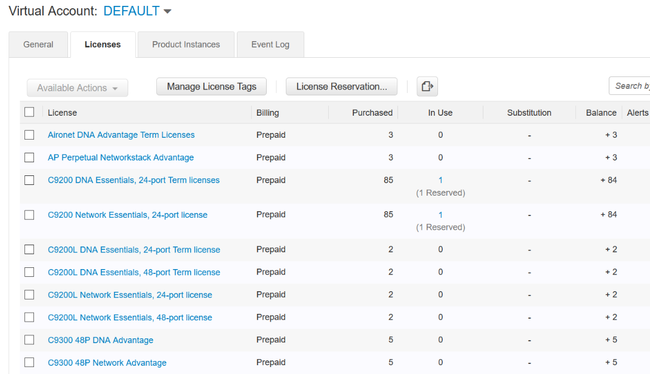
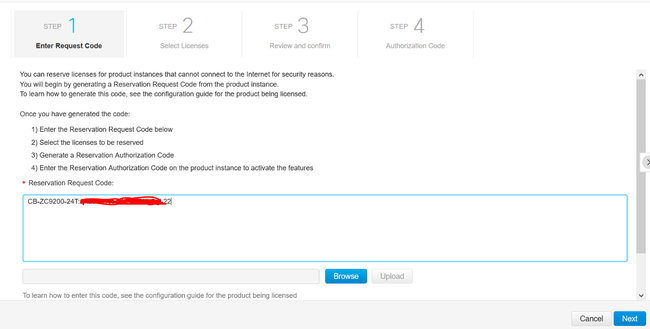
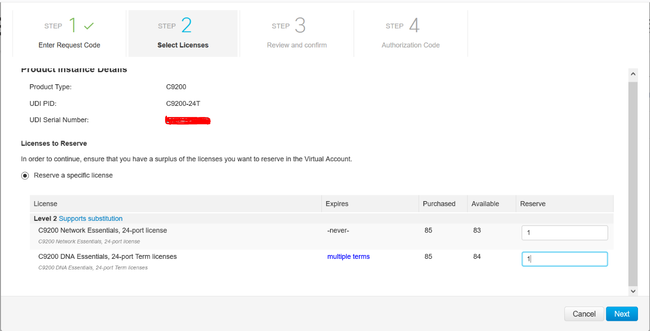
7. With the use of the earlier generated CSV filefrom DNA Center, generate an authorization code from the CSSM. This authorization code allows the use of a permanent DNA license, on a device that does not have Internet access.
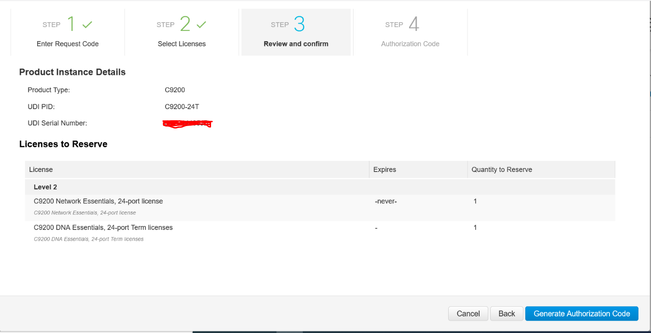
Once the Authorization codes have been generated, either Download them as a File or Copy them to Clipboard.
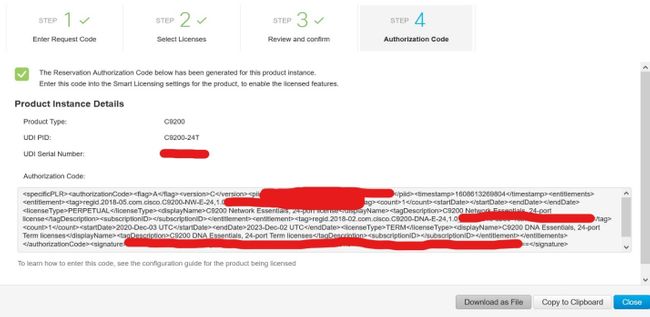
9. Click on Download Template and download the License Reservation Template as shown in the image.
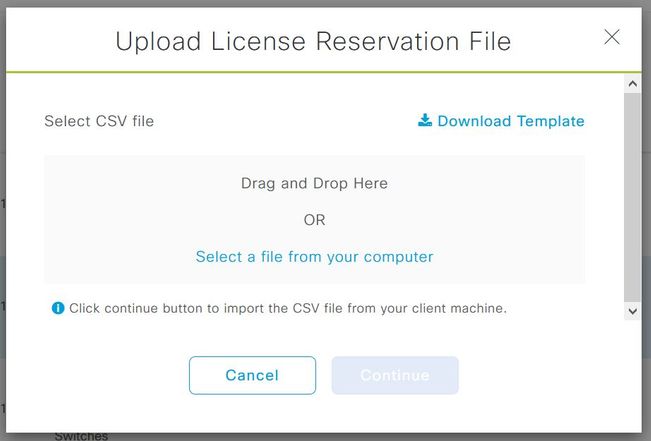
Update the information for the fields of DeviceName, Serial No., RequestCode (from Step 5.), and Authorization Code that was Copied earlier (Step 8.) as shown in the image.

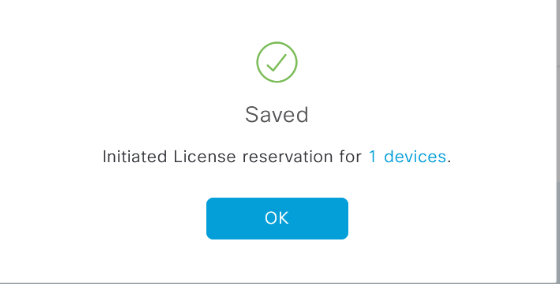
10. Once the CSV file is ready, click on Upload CSV to upload the Authorization Code to the Device. This will install the SLR license to the device, and the license will be respective DNA license is authorized to run on the device as shown in the image.
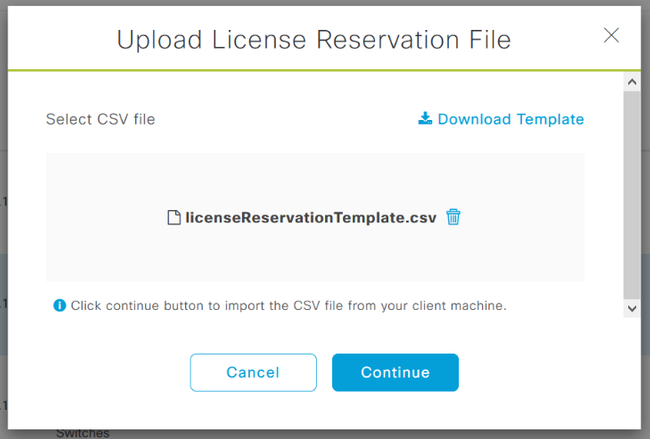
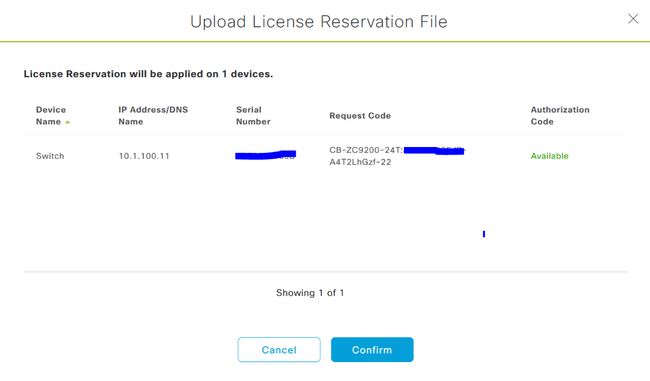
You should see the Registration Status change to Registered – SLR.


 Feedback