WAP361 Indoor Mounting Options
Available Languages
Table of Contents
Objective
The WAP361 Wireless-AC/N Dual Radio Wall Plate Access Point with PoE can be mounted indoors onto a wall or junction box. The objective of this document is to demonstrate and understand the mounting options and features of the WAP361.
For a full length demonstration of WAP361 Indoor Mounting Options, please view the video below:
Applicable Devices
- WAP361
WAP361 Indoor Mounting
Mounting Kit Materials
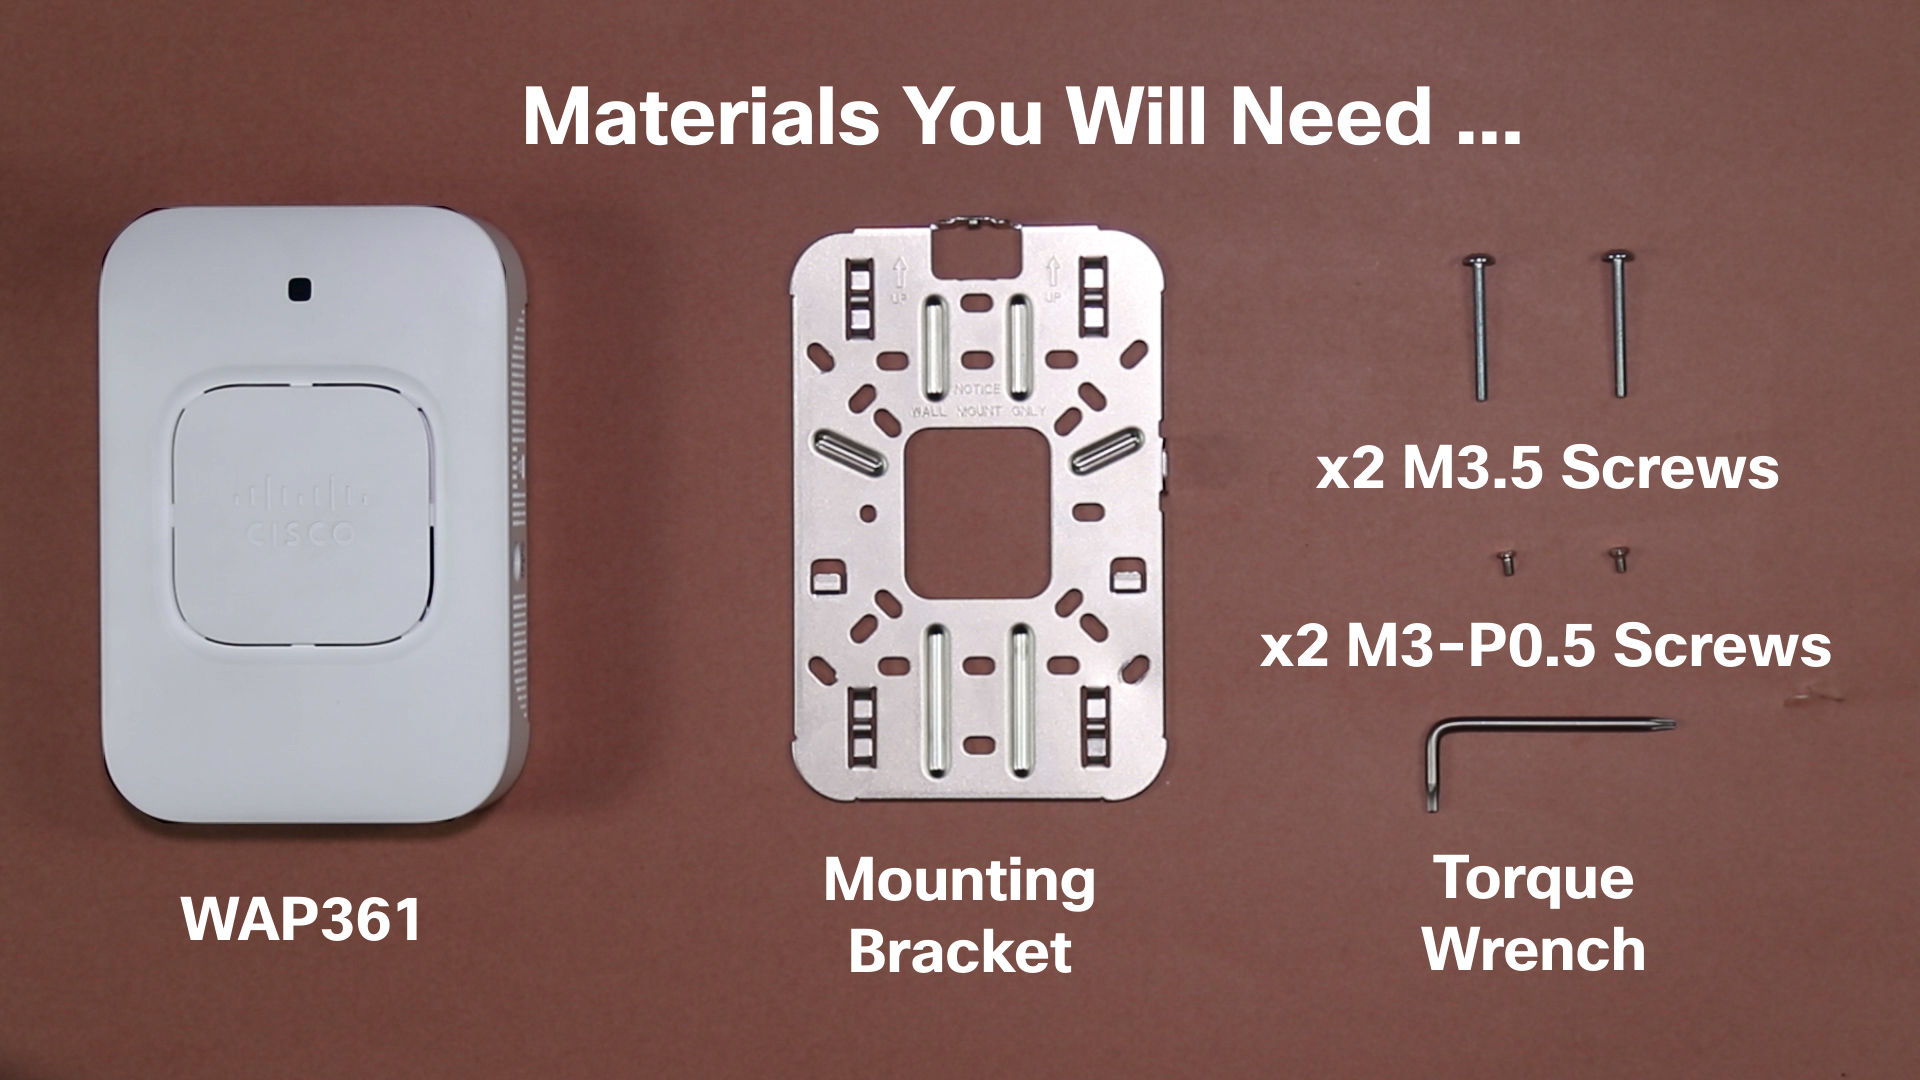
The following items are included in the WAP361 mounting kit:
- WAP361 Mounting Bracket
- (2) M3.5 Screws
- (2) M3-P0.5 Screws
- Torque Wrench

Wall Mounting
To install the WAP361 directly onto a wall, remove the wall plate and any connected cables. First, take off the tags located on the top and bottom of the wall plate, exposing the screws located behind the tags. Then, unscrew the plate from the wall and detach the Ethernet cables from the plate.
Next, attach the mounting bracket onto the wall using the M3.5 screws provided in the mounting kit. After securing the bracket to the wall, mount the WAP361 onto the bracket. Then, connect the cables to the WAP361 and attach the M3 P0.5 security screw to the top of the WAP361 using the torque wrench.
Junction Box Mounting
To mount the WAP361 onto a junction box, first attach the mounting bracket onto the junction box using the M3.5 screws. After securing the mounting bracket to the junction box, connect the cables to the WAP361 and attach the device to the bracket. Finally, insert the M3 P0.5 security screw through the hole located on the top of the WAP361, and tighten, using a torque wrench.
Conclusion
To provide consistent coverage for an indoor location, the WAP361 can be fixed onto a wall or junction box within the area. With the appropriate tools and mounting kit, either option can be quickly and easily achieved.
 Feedback