Using Cisco Business Mobile App with CBW150 Series
Available Languages
Objective
The objective of this document is to show you how to use the Cisco Business Mobile app with the Cisco Business 150 series access points.
Applicable Software | Version
- Cisco Business Mobile App | 1.2 (Download on the Apple App Store)(Get it on Google Play)
- CBW150AX | 10.2.2.0
- CBW151AXM | 10.2.2.0
Introduction
The Cisco Business Mobile app enables customers to deploy and manage supported Cisco Business devices. The mobile app is intended to help customers set up their switches and wireless networks and to manage their infrastructure from a single point of setup.
CBW 15x series devices are not compatible with CBW 14x/240 series devices and coexistence on the same LAN is not supported.
Some terms to be familiar with regarding the Cisco Business Mobile app:
- Greenfield Network - A new network which is yet to be configured
- Brownfield Network - An existing network which is already configured
- Day 0 - initial configuration
- Day 2 - changing or updating existing configuration
Currently, the Mobile app will only support Greenfield network deployments. Devices with existing configurations will not be discovered or managed.
If you are ready to configure using the Mobile app, let’s get you setup!
System Requirements
The CBW150AX and CBW151AXM are supported by the Cisco Business Mobile App 1.2.
Table of Contents
Configuration of Cisco Business Mobile app
Add A Site
Step 1
Download the Cisco Business Mobile app from the App Store on your Apple device (iPhone or iPad).
The app is optimized for display on an iPhone. If you use an iPad, you will see black bars on the side of the app as the aspect ratio of an iPad is different.
Step 2
Click on the Cisco Business Mobile app.

Step 3
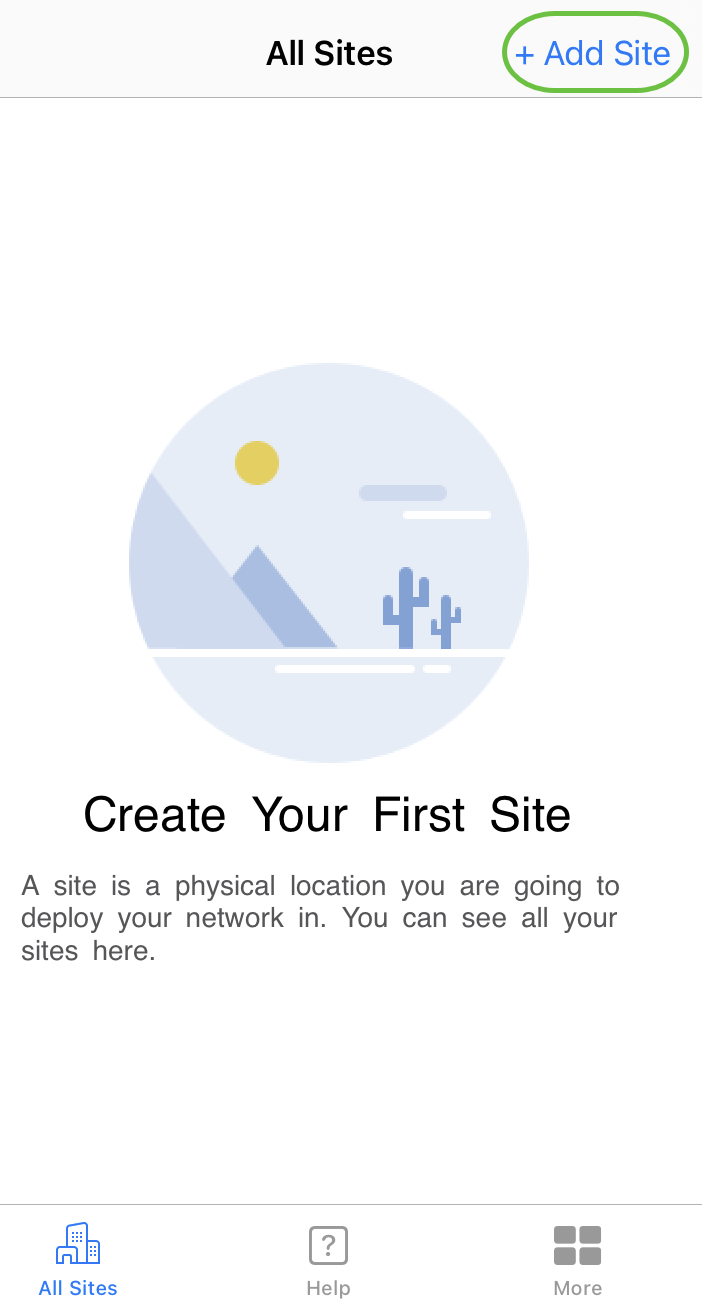
To create a location of your network, click on + Add Site.
Step 4
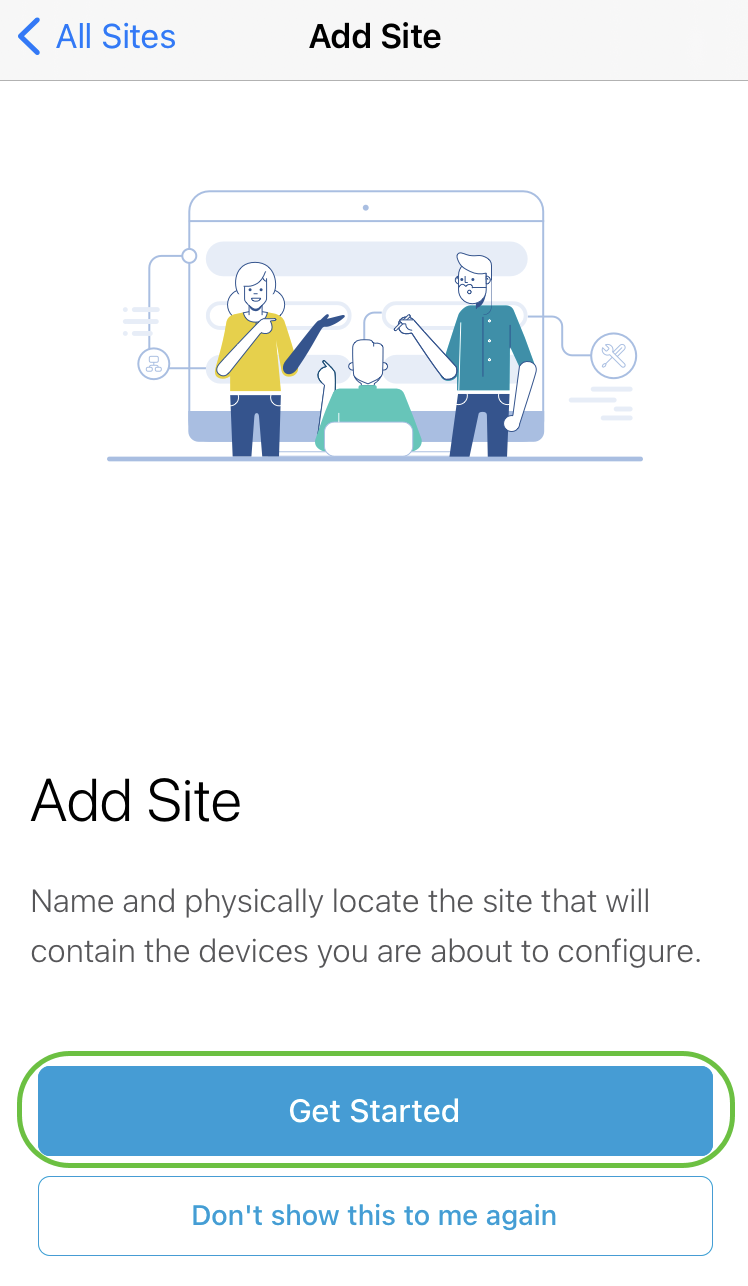
Click on Get Started.
Step 5
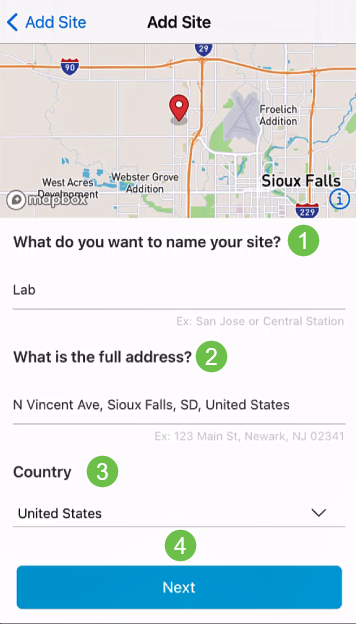
Configure the name of your site, address, Country, and click Next.
Step 6
Enter a Username and Password for the site and click Next.
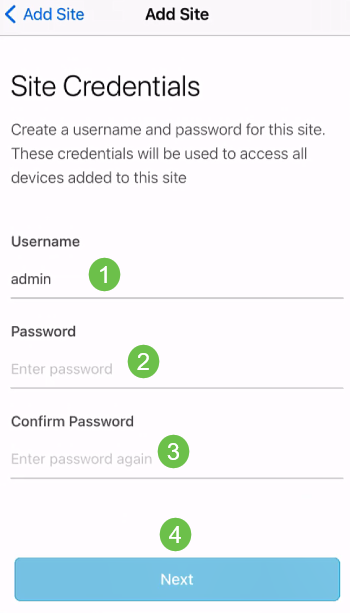
The credentials will be used to access the devices at this site.
Step 7
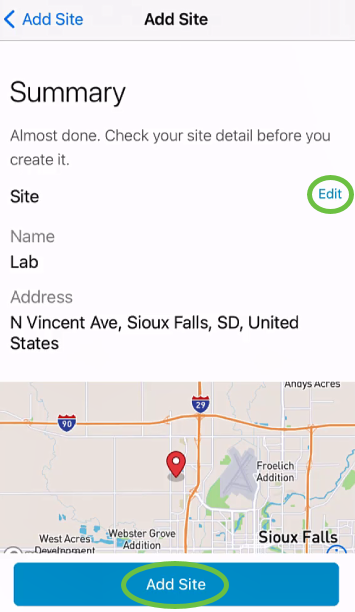
You will see the Summary screen. To make any changes, click Edit. If you are all set, click Add Site.
Step 8
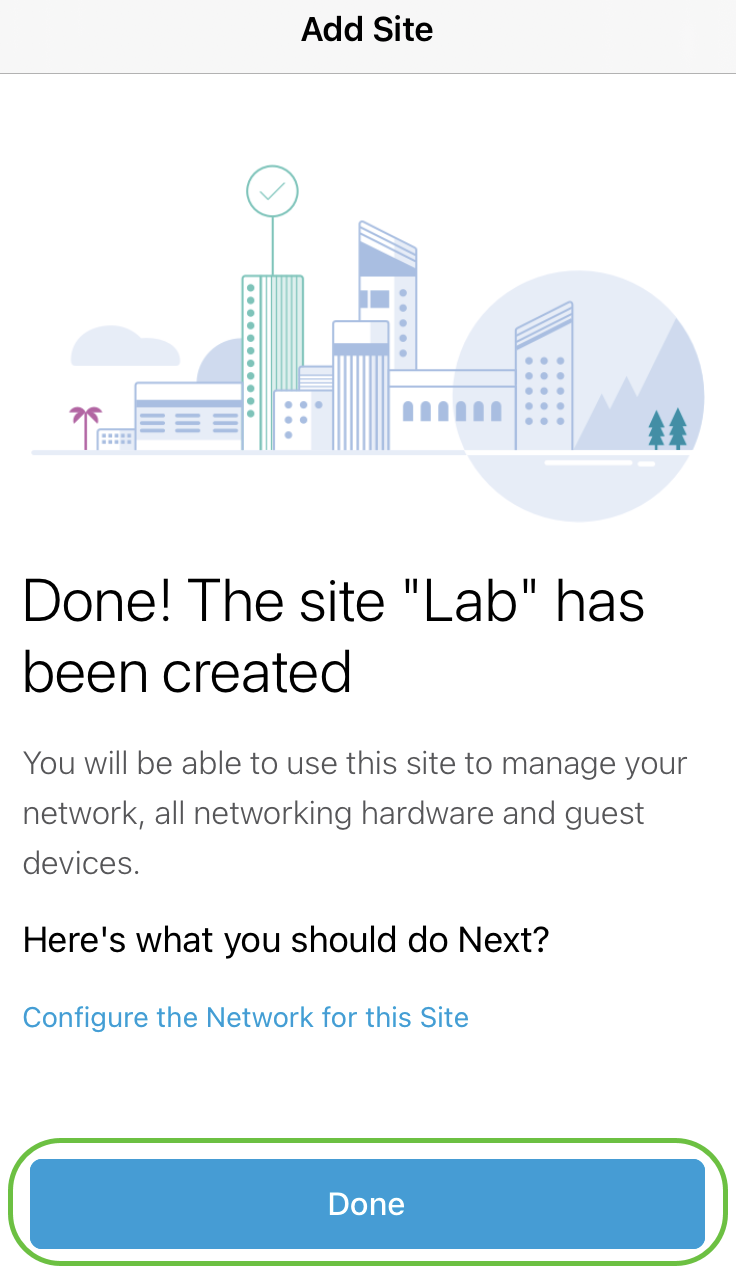
Click Done.
Site Configuration
To configure the site, follow the steps:
Step 1
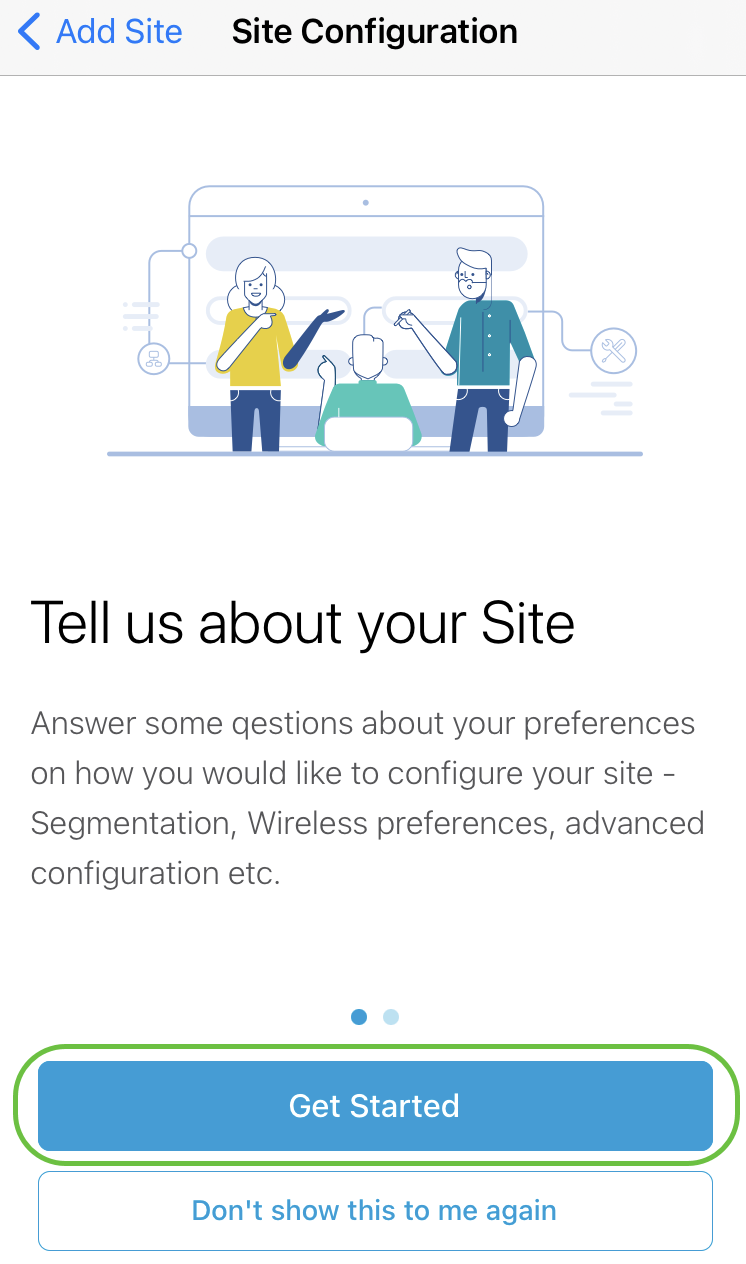
Click on Get Started.
Step 2
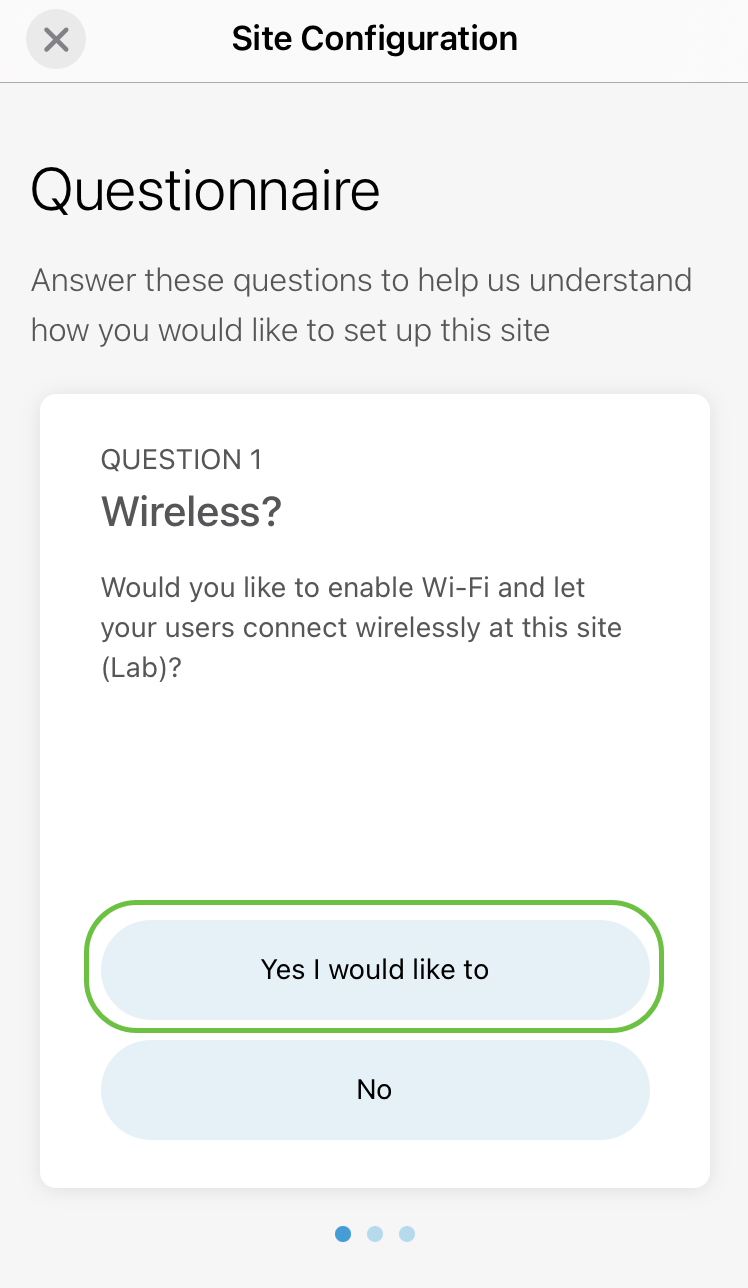
Choose an option to configure the wireless settings in your network. In this example, Yes I would like to is selected.
Step 3
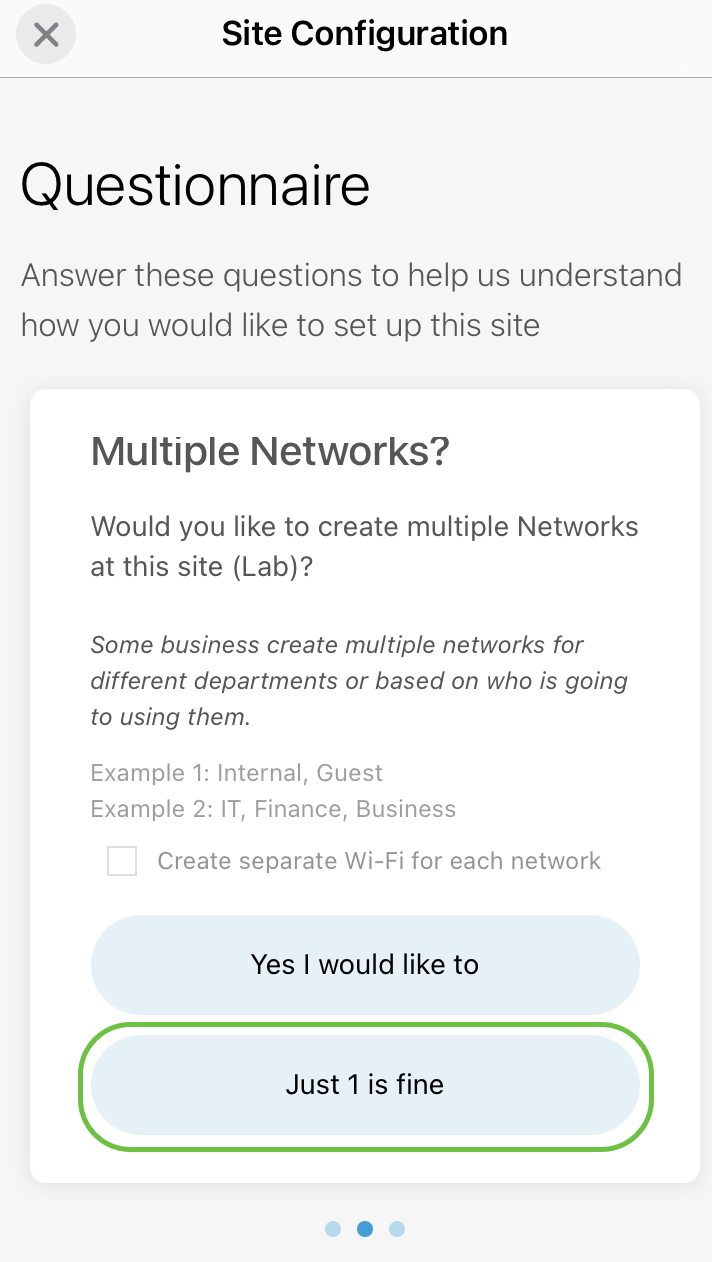
If you have multiple networks, you have the option to configure them. In this example, Just 1 is fine is selected.
Step 4
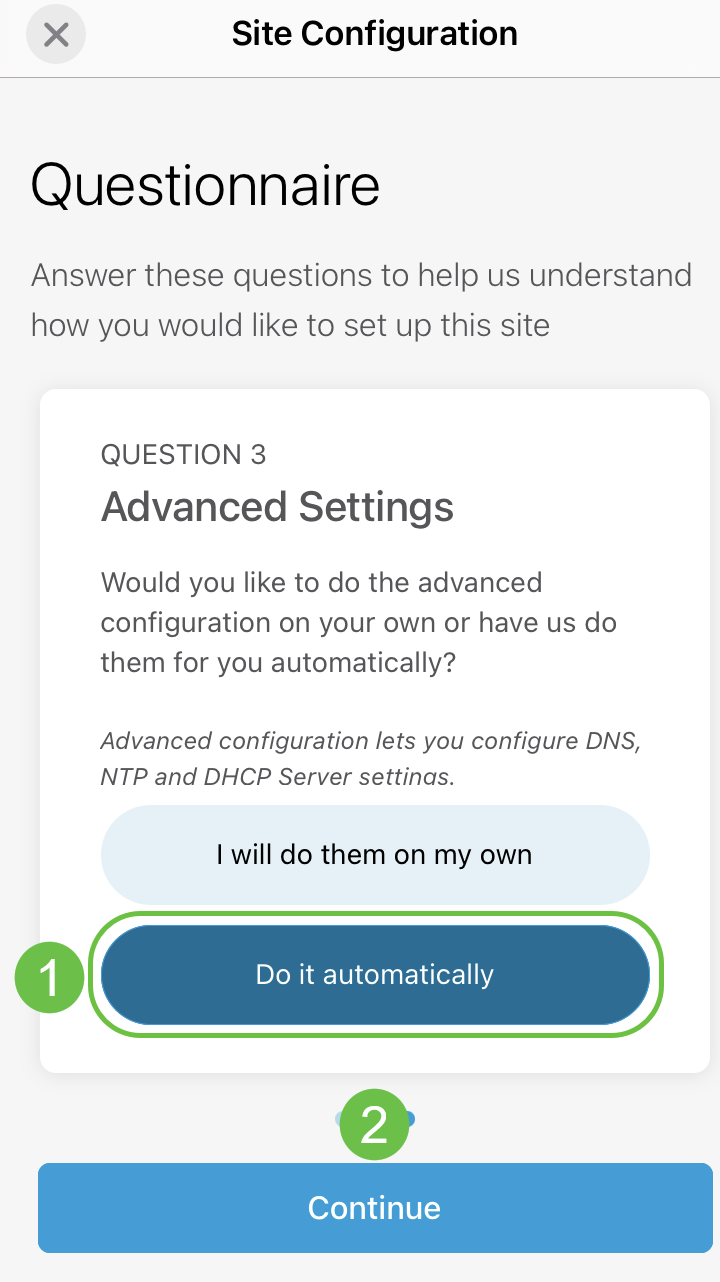
You can either configure the Advanced Settings manually or automatically. In this example, Do it automatically is selected. Click Continue.
Step 5
Enter a Network Name and click Next.
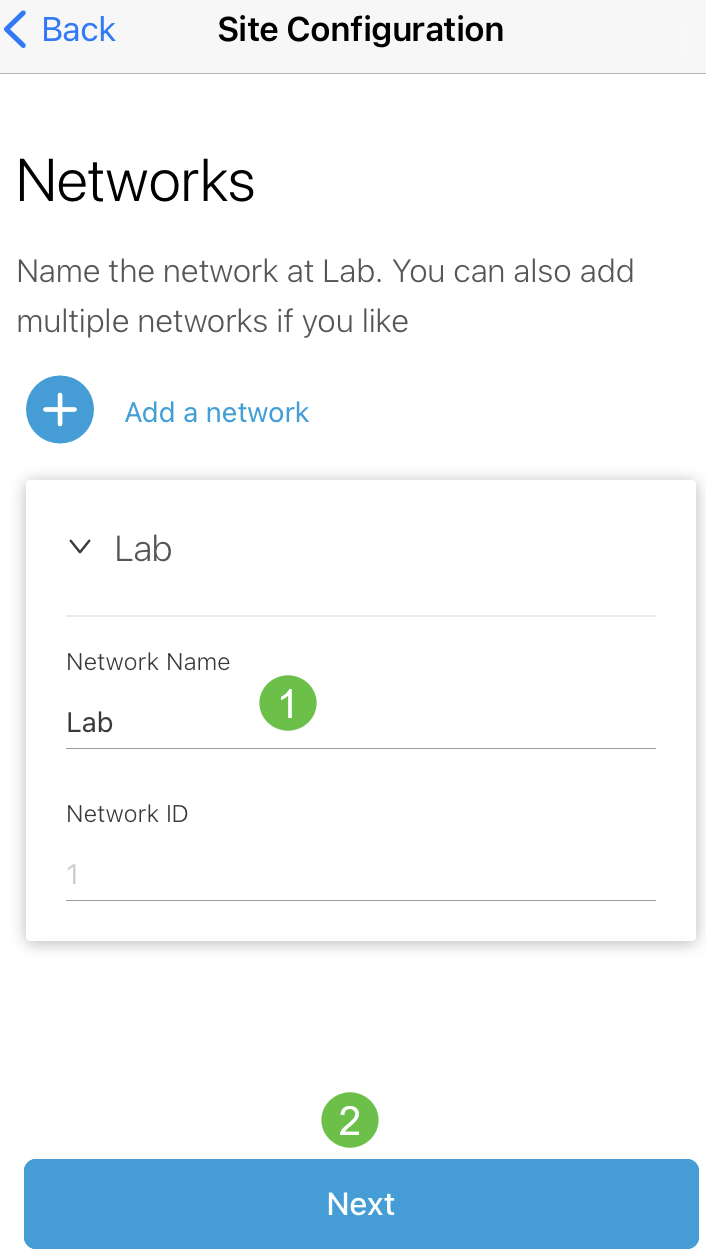
If you want to add more networks, click + Add a network.
Step 6
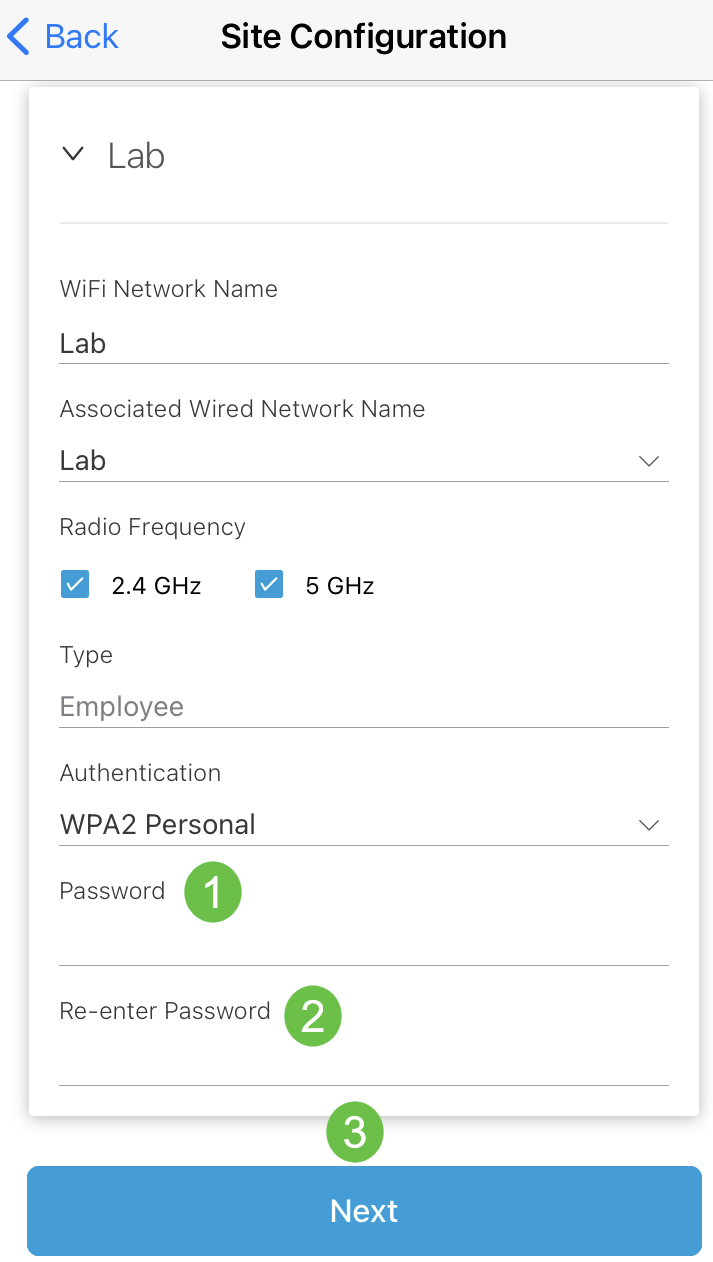
Enter a Password for your network and click Next.
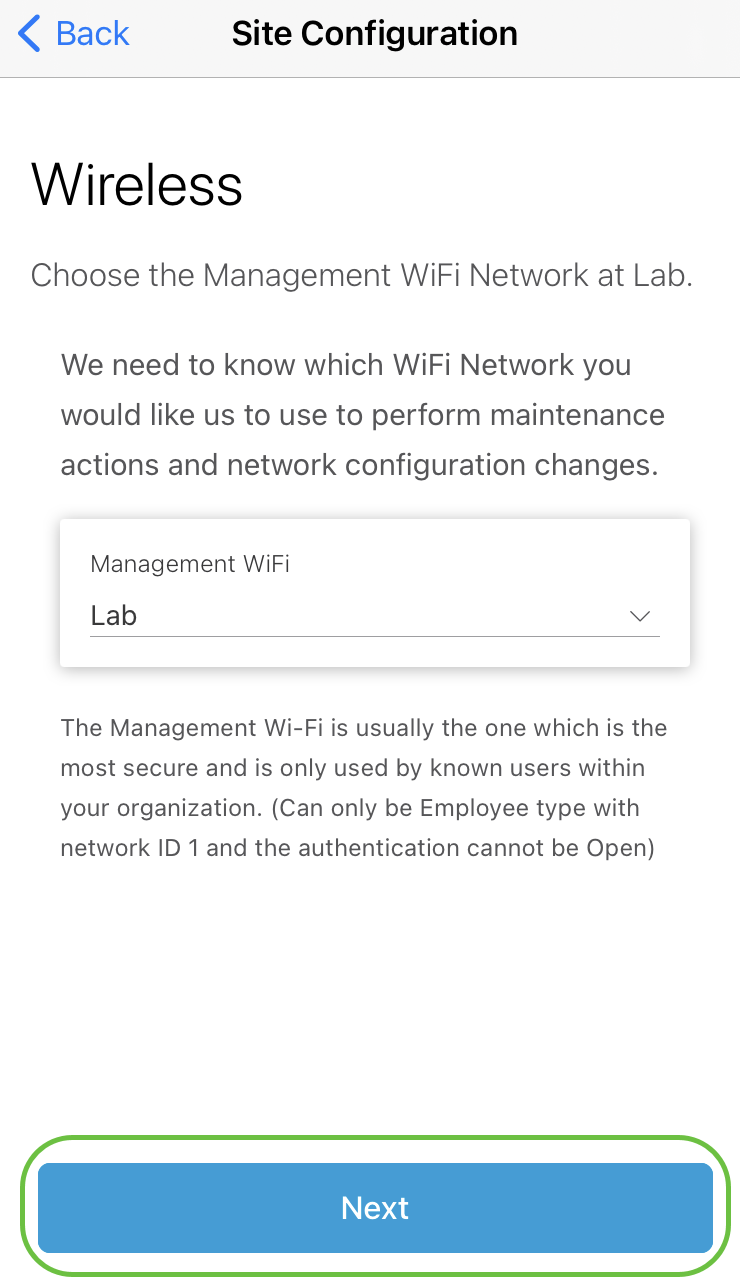
Step 7
Click Next to proceed.
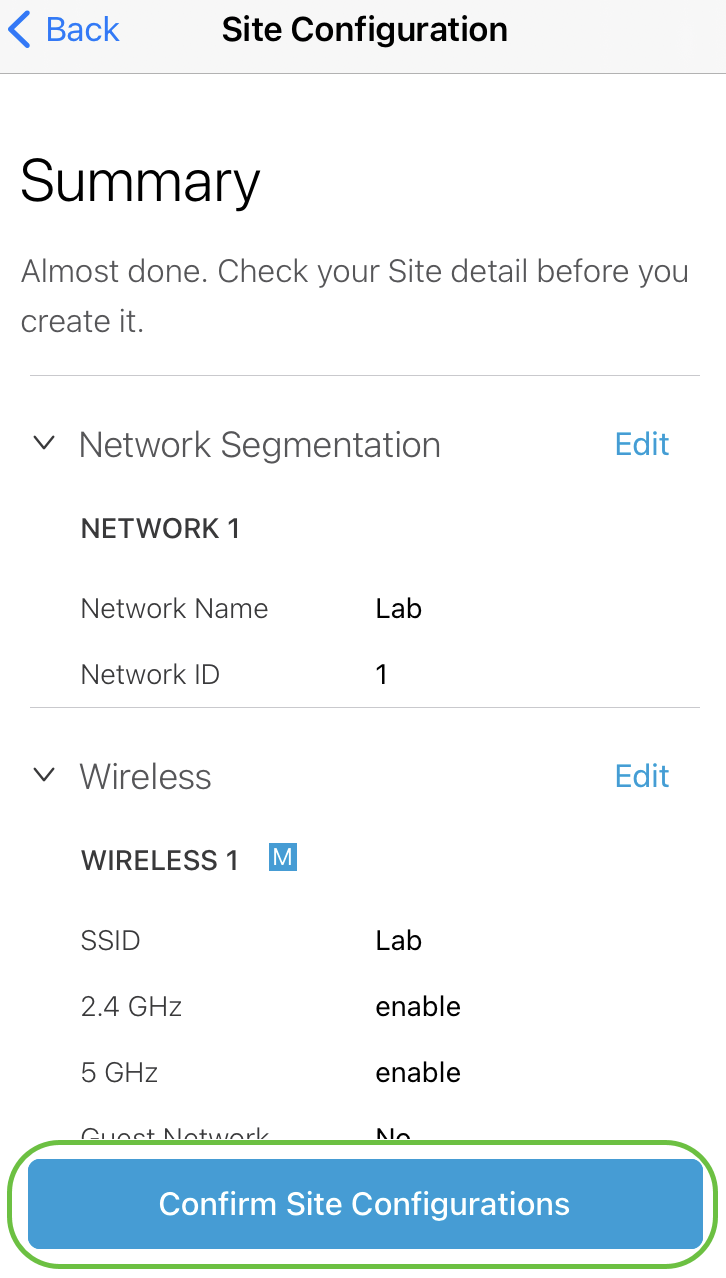
Step 8
Check the details in the Summary screen. Click on Confirm Site Configurations button to complete the set up.
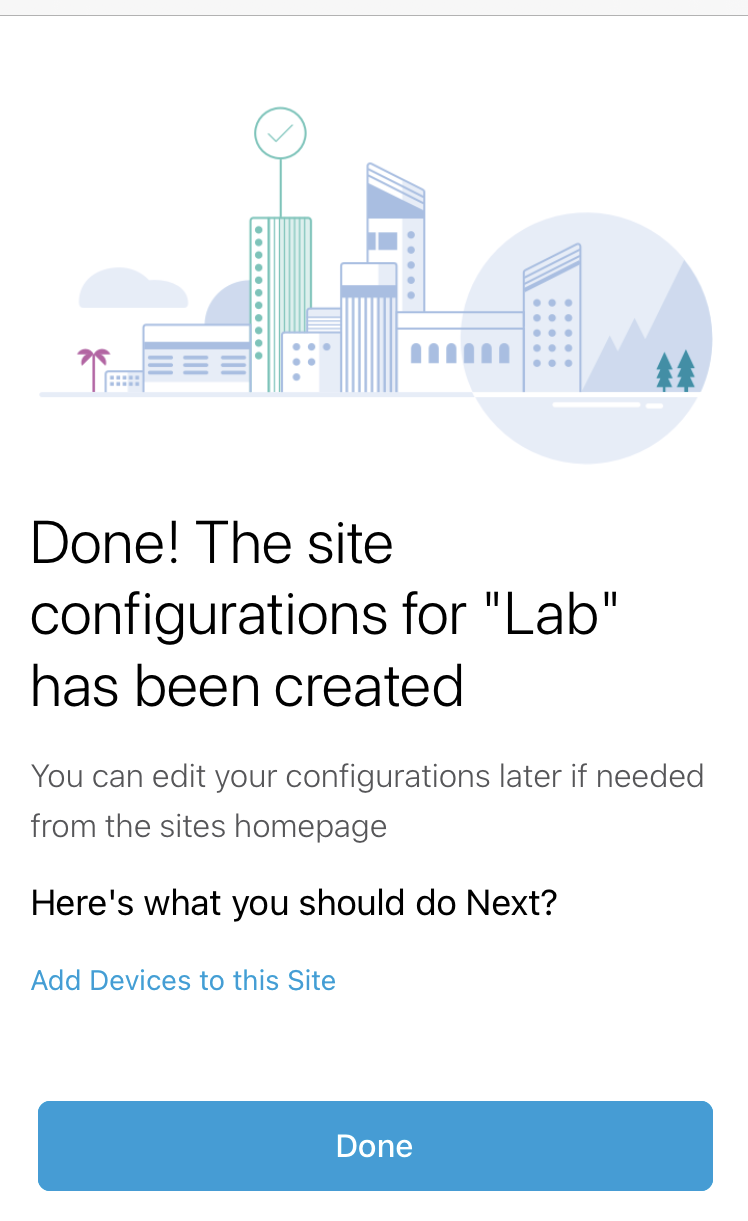
Step 9
Click Done.
Add Devices
To add devices, follow these steps:
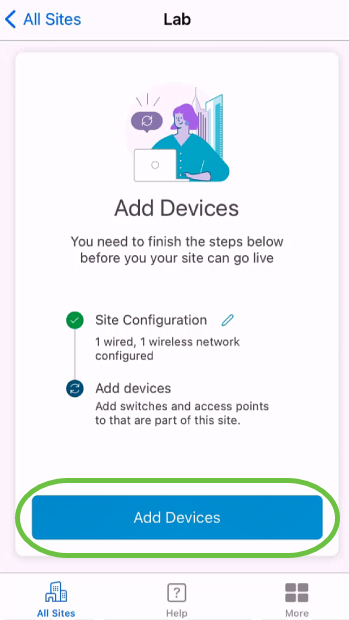
Step 1
Click on Add Devices.
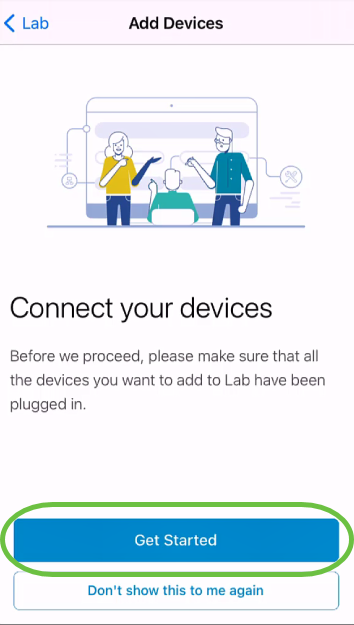
Step 2
Click on Get Started.
Step 3
Click Join to join the default CiscoBusiness-Setup SSID.
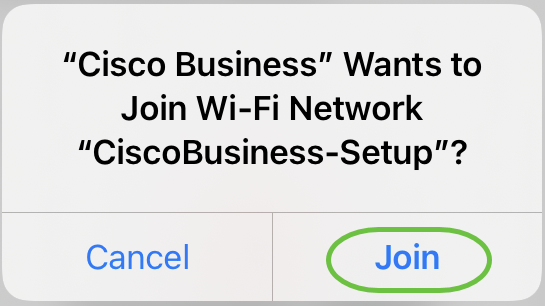
Make sure that the wireless access point is fully booted up and is in factory default settings.
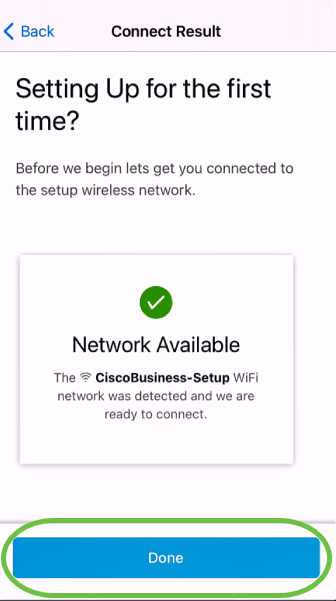
Step 4
Click Done after the connection is detected.
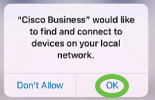
Step 5
Click OK to allow Cisco Business network to find and connect to Cisco Business devices.
Step 6
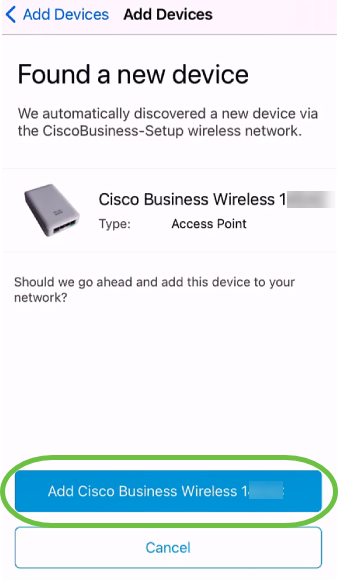
The access point will be detected. In this example, it is a Cisco Business Wireless access point. Click Add Cisco Business Wireless .
Step 7
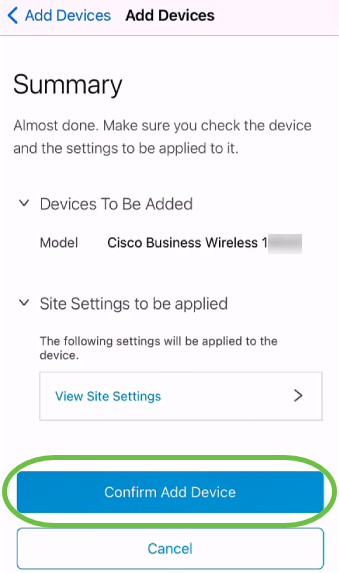
A Summary of the device and settings will be displayed. Click Confirm Add Device.
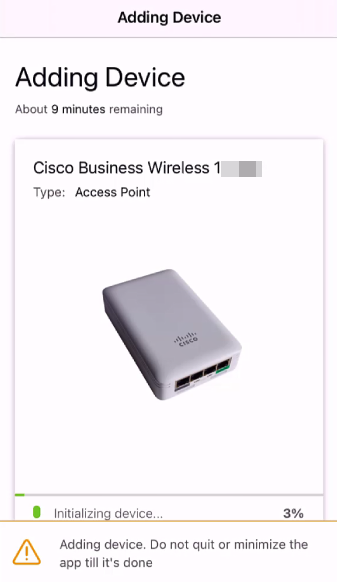
A screen will appear displaying the progress of adding the device.
Step 8
Click Join to allow the access point to join the network you created.

Step 9
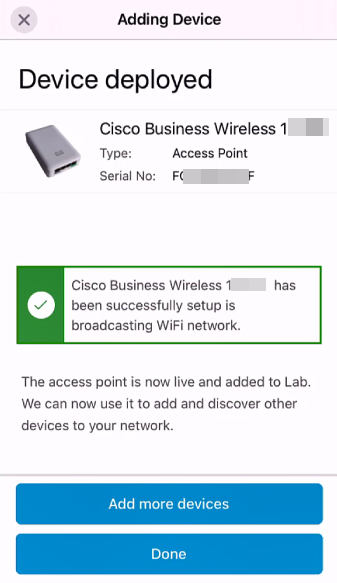
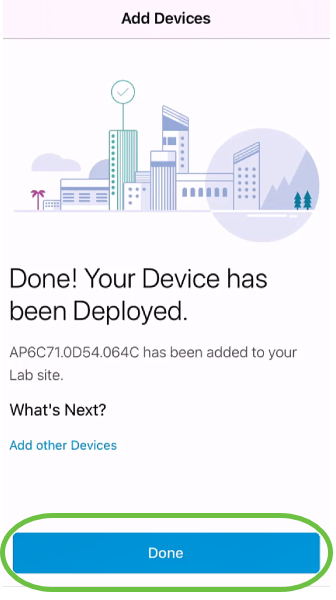
You will see a screen that the device was successfully deployed. You can choose to Add more devices or click Done. In this example, Done is selected.
Step 10
Click Done to navigate to the main page.
Conclusion
There you have it! You have now successfully used the Cisco Business Mobile App to deploy the CBW 150 series access point. Now you can manage your network with ease.
Now you know where to go for more information or to give feedback!
Looking for more articles on the Cisco Business Mobile application? Look no further! Click any of the tags below to be brought directly to that topic. Enjoy!
Revision History
| Revision | Publish Date | Comments |
|---|---|---|
1.0 |
06-Jul-2022 |
Initial Release |
 Feedback