Firmware Upgrade/Backup and Image Swap on the SG350XG and SG550XG
Available Languages
Objectives
This objective of this document is to explain how to upgrade, backup or swap the firmware on the SG350XG and SG550XG switches.
Using the latest firmware is a best practice for both security and performance. More than one firmware version may be saved onto the switch and may be swapped when desired. Firmware versions can also be backed up. This can be useful to save backup copies of firmware in case of device failure.
Applicable Devices
- SG350XG
- SG550XG
Software Version
- v2.0.0.73
Table of Steps
Login
Note: The following screenshots are from the Advanced Display. This can be toggled by clicking the Display Mode drop-down list located in the top right of the screen
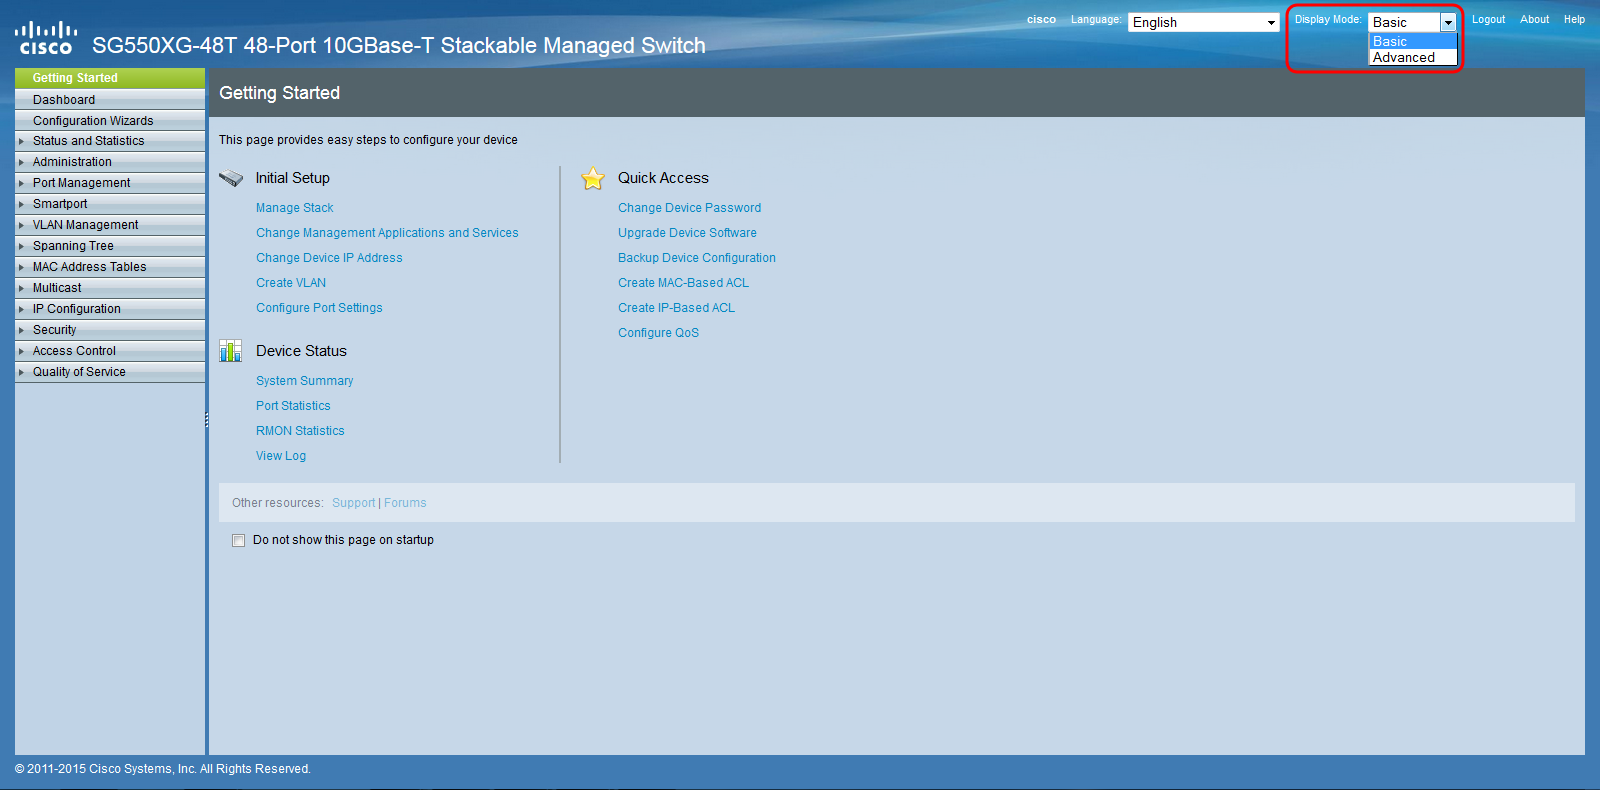
Step 1. Log in to the web configuration utility and chooseAdministration > File Management > Firmware Operations. The Firmware Operations page opens.
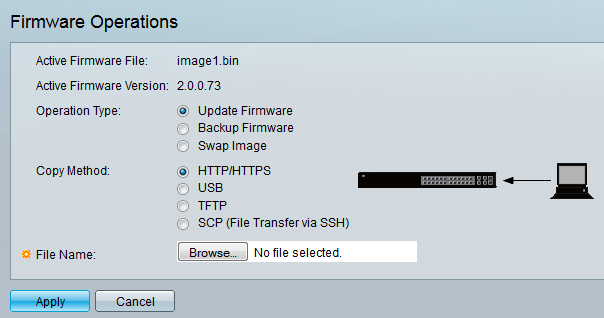
Note:You can see the current firmware file and version in the Active Firmware File field and the Active Firmware Versionfield.
Step 2. Click the desired radio button in the Operation Type area.
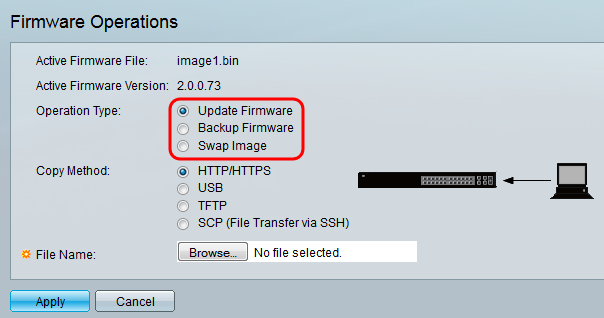
The options are described as follows:
- Update Firmware – Updates the device’s firmware.
- Backup Firmware – Creates a backup of the device’s firmware.
- Swap Image – Changes the device’s firmware with one stored in the device’s flash
memory.
Update/Backup Firmware
Step 1. Click the radio button in the Copy Method section for the desired method of transferring the file.
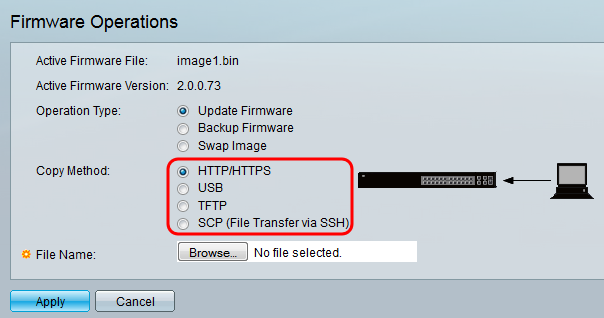
The options are described as follows:
- HTTP/HTTPS – Uses the facilities provided by the browser.
- USB – Uses the switches USB port.
- TFTP – Trivial File Transfer Protocol (TFTP) is a simple file transferring protocol
which allows a client to get from or put a file onto a remote host.
- SCP (File Transfer via SSH) – Secure Copy Protocol(SCP)supports file transfers
between hosts on a network. It uses Secure Shell (SSH) for data transfer and uses the same
mechanisms for authentication, thereby ensuring the authenticity and confidentiality of the data in
transit.
HTTP/HTTPS
Step 1. Click the Browse button in the File Name field to select the image file to be updated. This step is not relevant for Backup by HTTP/HTTPS.

Step 2. Click Apply.

Step 3. Navigate toAdministration > Reboot. The Reboot page opens.
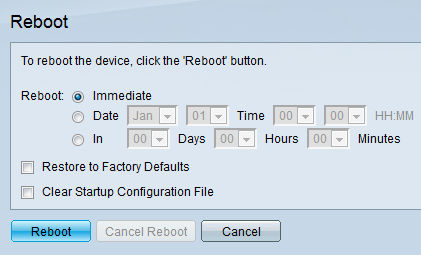
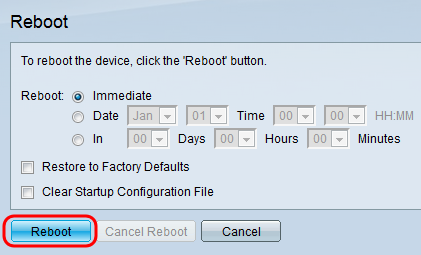
Step 4. Click Reboot. A confirmation window will appear.
Step 5. Click Ok.
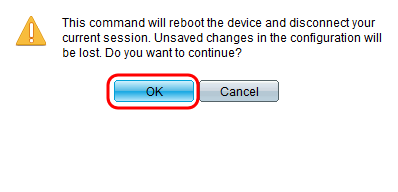
Note: The device will now reboot which will disconnect the current session. Once the reboot is complete, a new session will connect.
USB
Step 1. Enter the path of the image file located on the USB in the File Name field.

Step 2. Click Apply.

Step 3. On web configuration utility and chooseAdministration > Reboot. The Reboot page opens.

Step 4. Click Reboot.

Step 5. A confirmation window will appear. Click OK.

Note: The device will now reboot which will disconnect the current session. Once the reboot is complete, a new session will connect.
TFTP
Step 1. Select the corresponding radio button for how you would like to define the TFTP server. The server can be defined either By IP address or By name. If you selected By name, skip to Step 5.
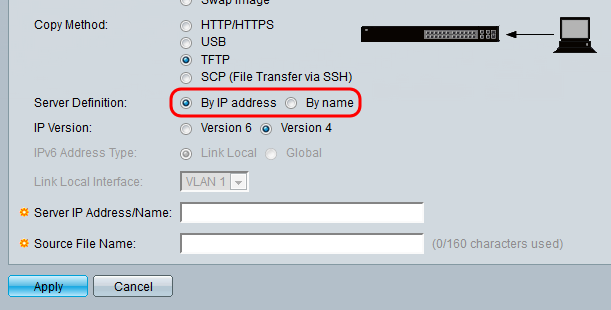
Step 2. (Optional) Select the version of the server’s IP address. If Version 4 is selected skip to Step 5.
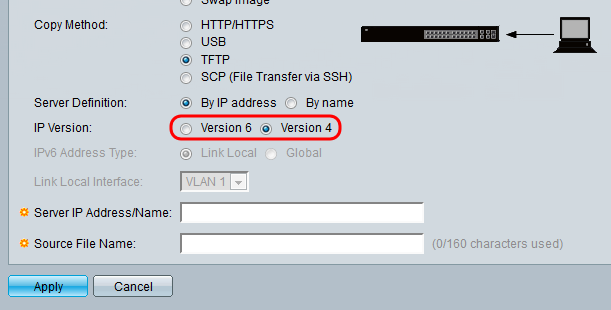
The options are described as follows:
- IPv4 – A 32-bit (four-byte) address.
- IPv6 – A successor to IPv4, consists of a 128-bit (8-byte) address.
Step 3. (Optional) Select the type of IPv6 address. You may select either Link Local or Global for your address type. If Global was selected, skip to Step 5.
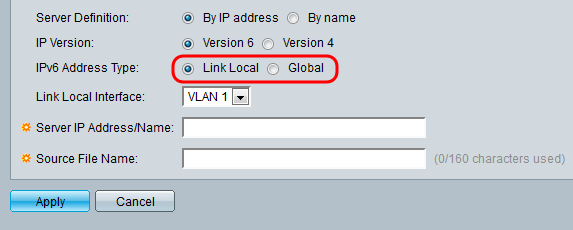
Step 4. (Optional) Select the desired VLAN from the Link Local Interface drop-down list.
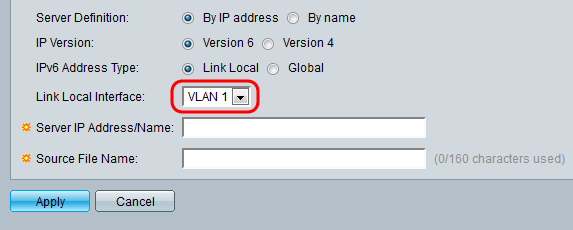
Step 5. Enter the name or IP address of the server in the Server IP Address/Name field.
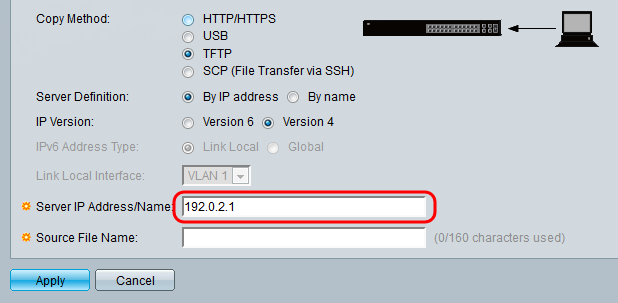
Note: The following field depends on the option selected in Step 1.
Step 6. Enter the file name in the Source/Destination File Name field.
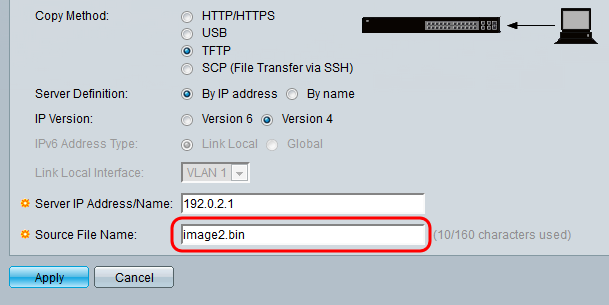
Note: The following field is titled Destination File Name for Backup by TFTP.
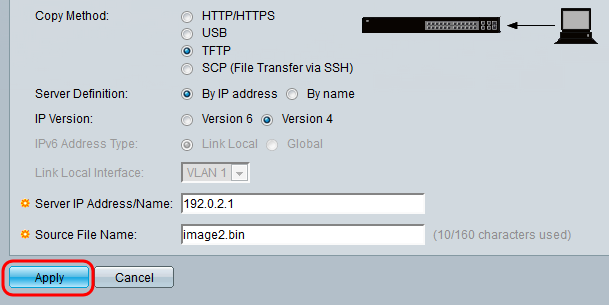
Step 7. Click Apply.
SCP (File Transfer via SSH)
Step 1. To enable SSH server authentication (which is disabled by default), click Edit by Remote SSH Server Authentication. This takes you to the Client SSH UserAuthentication page to configure the SSH User.
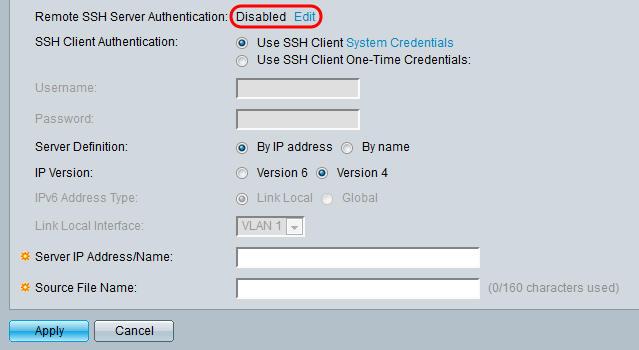
Note: For more information on SSH Client System Credentials refer to the SSH User Authentication article.
Step 2. Select the desired SSH authentication in the SSH Client Authentication field.
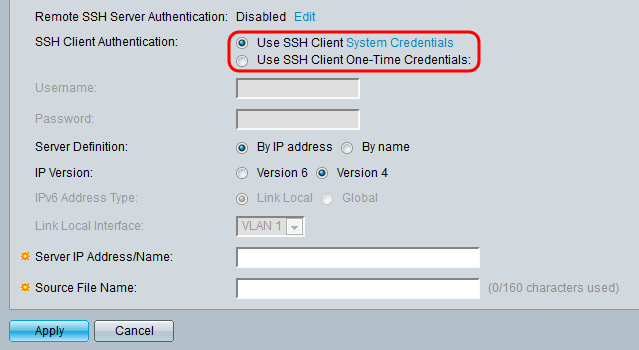
The available options are defined as follows:
- Use SSH Client System Credentials – Sets permanent SSH user credentials. Click
- System Credentials to go to the SSH User Authentication page where the user/password can be set once for all future use
- Use SSH Client One-Time Credentials – Sets one-time SSH user credentials.
Note: For more information on SSH Client System Credentials refer to the SSH User Authentication article.
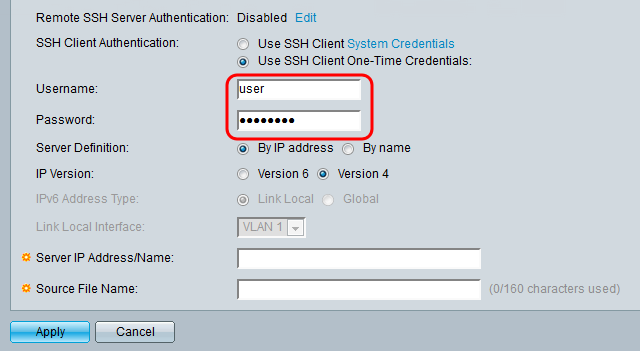
Step 3. (Optional) Enter the desired Username and Password in their respective fields.
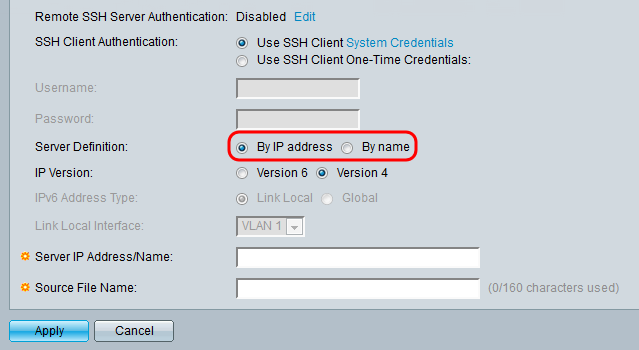
Step 4. Select the corresponding radio button for how you would like to define the SCP server. The server can be defined either By IP address or By name. If you selected By name, skip to Step 8.
Step 5. (Optional) Select the version of the server’s IP address. If Version 4 is selected skip to Step 8.

The options are described as follows:
- IPv4 – A 32-bit (four-byte) address.
- IPv6 – A successor to IPv4, consists of a 128-bit (8-byte) address.
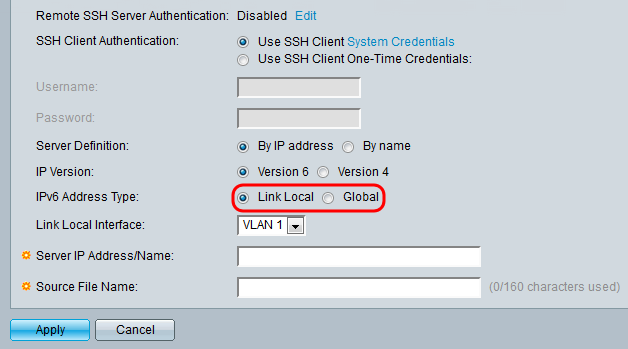
Step 6. (Optional) Select the type of IPv6 address. You may select either Link Local or Global for your address type. If Global was selected, skip to Step 8.
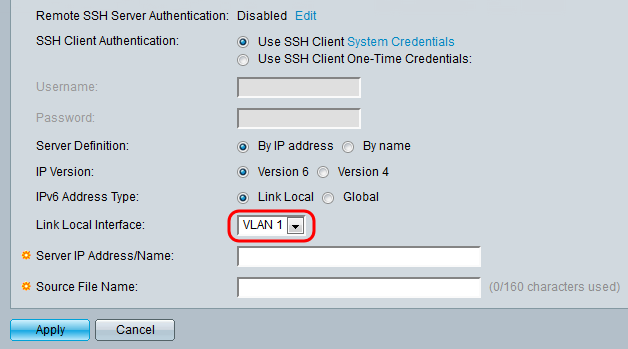
Step 7. (Optional) Select the desired VLAN from the Link Local Interface drop-down list.
Step 8. Enter the name or IP address of the server in the Server IP Address/Name field.
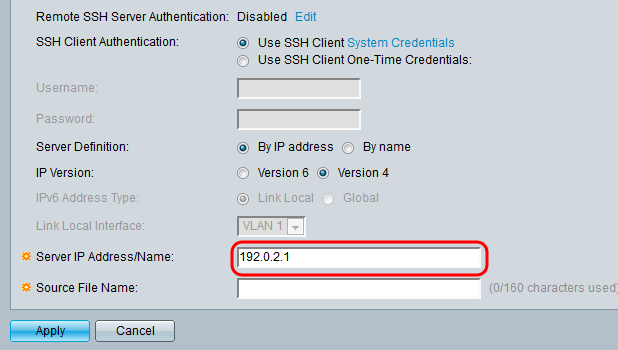
Step 9. Enter the file name in the Source/Destination File Name field.
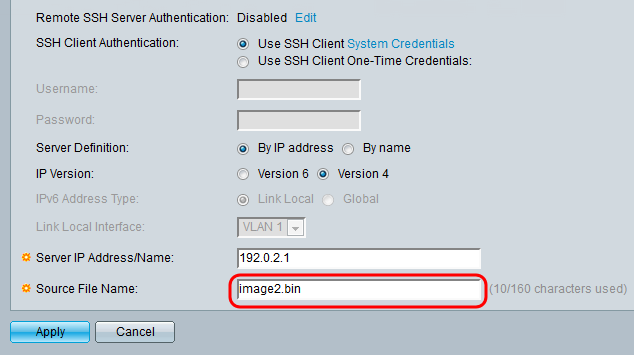
Note: The field is titled Destination File Name for Backup by SCP.
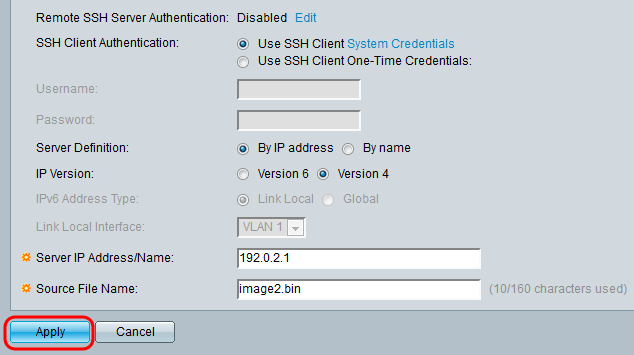
Step 10. Click Apply.
Swap Image
Step 1. Select the firmware file that you want to be active after reboot from the Active Image After Reboot drop-down list.
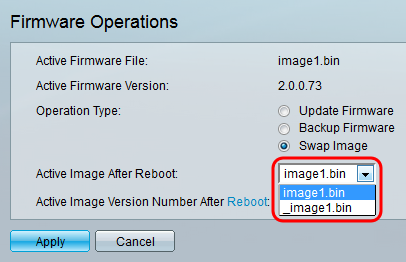
Step 2. Click Apply.
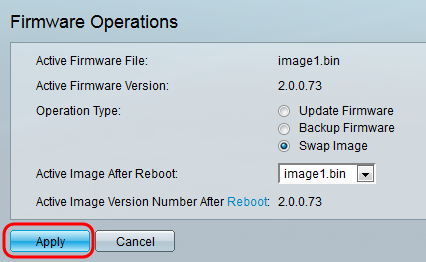
Step 3. On web configuration utility and choose Administration > Reboot. The Reboot page opens.

Step 4. Click Reboot. A confirmation window will appear.

Step 5. Click Ok.

Note: The device will now reboot which will disconnect the current session. Once the reboot is complete, a new session will connect.
 Feedback