Configure Routing Resources on the Switch
Available Languages
Objective
This article provides instructions on how to configure the routing resources settings on your switch. In this scenario, the default values must be adjusted in order to accommodate the VLAN mapping routing resources.
Applicable Devices | Software Version
- Sx350 Series | 2.3.0.130 (Download latest)
- SG350X Series | 2.3.0.130 (Download latest)
- Sx500 Series | 2.3.0.130 (Download latest)
- Sx550X Series | 2.3.0.130 (Download latest)
Introduction
On your switch, all of the routing information is stored in special high-speed memory called Ternary Content Addressable Memory (TCAM) which mainly functions in speeding up route search, packet classification and forwarding, and access control list (ACL)-based commands.
TCAM entries are divided into the following groups:
- IP Entries — Router TCAM entries reserved for IP static routes, IP interfaces, and IP hosts.
- Non-IP Entries — TCAM entries reserved for other applications, such as ACL rules, Cost of Service (CoS) policers, and Virtual Local Area Network (VLAN) rate limits.
The Routing Resources page on your switch allows you to adjust the TCAM allocation. Routing resources can be modified incorrectly in one of the following ways:
- The number of router TCAM entries you allocate is less than the number currently in use.
- The number of router TCAM entries that you allocate is greater than the maximum available for that category. The maximum values are displayed on the page.
If you change the router TCAM allocation incorrectly, an error message is displayed. If your router TCAM allocation is feasible, a message is displayed that an automatic reboot will be performed with the new settings.
The following table provides the number of TCAM entries used by the various features:
|
Logical Entity |
IPv4 |
IPv6 (PCL TCAM) |
IPv6 (Router TCAM) |
|---|---|---|---|
|
IP Neighbor |
1 entry |
1 entry |
4 entries |
|
IP Address on an interface |
2 entries |
2 entries |
8 entries |
|
IP Remote Route |
1 entry |
1 entry |
4 entries |
|
On-Link-Prefix |
N/A |
1 entry |
4 entries |
Note: VLAN mapping uses four TCAM entries in all cases.
Configure Router Resources
Step 1. Log in to the web-based utility of your switch then choose Advanced in the Display Mode drop-down list.
Note: The available menu options, default values, and range values may vary depending on the device model. In this example, SG350X-48MP is used.

Note: If you have an Sx300 Series switch, skip to Step 2.
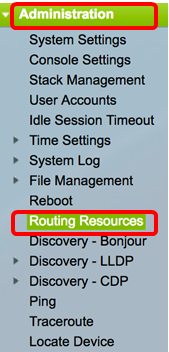
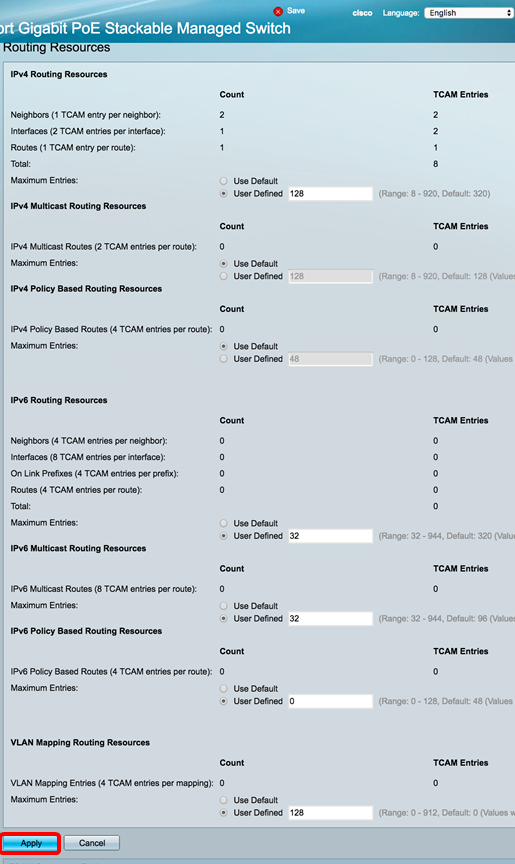
Step 2. Log in to the web-based utility of the switch then choose Administration > Routing Resources.
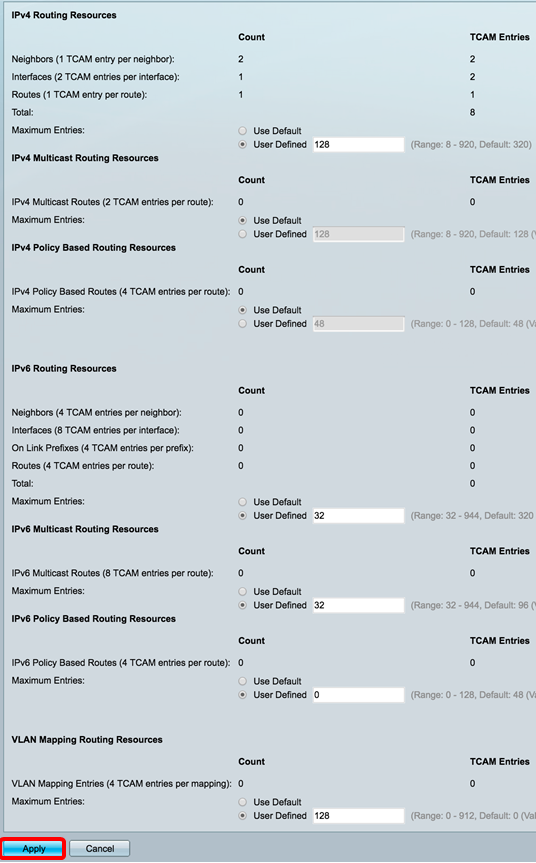
The Routing Resources page displays the following:

IPv4 Routing Resources
The Neighbors (1 TCAM entry per neighbor) area displays the following:
- Count — displays the number of neighbors recorded on the device.
- TCAM Entries — the number of router TCAM entries being used for the neighbors.
Note: There are four TCAM entries per neighbor for the SG550XG series switches and one for the SG350XG series.
The Interfaces (2 TCAM entries per interface) area displays the following:
- Count — the number of IP addresses on interfaces on the device.
- TCAM Entries — the number of router TCAM entries being used for the IP addresses.
The Routes (1 TCAM entry per route) area shows the following:
- Count — indicates the number of routes recorded on the device.
- TCAM Entries — the number of router TCAM entries being used for the routes.
The Total area displays the number of router TCAM entries which are currently being used.
Step 3. In the Maximum Entries area, choose one from the following options:
- Use Default — Use default values. The default value is 320 entries.
- User Defined — Once you choose this option, enter a value in the field. In this example, 128 is entered.

Important: The sum of new maximum entries of IPv4 Routes + 2* maximum entries of IP Interfaces + maximum entries of IP Host must be at most 992 for Sx350 and SG350X series, and 7424 for Sx550 series. This is the total TCAM entry number minus the number of used non-IP entries.
IPv4 Multicast Routing Resources
The IPv4 Multicast Routes (2 TCAM entries per route) area displays the following:
- Count — shows the number of Multicast routes recorded on the device.
- TCAM Entries — shows the number of TCAM entries being used for the Multicast routes.

Step 4. In the Maximum Entries area, choose one from the following options:
- Use Default — Use default values. The default value is 128 entries. In this example, this option is chosen.
- User Defined — Once you choose this option, enter a value in the field.

IPv4 Policy Based Routing Resources
The IPv4 Policy Based Routes (4 TCAM entries per route) area displays the following:
- Count — the number of Multicast routes recorded on the device.
- TCAM Entries — the number of TCAM entries being used for the Multicast routes.
Step 5. In the Maximum Entries area, choose one from the following options:
- Use Default — Use default values. The default value is 48 entries. In this example, this option is chosen.
- User Defined — Once you choose this option, enter a value in the field.

IPv6 Routing Resources

The Neighbors (4 TCAM entry per neighbor) area displays the following:
- Count — displays the number of neighbors recorded on the device.
- TCAM Entries — the number of router TCAM entries being used for the neighbors.
The Interfaces (8 TCAM entries per interface) area displays the following:
- Count — the number of IP addresses on interfaces on the device.
- TCAM Entries — the number of router TCAM entries being used for the interfaces.
The On Link Prefixes (4 TCAM entries per prefix) area shows the following:
- Count — the number of on link prefixes recorded on the device.
- TCAM Entries — the number of TCAM entries being used for them.
The Routes (4 TCAM entry per route) area shows the following:
- Count — the number of routes recorded on the device.
- TCAM Entries — the number of TCAM entries being used for the routes.
The Total area displays the number of router TCAM entries which are currently being used.
Step 6. In the Maximum Entries area, choose one from the following options:
- Use Default — Use default values. The default value is 320 entries.
- User Defined — Once you choose this option, enter a value in the field. In this example, this option is chosen and 32 is entered.

IPv6 Multicast Routing Resources

The IPv6 Multicast Routes (8 TCAM entries per route) area displays the following:
- Count — shows the number of Multicast routes recorded on the device.
- TCAM Entries — shows the number of TCAM entries being used for the Multicast routes.
Step 7. In the Maximum Entries area, choose one from the following options:
- Use Default — Use default values. The default value is 96 entries.
- User Defined — Once you choose this option, enter a value in the field. You can enter a value from 32 up to 944. In this example, 32 is entered.

IPv6 Policy Based Routing Resources

The IPv6 Policy Based Routes (4 TCAM entries per route) area displays the following:
- Count — the number of Multicast routes recorded on the device.
- TCAM Entries — the number of TCAM entries being used for the Multicast routes.
Step 8. In the Maximum Entries area, choose one from the following options:
- Use Default — Use default values. The default value is 48 entries.
- User Defined — Once you choose this option, enter a value in the field. In this example, this option is chosen and 0 is entered.

VLAN Mapping Routing Resources

The VLAN Mapping Entries (4 TCAM entries per mapping) area displays the following:
- Count — the number of VLAN mapping entries recorded on the device.
- TCAM Entries — the number of TCAM entries being used for that VLAN mapping.
Step 9. In the Maximum Entries area, choose one from the following options:
- Use Default — Use default values. The default value is 0.
- User Defined — Once you choose this option, enter a value in the field. In this example, this option is chosen and 128 is entered.

Step 10. Click Apply.
Step 11. Click OK to proceed.

The switch will automatically reboot to apply the configuration settings to the running configuration file.
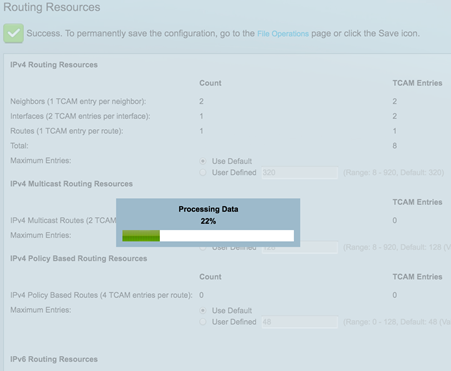
You should now have successfully configured the routing resources settings on your switch.
Verify the Configured Router Resources
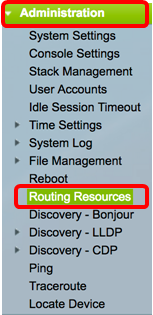
Step 1. Log in to the web-based utility of the switch then choose Administration >Routing Resources.
The TCAM Resources Table displays the number of TCAM entries actually in use and available.

- Unit No. — Number of unit of device in the stack.
- Maximum TCAM Entries for Routing and Multicast Routing — Number of TCAM entries available for routing and Multicast routing.
- IPv4 Routing
- In Use — Number of TCAM entries utilized for IPv4 routing.
- Maximum — Maximum number of TCAM entries available for IPv4 Routing.
- IPv4 Multicast Routing
- In Use — Number of TCAM entries utilized for IPv4 Multicast routing.
- Maximum — Maximum number of TCAM entries available for IPv4 Multicast routing.
- IPv4 Policy Based Routing
- In Use — Number of router TCAM entries used for IPv4 Policy-based routing.
- Maximum — Number of available router TCAM entries that can be used for IPv4 Policy-based routing.
- IPv6 Routing
- In Use — Number of TCAM entries utilized for IPv6 routing.
- Maximum — Maximum number of TCAM entries available for IPv6 Routing.
- IPv6 Multicast Routing
- In Use — Number of TCAM entries utilized for IPv6 Multicast routing.
- Maximum — Maximum number of TCAM entries available for IPv6 Multicast routing.
- IPv6 Policy Based Routing
- In Use — Number of router TCAM entries used for IPv6 Policy-based routing.
- Maximum — Number of available router TCAM entries that can be used for IPv6 Policy-based routing.
- Maximum TCAM Entries for Non-IP Rules — Number of TCAM entries available for non-IP rules.
- Non-IP Rules
- In Use — Number of TCAM entries utilized for non-IP rules.
- Maximum — Maximum number of TCAM entries available for non-IP rules.
- VLAN Mapping
- In Use — Number of VLAN Mapping entries utilized for non-IP rules.
- Maximum — Maximum number of VLAN Mapping entries available for non-IP rules.
Step 2. (Optional) Click the Save button to save the settings to the startup configuration file.
You should now have successfully verified the configured routing resources on your switch.
If you would like more information on these related topics, click the links below:
- Configure the VLAN Mapping Settings on your Switch
- Configure Routing Resources on the Switch through the CLI
- Configure IPv4 Static Routes Settings on a Switch through the CLI
 Feedback