Manage Product Instances in a Virtual Account of Smart Software Manager
Available Languages
Objective
Cisco Smart Software Licensing is a new way of thinking about licensing. It simplifies the licensing experience across the enterprise making it easier to purchase, deploy, track, and renew Cisco Software. It provides visibility into license ownership and consumption through a single, simple user interface.
There are three types of Licenses which are valid for a different period of time:
- Perpetual licenses remain valid and has no expiration.
- Demo Licenses must be renewed after 60 days.
- Term Licenses remain valid for specified periods of one to three years.
Note: Licenses are removed from virtual accounts as they expire.
Before registering a Smart Software License, you must first generate a product instance registration token. A product instance is a single device with a unique device identifier (UDI) that is registered using a product instance registration token. You can register several instances of a product with a single registration token. Each product instance can have one or more licenses that reside in the same virtual account.
Note: To know how to create or manage the product instance registration tokens on your virtual account, click here.
The Product Instances tab of the Smart Software Licensing page displays information about all of the product instances in your virtual account. From the Product Instances tab, you can do the following:
- View a list of all product instances.
- View information about every product instance and the licenses it consumes.
- View information about the alerts for a specific product instance.
- Transfer a specific product instance between virtual accounts.
- Remove a specific product instance from the virtual account which subsequently removes it from the smart account.
- Export the list of product instances to a comma-separated values (CSV) file.
This article provides instructions on how to manage the product instances in your virtual account.
Note: To learn how to register a Smart Software License on an RV34x Series Router, click here for instructions.
Manage Product Instances in your Virtual Account
Important: Product Instances are validated for 90 days from the date and time when they are first established. Smart-enabled products register contacts with the Cisco cloud, or their satellite service, as the products are used. If a Product Instance does not contact Cisco for 30 days, a Minor Alert is sent to the License Administrator, indicating that there may be disruption of their Internet connection. Another Minor Alert is sent if the Product Instance does not contact Cisco for 60 days following its validation date. After 90 days, a Major Alert is issued. If the Product Instance does not connect with Cisco after that, the Product Instance is de-linked from the licenses used by the product. Those licenses are returned to the company license Quantity Pool to be used for another Product Instance.
View Product Instances in a Virtual Account
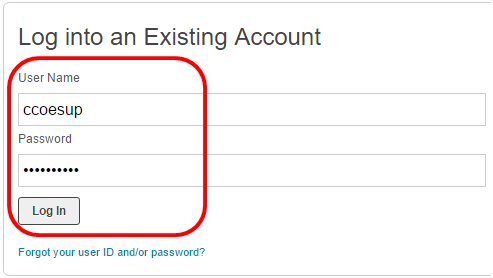
Step 1. Using your web browser, access the Cisco Software Central page then log in to your Smart Account.
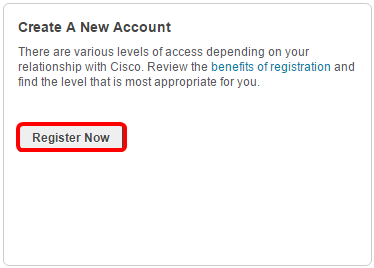
Note: If you do not have an account yet, create a new one by clicking Register Now.
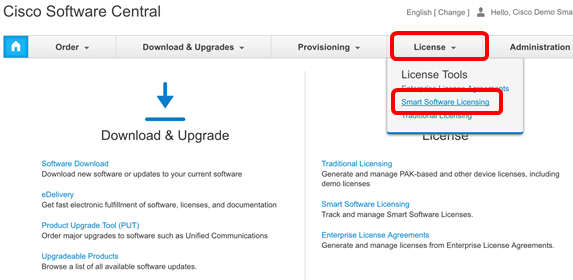
Step 2. In the Cisco Software Central page, choose License > Smart Software Licensing.
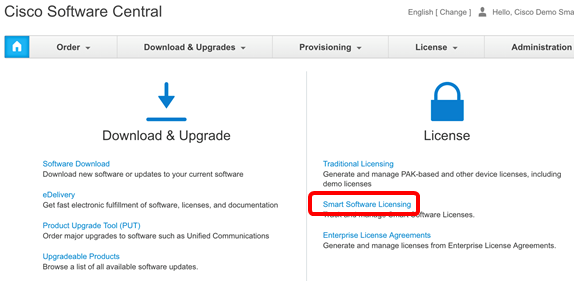
Note: Alternatively, you can click Smart Software Licensing under the License area.
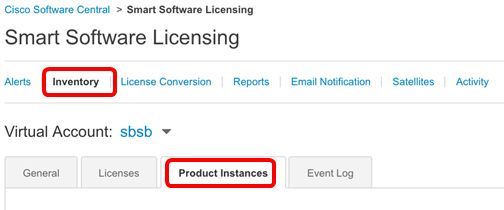
Step 3. Click on Inventory > Product Instances.
The Product Instances table contains the following information for every product instance that you have associated on your Virtual Account:
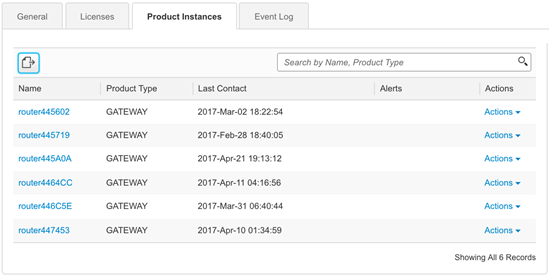
- Name — Product ID or Product Instance name
- Product Type — Product Identification Number
- Last Contact — Association Date
- Alerts — Messages alerting the user to actions required to maintain products
- Actions — Option for removing a Product instance or transferring to another Virtual Account.
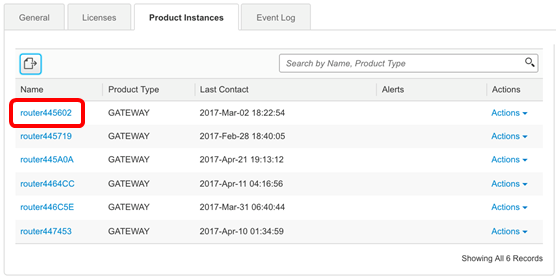
Step 4. Click on the product instance name to view the detailed information about a specific product instance.
Note: If a Cluster Setup icon appears next to the product instance, it means a high availability of routers for that specific instance.
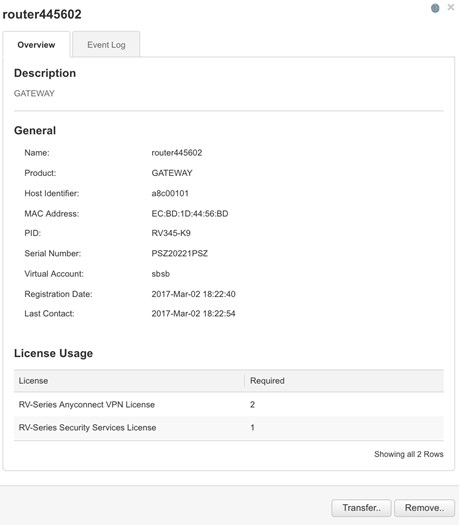
The information is organized under the following tabs:
- Overview Tab — The Overview tab displays the following:
- Description of the instance.
- General Product Instance information including Name, Product, Host identifier, Media Access Control (MAC) address, Product ID (PID), Serial Number, Virtual Account, Registration Date, and Last Contact.
- License Usage including the name of the license and number required.
- Event Log Tab — The Event Log tab displays details on events specific to the Product Instance for the selected Virtual Account:
- Messages describing events.
- Times the events occurred.
- Users associated with the event, either the CCO ID of the account owner or Cisco Support.
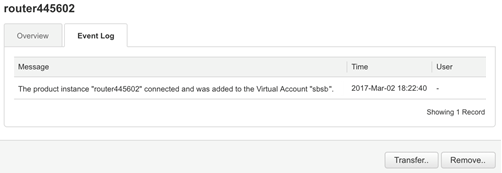
You should now have successfully viewed the product instances from the Product Instances tab of your virtual account.
Export Product Instances in a Virtual Account
You can export the product instances table from the Product Instances tab of your virtual account.
Step 1. Click on Inventory > Product Instances.

Step 2. Click the Export icon to export a comma-separated values (CSV) file on your hard drive.

Note: The system uses a platform-dependent dialog box to save the file. The dialog box varies slightly depending on the browser and operating system that you are using.

You should now have successfully exported a CSV file containing the product instances from your virtual account.
Transfer a Product Instance from or to Another Virtual Account
To transfer a product instance to another virtual account, you must have an access to the virtual account that you are going to transfer product instances to. Follow these steps to transfer a product instance to another virtual account.
Step 1. In the Smart Software Licensing page, click on Inventory > Product Instances.
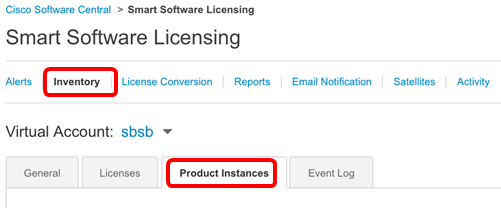
Step 2. From the Actions column, click the Transfer link on the product instance that you want to transfer.
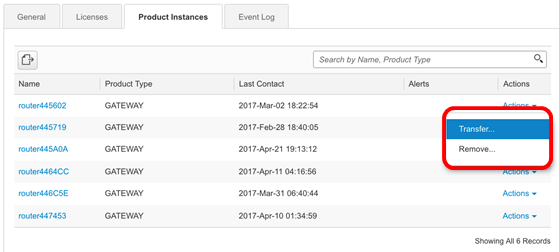
Note: Alternatively, you can click on the instance name then click the Transfer button located at the bottom left part of the Overview or Event Log tab.
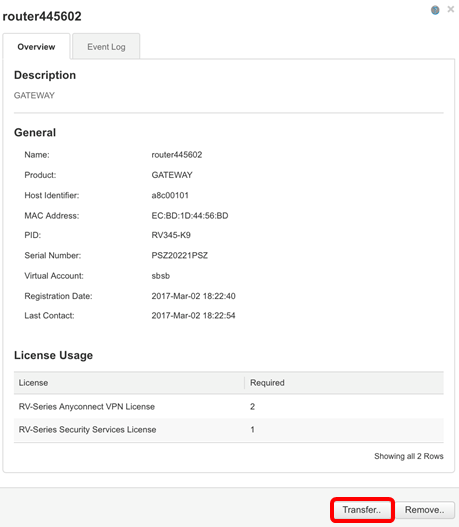
Note: In this example, router445602 is chosen.
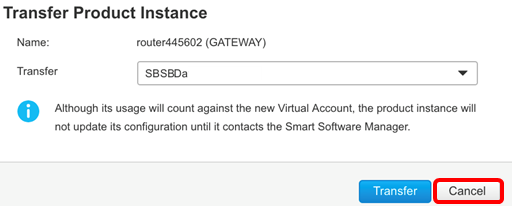
In the Name area, the product instance and the product name will automatically display. In this example, the product instance is router445602 and the product name is GATEWAY.

Step 3. Choose the virtual account that you want to transfer the product instance to.

Note: In this example, SBSBDa is chosen.
Step 4. (Optional) Click Cancel to cancel the transfer.
Step 5. Click the Transfer button to transfer the product instance to another virtual account.
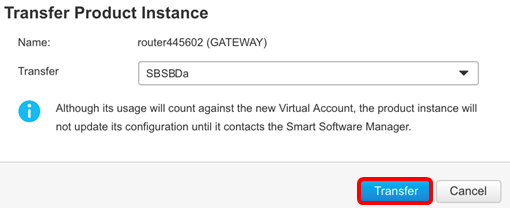
You should now have successfully transferred a product instance to another virtual account.

Verify Transferred Product Instances
There are two ways for you to verify that the product instance transfer has been successfully completed.
Option 1: Check from the current Virtual Account
Step 1. Click the Event Log tab of the current virtual account.

Note: In this example, the router445602 product instance has been transferred to the SBSBDa virtual account.
Option 2: Check from the chosen Virtual Account
Step 1. Choose the virtual account where you transferred product instance to.
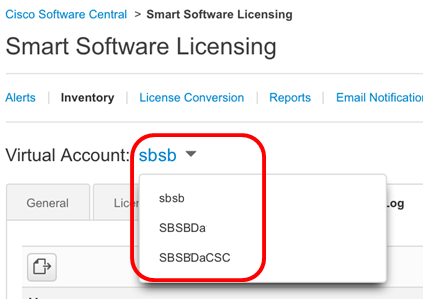
Note: In this example, the chosen virtual account is SBSBDa.
Step 2. In the Inventory page, click on Event Log.

Note: In this example, the router445602 product instance has been transferred to the SBSBDa virtual account.
Step 3. Click on the Product Instances tab to check the Product Instances table. The new product instance should have been added.
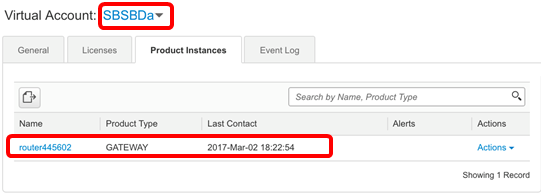
Note: In this example, the router445602 product instance has been added in the SBSBDa virtual account.
You should now have successfully verified the transferred product instance to another virtual account.
Remove a Product Instance
Important: Removing a product instance from the software means you are only removing it from the Product Instance table. The licenses that the product instance are using are still available and can be used by other products. You must re-register the product instance with the cloud so that it can communicate with the product again.
To remove a product instance from the Product Instance table of your virtual account, follow these steps:
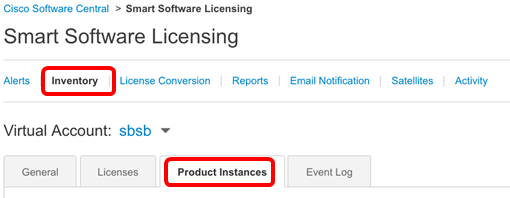
Step 1. In the Smart Software Licensing page, click on Inventory > Product Instances.
Step 2. From the Actions column, click the Remove link on the product instance that you want to transfer.
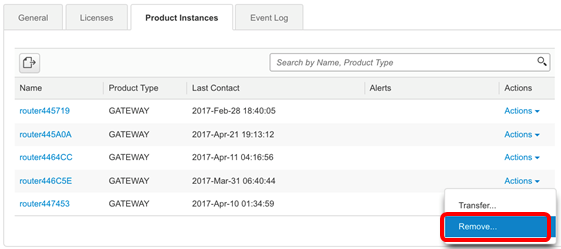
Note: In this example, router446C5E is chosen.
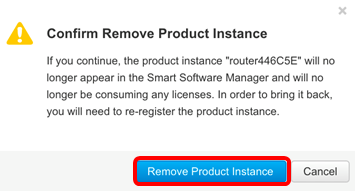
Step 3. Click the Remove Product Instance button to remove the specific product instance.
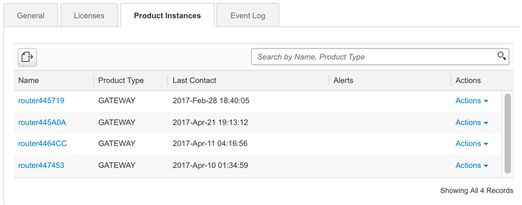
You should now have successfully removed a product instance from the Product Instance table of your virtual account.

Note: To know how to deregister a device from your Smart Software Licensing account, click here.