Configure Dynamic Routing Protocol on an RV34x Series Router
Available Languages
Objective
Advanced Routing has two kinds of settings: Static and Dynamic. In the Static routing mechanism, a static or predetermined route is created when a router is connected to more than one network. The network information routes through this predetermined pathway to reach a particular host or network. Dynamic routing enables the router to adjust automatically to physical changes in the network layout. Using the dynamic Routing Information Protocol (RIP), the router calculates the most efficient route for the network data packets to travel between the source and destination.
RIP is a distance-vector protocol used by routers to exchange routing information. RIP uses hop count as its routing metric. RIP prevents routing loops from continuing indefinitely by implementing a limit on the number of hops allowed in a path from the source to a destination. The maximum hop count for RIP is 15 which limits the network size that it can support. Thus, the RIP version 2 was developed. Unlike the classful RIPv1, RIPv2 is a classless routing protocol that includes the subnet masks when it sends out its routing updates.
Summarizing routes in RIPv2 improves scalability and efficiency in large networks. Summarizing IP addresses means that there is no entry for child routes (a route that is created for any combination of the individual IP addresses contained within a summary address) in the RIP routing table, reducing the size of the table and allowing the router to handle more routes.
RIPng (Routing Information Protocol next generation) is an information routing protocol for the IPv6. RIPng for IPv6 is based on protocols and algorithms used extensively in the IPv4 Internet such as RIP and RIPv2.
This article provides you with instructions on how to configure dynamic routing on your RV34x Series Router.
Applicable Devices
- RV34x Series
Software Version
- 1.0.02.16
Configure Dynamic Routing
Enable RIP
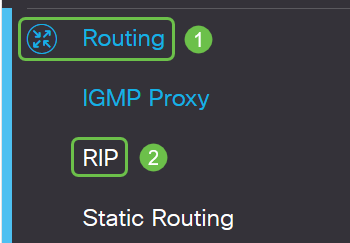
Step 1. Log in to the web-based utility of the router and choose Routing > RIP.
Step 2. Check the Enable RIP check box for the Internet Protocol (IP) version you want to enable for RIP. The options are for IPv4 and for IPv6.
Note: In this example, both for IPv4 and for IPv6 are checked.

Note: Sending RIP advertisements on WAN interface is automatically disabled if the Network Address Translation (NAT) is enabled.
Configure RIP
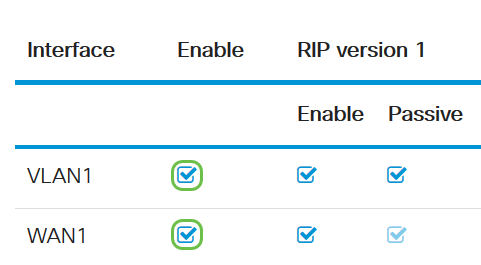
Step 1. (Optional) Check the Enable check box of an interface you want to apply RIP. This applies all RIP versions to the interface.
Note: In this example, VLAN1 and WAN1 are checked.
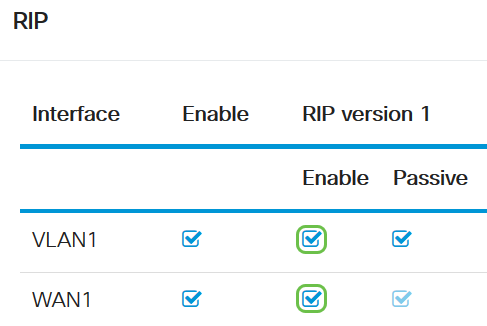
Step 2. (Optional) In the RIP version 1 area, check the Enable check box to allow routing information to be sent through RIP version 1. If the check boxes were already checked in Step 1, skip to Step 4.
Step 3. (Optional) Check the Passive check box to disable routing information from broadcasting through RIP version 1.
Note: Depending on which interface is being configured, this will be enabled by default. On WAN interfaces, this is unchangeable.

Step 4. Click Apply.

You should now have successfully configured RIP on an RV34x Series Router.
Configure RIPv2
Step 1. In the RIP version 2 area, check the Enable check box of the interface you want to allow routing information to be sent through RIPv2.
Note: In this example, VLAN1 and WAN1 are checked.
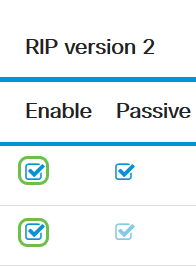
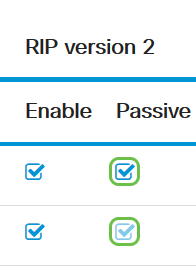
Step 2. (Optional) Check the Passive check box to disable routing information from broadcasting through RIP version 2.
Note: Depending on which interface you are configuring, this will be enabled by default. On WAN interfaces, this is unchangeable.
Step 3. In the Authentication area, the column after RIPng (IPv6), check the Enable check box to allow authentication of the RIP packets preceding the exchange of routes with other routers.

Step 4. From the Password drop-down list, choose a method which RIPv2 will authenticate packets. The options are:
- Plain — Requires an administrator to create a simple key string for authentication.
- MD5 — Message-Digest algorithm 5 (MD5) is a one-way hashing algorithm that produces a 128-bit digest. This requires an administrator to create an MD5 Key ID and MD5 Key String.
Note: In this example, Plain was chosen for VLAN1 and MD5 was chosen for WAN1.

Step 5. (Optional) If Plain was chosen, enter a simple key string in the Simple Key String field. This may be a combination of any alphanumeric character and special characters.
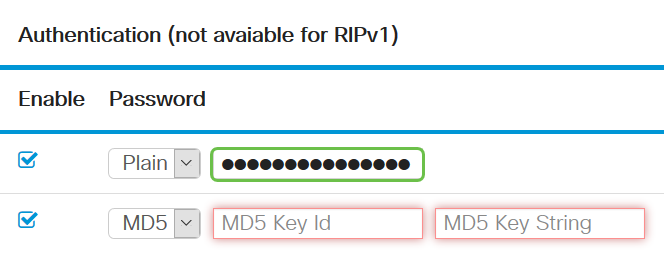
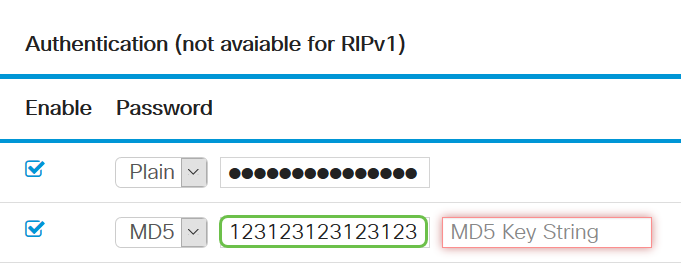
Step 6. If MD5 was chosen, enter an MD5 Key ID in the MD5 Key ID field. The maximum number of characters is 15.
Note: In this example, 123123123123123 is used.
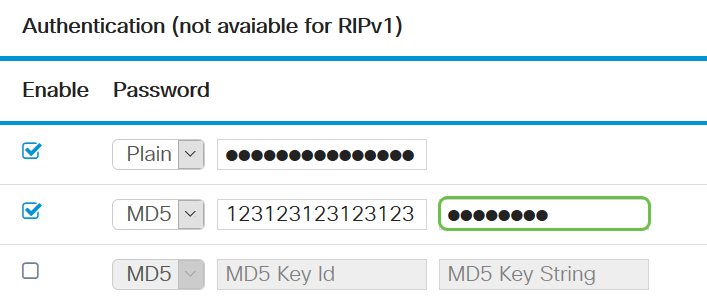
Step 7. In the MD5 Key String field, enter a string that will be used by RIPv2 to authenticate with the MD5 Key ID.
Step 8. Click Apply.
 .
.
You should now have successfully configured RIPv2 on an RV34x Series Router.
Configure RIPng
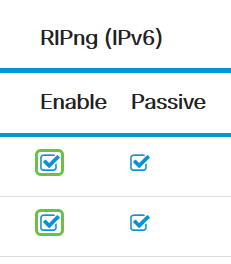
Step 1. In the RIPng IPv6 area, check the Enable check box of the interface you want to allow routing information to be sent through RIPng.
Note: In this example, VLAN1 and WAN1 are checked.
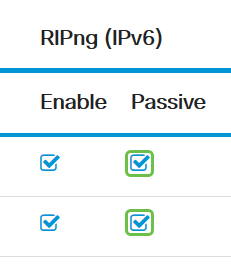
Step 2. (Optional) Check the Passive check box to disable routing information from broadcasting through RIP version 2.
Note: Depending on which interface you are configuring, this will be enabled by default. On WAN interfaces, this is unchangeable.
Step 3. Click Apply.
 .
.
You should now have successfully configured RIPng on an RV34x Series Router.
 Feedback