Configuration of IPv4 LAN on RV130 and RV130W
Available Languages
Objective
The LAN Configuration page allows you to configure the LAN interface of the router.. An interface can have one primary IP address and multiple secondary addresses. All networking devices on an interface should share the same primary IP address because the packets that are generated by the device always use the primary IPv4 address. Each IPv4 packet is based on the information from a source or destination IP address.
The objective of this document is to show you how to configure the IPv4 LAN settings on RV130 and RV130W.
Applicable Devices
• RV130
• RV130W
Configuration of IPv4 LAN Settings
IPv4 Configuration
Step 1. Log in to the web configuration utility and choose Networking > LAN > LAN Configuration. The LAN Configuration page opens:
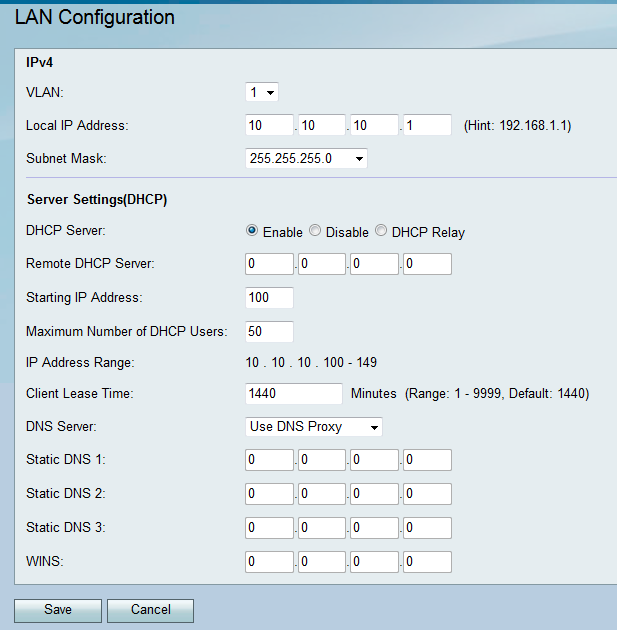
Step 2. Select a VLAN ID from the VLAN drop-down list.

Note: To add VLANs, refer to VLAN Membership on the RV130 and RV130W.
Step 3. Enter the desired IP address for your router.

Note: If the Local IP address is changed, the browser will not respond when the Save button is clicked to apply the changes. The new IP address must be used to reconnect to the configuration utility. For example, if the Local IP address is changed from 192.168.1.1 (default) to 10.0.0.1 , then the IP address of the computer connected to the router must be changed(or release and renew IP address if connected via DHCP) so that it is in the 192.168.1.x subnet. Then use http://10.0.0.1 in the browser to connect to the utility.
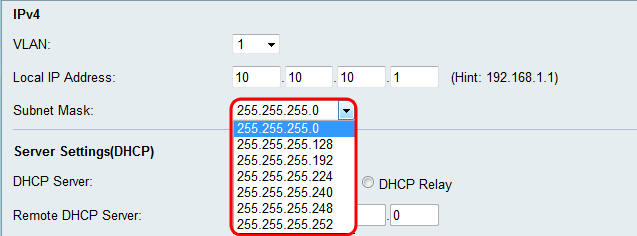
Step 4. Select a subnet mask in the Subnet Mask drop-down list. Subnet masks that have a final digit of a lower value will allow for a greater range of IPs to belong to that subnet. For example 255.255.255.0 supports 254 host IPs while 255.255.255.128 supports 126 host IPs.
Server Settings (DHCP) Configuration
Step 1. Select one of the desired radio buttons in the DHCP Server section.
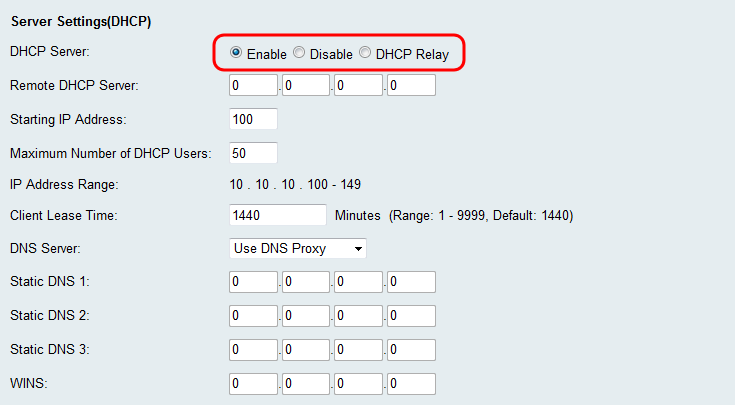
The available options are defined as follows:
• Enable — Allows the router to act as a DHCP Server. Skip to Step 3 if you choose this option.
• Disable — Choose this option if the computers in the LAN are configured with utilizing static IP addresses a separate DHCP server. Skip to Step 9 if you choose this option.
• DHCP Relay — The Dynamic Host Configuration Protocol (DHCP) servers provide configuration parameters to DHCP clients. When DHCP clients and associated servers do not reside on the same IP network or subnet, a DHCP relay agent can transfer DHCP messages between them.
Step 2. If DHCP Relay is selected in Step 1, enter the IP Address of the remote DHCP server in the Remote DHCP Server field. Skip to Step 9.

Step 3. If Enable is selected in Step 1, choose a number for the last octet of your IP address from the Starting IP Address field. The number will set a starting IP Address by appending the decimal value to your local host.
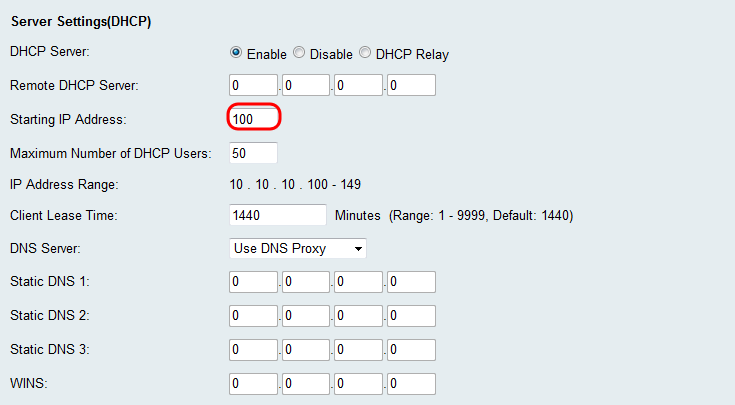
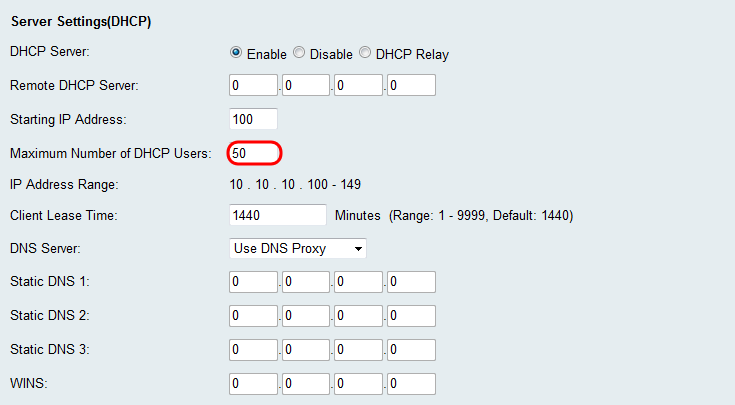
Step 4. If Enable is selected in Step 1, set the maximum number of clients that can receive an IP Address from your router in the Maximum Number of DHCP Users field.
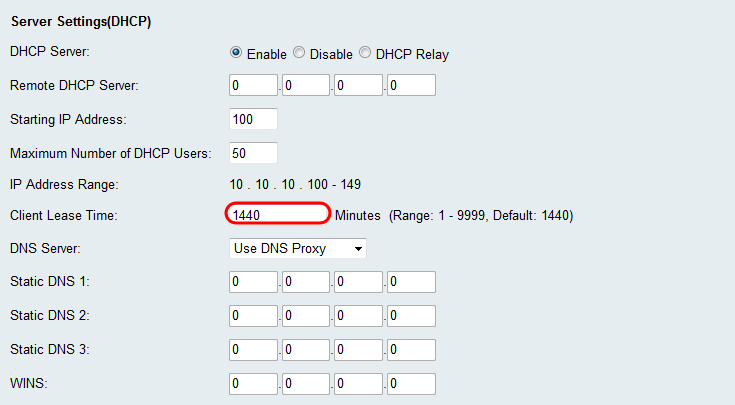
Step 5. If Enable is selected in Step 1, enter the amount of time (in minutes) that a network user can be connected to the router with the dynamically assigned address in the Client Lease Time field. The default is 1440 minutes. You can choose between a range of 1 to 9999 minutes for the client lease.
Step 6. Select a source DNS server in the DNS Server drop-down menu.

The available options are defined as follows:
• Use DNS Proxy — Relay DNS requests to the current public network DNS server for the proxy and reply as a DNS resolver to the client devices on the network. Skip to Step 9 if this is chosen.
• Use DNS from ISP — Use the DNS address provided by the Internet Service Provider (ISP). Skip to Step 9.
• Use DNS as Below — Use the DNS address specified in the Static DNS Server IP Address field.
Step 7. If Use DNS as Below is selected in Step 6, enter the static DNS IP addresses in the Static DNS (1-3) field.
Note: Multiple Static DNS fields are provided as it is common to configure extra DNS servers for redundancy, limiting downtime if one of the DNS servers goes down unexpectedly.

Step 8. If Use DNS as Below is selected in Step 6, enter the WINS IP address in the WINS field. The Windows Internet Naming Service (WINS) manages each device interaction with the Internet. WINS uses a distributed database that is automatically updated with the names of computers currently available and the IP address assigned to each one.

Step 9. Click Save to save your configuration.
Revision History
| Revision | Publish Date | Comments |
|---|---|---|
1.0 |
12-Dec-2018 |
Initial Release |
 Feedback