Configure Inbound Load Balance on RV320 and RV325 VPN Routers
Available Languages
Objective
Network load balance distributes network traffic to make the best use of the network bandwidth and to provide network redundancy. Inbound load balance is one of the network load balance techniques where traffic is balanced through an external system or service, or a dynamic DNS system. Inbound load balance provides the flexibility to balance equal network traffic through different WAN ports without any complex routing protocol.
The objective of this document is to show you how to configure inbound load balance on RV32x VPN Router Series.
Applicable Devices
• RV320 Dual WAN VPN Router
• RV325 Gigabit Dual WAN VPN Router
Software Version
• v1.1.0.09
Configure Inbound Load Balance
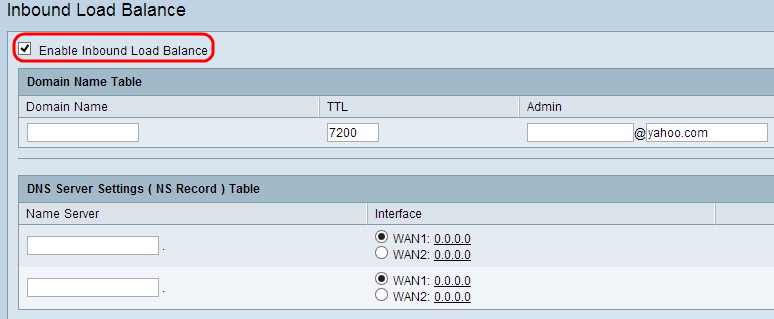
Step 1. Log in to the web configuration utility and choose Setup > Inbound Load Balance. The Inbound Load Balance page opens:

Step 2. Check Enable Inbound Load Balance check box to enable network traffic distribution through two WAN ports.
Domain Name Table
Domain Names are registered names of the Domain Name Server (DNS) which are used to identify IP address of any specific web page.
Step 1. Enter the domain name which your Internet Service Provider (ISP) provides you for your service in the Domain Name field.
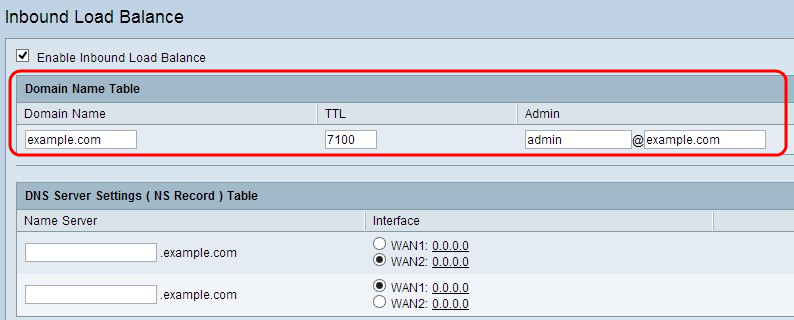
Step 2. Enter the time, in seconds, that you want to store the DNS information in the cache memory of the DNS server in the TTL field. The default is 7200 seconds. The range is from 0 to 65535 seconds.
Step 3. Enter the e-mail address of the administrator to contact in the Admin field.
Step 4. If you want to save your configuration so far and leave the other configuration as default, click Save to save the settings.
DNS Server Settings (NS Record) Table
Name server translates the human recognizable domain name in to machine recognizable numeric IP address. For equal load balancing, you need to provide the name server for your domain name server and via which WAN port the name server operates.
Step 1. Enter name server (NS) of the DNS in the Name Server field.
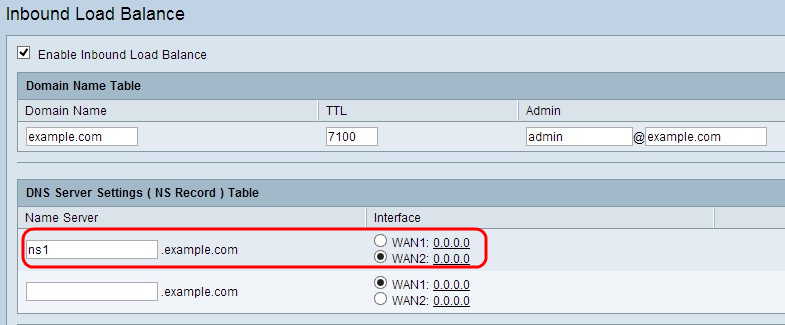
Step 2. Click the appropriate WAN interface of the selected name server.
Step 3. If you want to save your configuration so far and leave the other configuration as default, click Save to save the settings.
Host Record (A Record) Table
Host name is used to identify any unique user of the domain. For load balancing, you need to provide the host name for whom you want to divide the load equally through the WAN ports.
Step 1. Enter the host name which provides the FTP or mail services in the Host Name field.
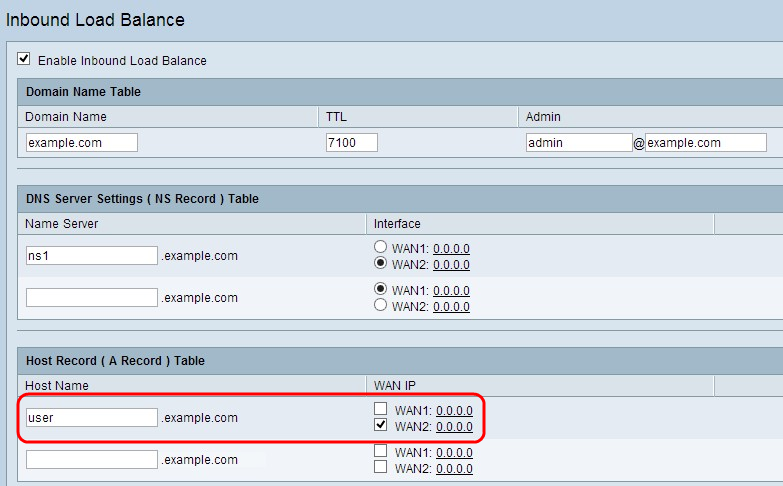
Step 2. Check the appropriate check box to choose appropriate WAN interface for the host.
Step 3. If you want to save your configuration so far and leave the other configuration as default, click Save to save the settings.
Alias Record (CName Record) Table
Alias is the other name to identify the host of the domain. For equal load balancing, you need to provide the alias name of your host for whom you want to equally divide the load.
Step 1. Enter the Alias name in the Alias field. This helps to redirect a specific sub domain to other domain or sub domain according to the need.
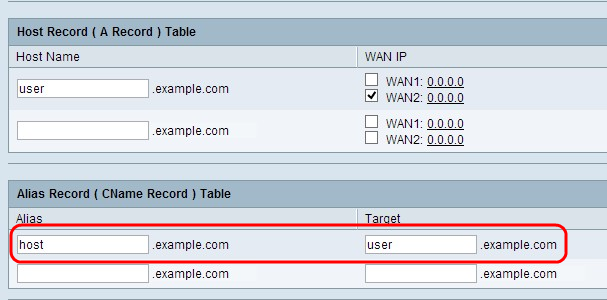
Step 2. Enter the specific domain name for the alias name in the Target field.
Step 3. If you want to save your configuration so far and leave the other configuration as default, click Save to save the settings.
Sender Policy Framework (SPF)
SPF provides security from email spoofing through the prevention of email spam through sender IP address verification. This configuration is not mandatory, but it provides security to your system.
Step 1. Click SPF Settings.. to add email based record test.
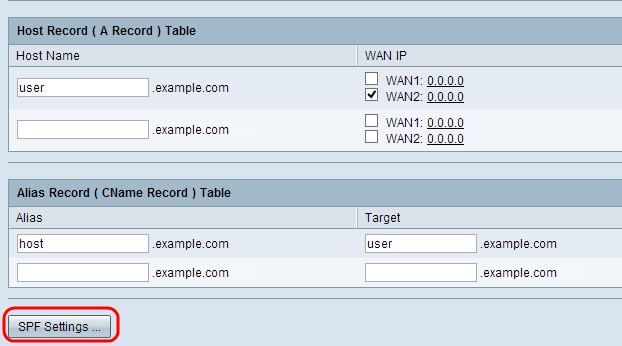
The SPF Settings Table window opens:

Step 2. Click Add. A new row is added:

Step 3. Enter the name of the mail server in the SPF TXT field.

Step 4. (Optional) If you want to edit the SPF text, check the check box beside the specific SPF text which you want to edit, click Edit, change the desire fields, and click Save.
Step 5. (Optional) If you want to delete the SPF Text, check the check box beside the specific SPF Text which you want to delete, and click Delete.
Step 6. (Optional) If you want to save your configuration so far and leave the other configuration as default, click Save to save the settings.
Mail Server (MX Record) Table
Mail server is the mail server of the host of the domain. For load balancing, you need to provide the mail server of the host for whom you want to equally divide the load.
Step 1. Enter the host name without the domain name of the mail server in the Host Name field.
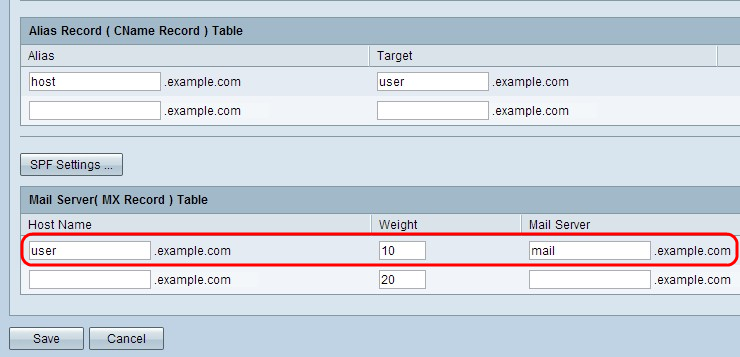
• Weight — Represents the number of hosts for the mail server.
Step 2. Enter the name of the internal mail server which is saved in the Host Record (A Record) Table section or the external mail server in the Mail Server field.
Step 3. Click Save to save the settings.
 Feedback