VPN Client Configuration on RV215W
Available Languages
Objective
A Virtual Private Network (VPN) is a network established between various remote locations such as when small offices communicate with a head office. A VPN Client is a means of connection with the VPN. Point to Point Tunneling Protocol (PPTP) is a network procedure that secures connections between remote locations over a VPN.
This article explains how to configure VPN clients on the RV215W.
Applicable Devices
• RV110W
Software Version
• 1.1.0.5
VPN Clients
PPTP Configuration
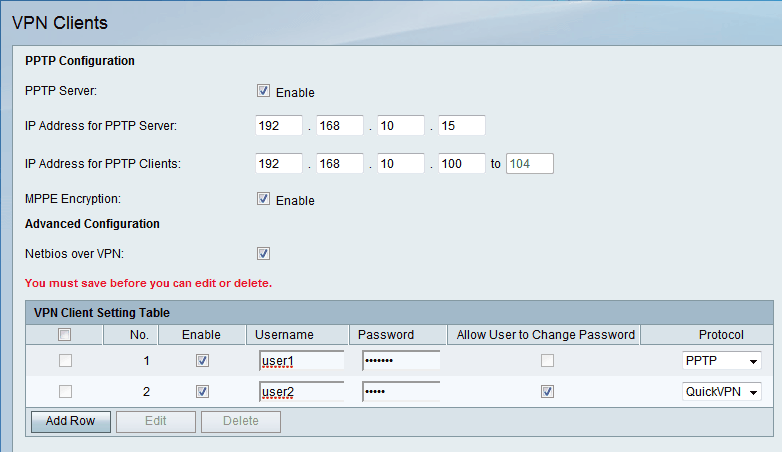
Step 1. Log in to the web configuration utility and choose VPN > VPN Clients. The VPN Clients page opens:

Step 2. Check the PPTP Server to allow changes to the PPTP server.
Step 3. Enter the IP address of the PPTP server in the IP Address for PPTP Server field.
Step 4. Enter the IP address range of the PPTP clients in the IP Address for PPTP Clients field.
Step 5. Check the MPPE Encryption check box to enable Microsoft-Point-to-Point Encryption (MPPE). The PPTP with MMPE option allows VPN to use PPTP as the tunnel protocol.
Step 6. Check the Netbios over VPN check box to allow NetBIOS communication over the VPN tunnel. Network Basic Input Output System (NetBIOS) is a protocol that allows the computers to communicate with each other over the LAN.
Step 7. Click Save.
Add VPN Client

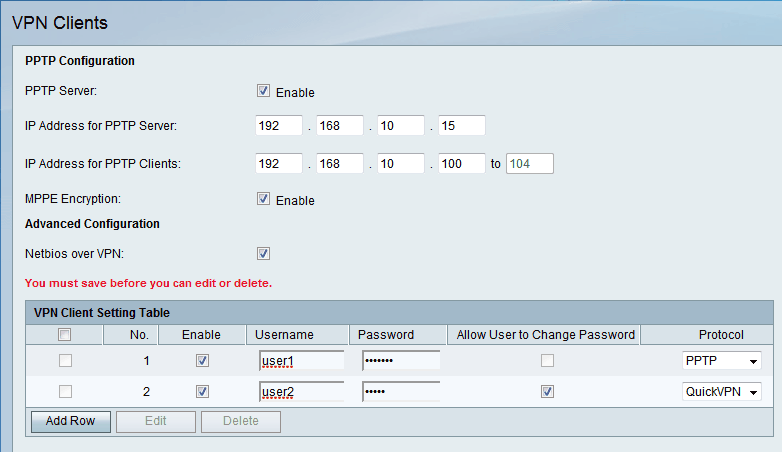
Step 1. Click Add Row.
Step 2. Check the Enable check box to enable the VPN client.
Step 3. Enter the username of the client in the Username field.
Step 4. Enter the password of the client in the Password field.
Step 5. Choose the desired protocol from the Protocol drop-down list. The available options are:
• PPTP — Uses Transmission Control Protocol (TCP) and Generic Routing Encapsulation (GRE). PPTP does not provide confidentiality or encryption.
• QuickVPN — It uses secure Hypertext Transfer Protocol (HTTP) for all the authentication and negotiation of encryption parameters but the data connection is pure Internet Protocol Security (IPsec). It provides confidentiality and provide a encrypted tunnel between the host computers.
Step 6. (Optional) Check Allow User to Change Password check box. This option is available only when QuickVPN is chosen from the above step.
Step 7. Click Save.
Edit VPN Client

Step 1. Check the desired VPN Client check box.
Step 2. Click Edit and follow steps 3-7 from the Add VPN Client section.
Step 3. Click Save.
Delete VPN Client

Step 1. Check the desired VPN Client check box.
Step 2. Click Delete.
Step 3. Click Save.
Import VPN Clients
A user can import VPN clients settings with a .CSV file. This feature saves time because a user does not have to enter the settings manually.
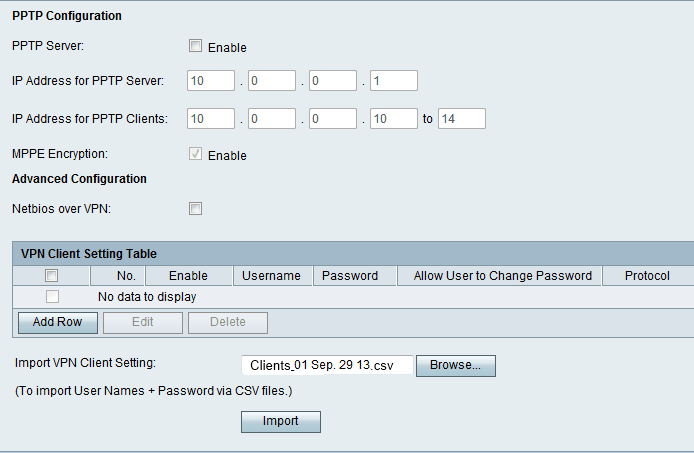
Step 1. Log in to the web configuration utility and choose VPN > VPN Clients. The VPN Clients page opens:

Step 2. Click Browse at the bottom of the page to choose the .csv file from the current system.
Step 3. Click Import to load the file.
Step 4. Click Save.
 Feedback