Configuring Static Routing on the RV160 and RV260
Available Languages
Objective
This document shows you how to configure IPv4 or IPv6 Static Routing on the RV160 and RV260.
Introduction
A router is essential in a network because it routes packets. It enables a computer to communicate with other computers that are not on the same network or subnet. A router accesses a routing table to determine where packets should be sent. The routing table lists destination addresses. Static and dynamic configurations can both be listed on the routing table in order to get packets to their specific destination.
Static Routing is a manually configured fixed pathway that a packet must travel through to reach a destination. Static routings uses less network resources than dynamic routings because they do not constantly calculate and analyze routing updates.
It is best to use static routes when network traffic is predictable, and the network design is simple. It is not recommended to use static routes in a large environment where networks are constantly changing because static routes would not update to any network changes. When using static routes, you would need to configure the other router to have static routes as well depending on what you are trying to do.
One example where static routes can be useful would be specifying a gateway of last resort (a default router to which all unrouteable packets are sent). Another example is to facilitate communication between routers that are not able to communicate on your current network topology.
Dynamic routing is calculated by using dynamic routing algorithms. Dynamic routing protocols automatically create and update the routing table. Most networks use dynamic routes and might have at least one or two static routes configured for special cases.
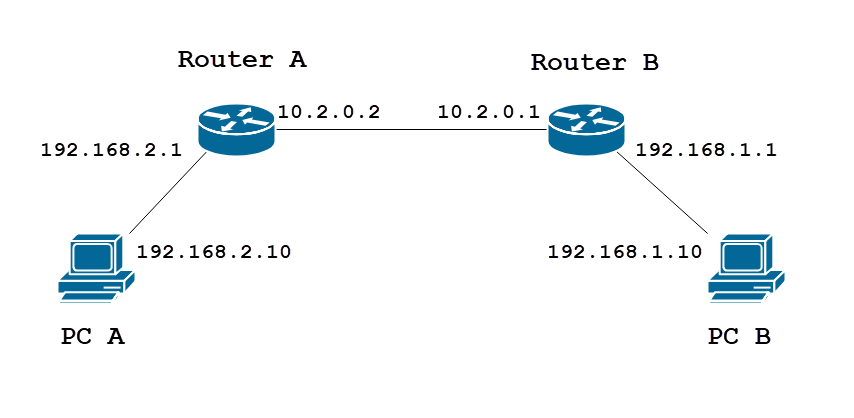
Below is an example of a topology that we are going to configure static routes for. In the topology, PC A will not be able to communicate with PC B and vice versa until a static route is created.
This is a network diagram that is going to be used to help demonstrate IPv4 static route. In this topology, we are using /24 as our subnet mask.
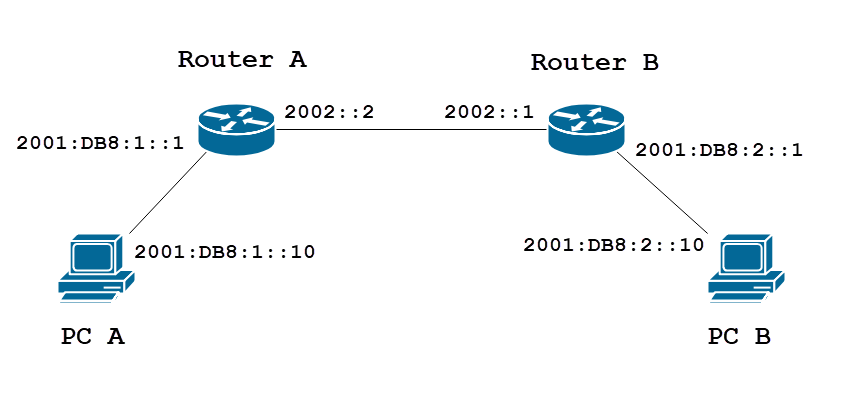
A simple IPv6 static route topology is shown below.
Applicable Devices
RV160
RV260
Software Version
1.0.0.13
IPv4 Static Routing Configuration
Step 1
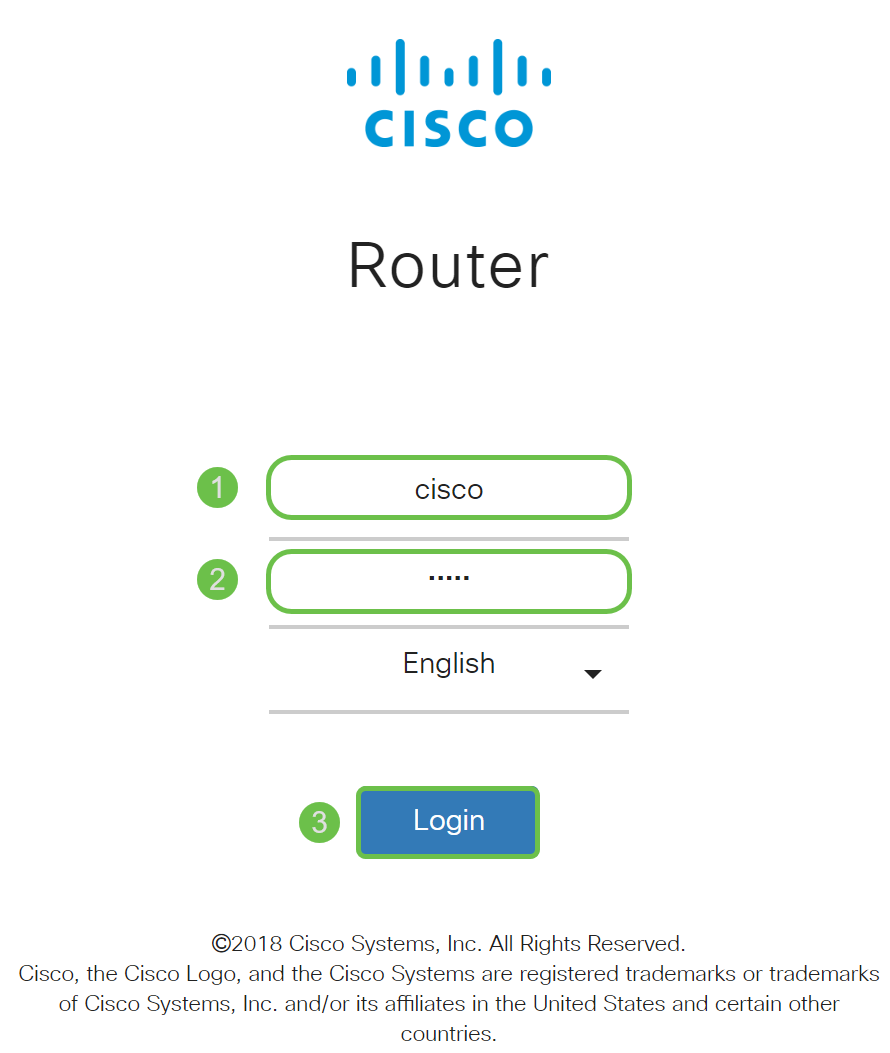
Log into the web configuration page for Router A.
Step 2
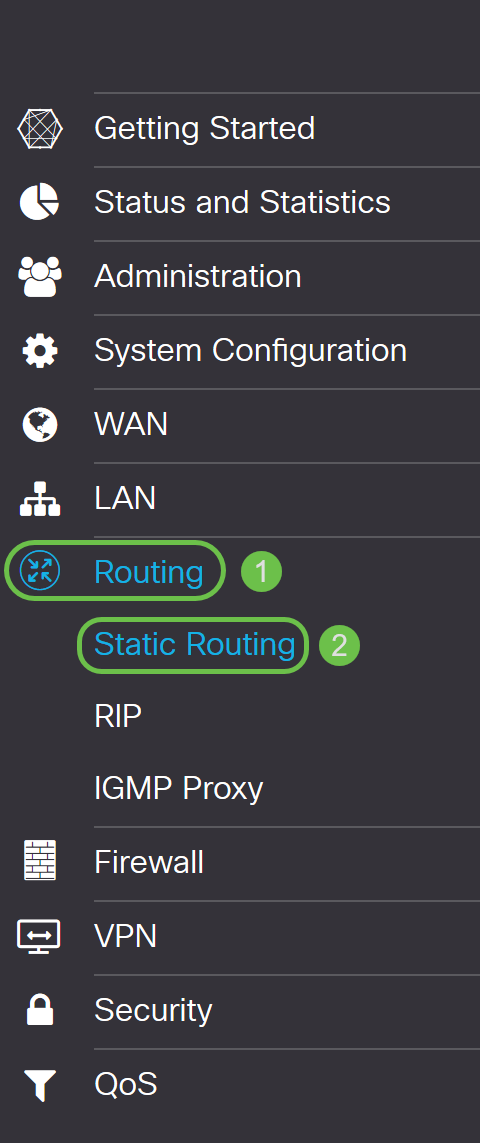
Navigate to Routing > Static Routing.
Step 3
In the IPv4 Routes section, click the Plus icon to add a new IPv4 static route. You can edit an existing static route by clicking the Pencil and Notepad icon. In this example, we will be adding a new IPv4 static route.

Step 4
Enter the destination network IP address in the Network field to which you want to assign a static route. In this example, we will enter in 192.168.1.0 as we don’t have any routes to reach that network.

Step 5
In the Mask field, enter the subnet mask of the destination address. For this demonstration, we will be using the /24 (255.255.255.0) subnet mask.

Step 6
Using the topology that was shown in Introduction section, enter in Router B’s IP address in the Next Hop field. We will be entering 10.2.0.1 as that is our next hop to the destination 192.168.1.0.
Note: Each hop directs the packet to the next router in the path.

Step 7
Enter the hop count number. The max hop number is 255. In this example, 1 is entered as there will be 1 hop count to the destination.

Step 8
Choose the interface to use for this static route from the drop-down list. We will be selecting WAN as our interface.

Step 9
Click Apply to add the static route.
Note: For more information about Router B’s configuration, please continue to the next step. To learn how to configure IPv6 static routes, please refer to the next section.

Step 10
The configuration for the IPv4 static route on the Router B should look like the picture below. We will be entering 192.168.2.0 as the destination network with 255.255.255.0 subnet mask, 10.2.0.2 as the Next Hop, 1 as the Hop Count, and the Interface as WAN. Click Apply to add the IPv4 static route.

IPv6 Static Routing Configuration
Step 1
Log into the web configuration page for Router A.

Step 2
Navigate to Routing > Static Routing.

Step 3
If you want to configure IPv6 routes, go to the IPv6 Routes section. Click the Plus icon to add a new IPv6 static route. You can edit an existing static route by clicking the Pencil and Notepad icon. In this example, we will be adding a new IPv6 static route.

Step 4
Enter the destination host/network in the IPv6 prefix field.

Step 5
Enter the length of the prefix bits in the IPv6 destination in the IPv6 prefix Length field. This specifies the size of the destination subnet. We will be using 48 as the prefix length for this example.

Step 6
Enter the next hop router IP address in the Next Hop field. We will be using Router B’s IPv6 address.

Step 7
Enter the hop count number. The maximum hop count number is 255.

Step 8
Choose the interface to use for this static route from the drop-down list.

Step 9
Click Apply.
Note: To see Router B configuration, please refer to the next step.
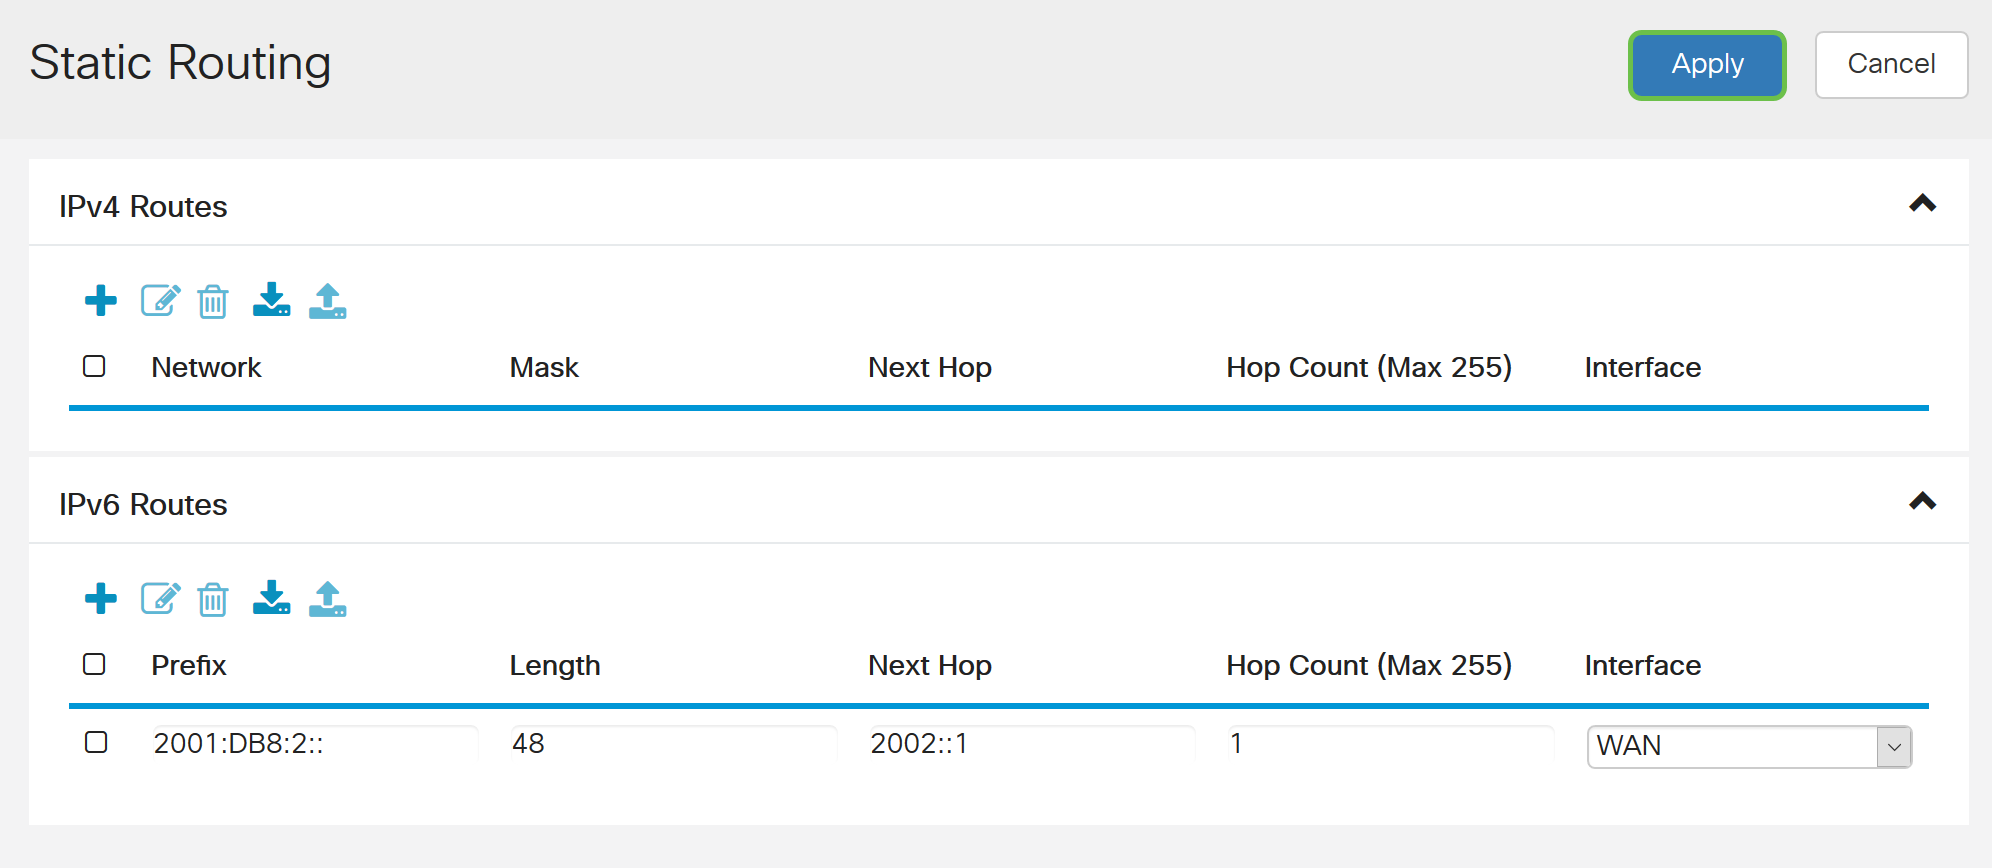
Step 10
For IPv6 static route on Router B, we will be putting 2001:DB8:1:: as the destination Prefix network, 48 as the Length, 2002::2 as the Next Hop, 1 Hop Count, and WAN as the Interface. Click Apply to add the static route.

Conclusion
You should now have successfully added a static route on the RV160 or RV260 for either IPv4 or IPv6 on Router A and B. After configuring both Router A and Router B with static routes, PC A should be able to ping PC B and vice versa. If they are not able to ping, double check your configuration.