Configure Voice Mail Parameters via XML on a Cisco 7800 Series or 8800 Series Multiplatform Phone
Available Languages
Objective
Extensible Markup Language (XML) is a markup language that is based on a set of rules for encoding a document. .XML has become the base language for communications, and interchange of data over the Internet. This is because it is both machine and human readable. Being so, XML has become the most common type of format for many office-productivity tools. In the case of the Cisco 7800 Series and 8800 Series Multiplatform Phones, configurations may be done through the use of an XML file.
This article aims to show you how to configure Voicemail Parameters for the Cisco 7800 Series and 8800 Series Multiplatform Phones through XML. It assumes that you already have the voicemail parameters that you need to configure, and that your computer is able to communicate with your phone. It also assumes that you have an active Trivial File Transfer Protocol (TFTP) server installed.
Applicable Devices
- 7800 Series
- 8800 Series
Software Version
- 11.0.1
Configure Voicemail Parameters
Save the XML File
Step 1. On a web browser, enter http://<phoneip>/admin/cfg.xml in the address bar where, phoneip is the IP address of the phone.

Note: In this example, the IP address of the phone is 192.168.100.25 and http://192.168.100.25/admin/cfg.xml is entered.
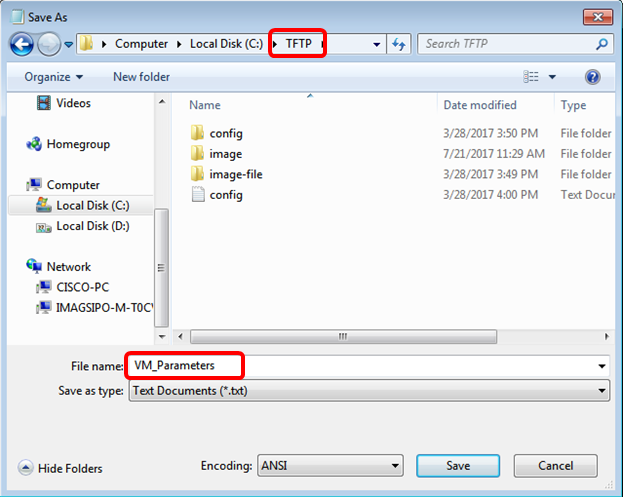
Step 2. The XML page will appear. Copy the XML script and save a copy of the file in your computer or TFTP server in the .xml format.


Note: In this example, the file is saved with the filename VM_Parameters in the TFTP folder.
Step 3. Open the file and edit the voicemail parameters as needed.

Note: In this example, the voice mailbox number is set to 5551234.
Step 4. Save the file to retain the edits.
You should now have copied and saved the XML file of your voice mail parameters.
Upload the XML file to the phone using TFTP
After saving the XML file, upload it to the phone by following the steps below:
Step 1. Log in to the web-based utility of the phone and choose Admin Login > advanced.

Step 2. Click Voice > Provisioning.

Step 3. Under the Firmware Upgrade section, verify that Upgrade Enable is set to Yes.

Step 4. Enter the tftp string to load the .xml file to the phone in the Upgrade Rule field.

Note: In this example, Tftp://192.168.100.147/VM_Parameters.xml is entered where, 192.168.100.147 is the IP address of the TFTP server.
Step 5. Click Submit All Changes.

You should now have uploaded the XML file to your phone.
Check the Voicemail Parameter
To verify that the edit was applied to the phone, follow the steps below:
Step 1. On the phone, press the Applications button.

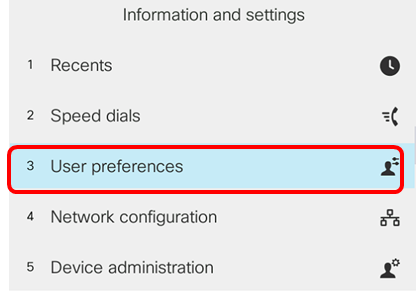
Step 2. Choose User preferences.

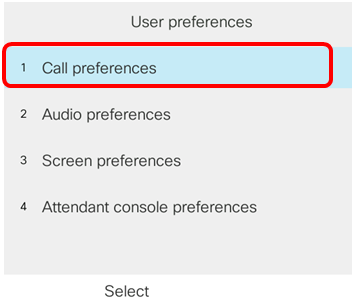
Step 3. Choose Call preferences.

Step 4. Verify that the Voice mail field displays the same voice mailbox number.

Note: In this example, the number of the voice mailbox that was edited in the XML file is reflected.
Step 5. Alternatively, you can dial the voice mailbox number and hear the prompts for you to play, skip, replay and delete the voicemail, depending on the configuration of your voice mailbox.
You should now have successfully configured voicemail parameters via an XML.
 Feedback