Configure New Profile on the Cisco IP Phone 7800 Series or 8800 Series
Available Languages
Objective
Provisioning is the process of preparing and equipping a network to allow it to provide services to its users. Network provisioning specifically refers to provisioning of the customer services to the network elements. It allows an IP phone to pull its configuration information from a central server automatically. This way, phones can be configured together from one central location rather than going to each phone and setting them up individually.
The Profile Rule settings page in the Provisioning tab of the 7800 or 8800 Series IP phones allows the user to resync an IP phone with a remote profile. The resync option is used to synchronize the individual IP phones to a standard configuration available in the remote IP phone.
This article provides you with instructions on how to configure profile rules on the Cisco IP Phone 7800 or 8800 Series IP Phone.
Note: The phone resyncs only when it is in idle state.
Applicable Devices
- 7800 Series
- 8800 Series
Software Version
- 10.4
Configure New Profile
Step 1. Log in to the web-based utility and choose Admin Login > Advanced.

Step 2.Choose Voice > Provisioning > Configuration Profile.
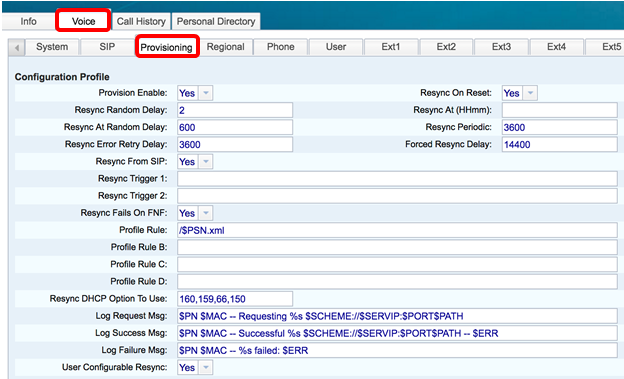
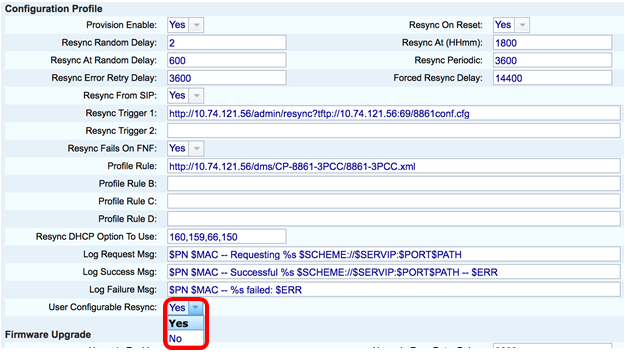
Step 3. Choose Yes from the Provision Enable drop-down list. This allows you to control all the resync actions independent of the firmware upgrade actions. This is also used to enable Remote Provisioning. Remote Provisioning permits the running files to be cached in the web server. The default value is Yes.
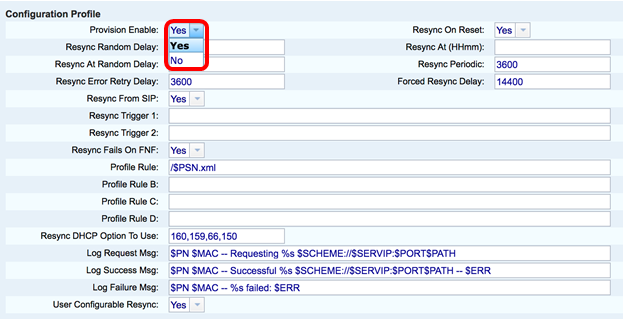
Step 4. Choose Yes from the Resync On Reset drop-down list. This triggers a resync after every reboot apart from reboots caused by parameter updates and firmware upgrades. The default value is Yes.
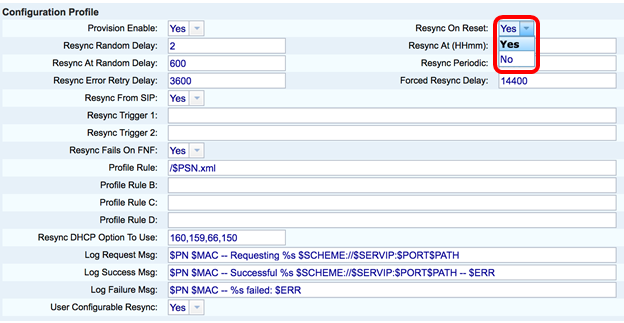
Step 5. In the Resync Random Delay field, enter a delay time. This is the time interval that the device waits before it contacts the provisioning server, which prevents the overload of the provisioning server when all the devices try to power on at the same time and do initial configuration. This delay can be used only at the time of the initial configuration when the device is powered on or reset. The unit of this parameter is 20 seconds. The default value of 2 indicates 40 seconds. This feature is disabled if this parameter is set to 0.
Note: For this example, the value used is 3.

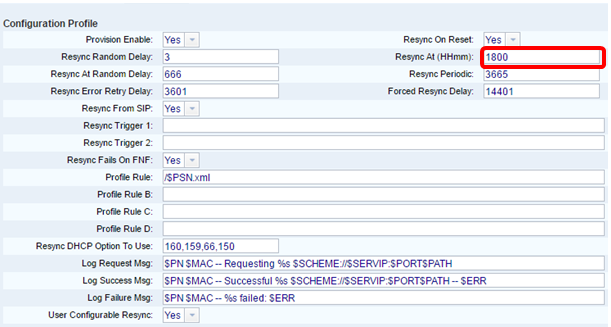
Step 6. In the Resync at (HHmm) field, enter the time in 24-hour format (hhmm). It is the time which the IP phone will follow for resync.
Note: For this example, 1800 is used.
Step 7. In the Resync At Random Delay field, enter a time (in seconds). The IP phone will resync in a random manner so that there is no collision in the server between resync requests from multiple IP phones. The default entry is 600 seconds (10 minutes).
Note: For this example, the entered value is 666.

Step 8. In the Resync Periodic field, enter a time (in seconds) that the device resyncs periodically with the provisioning server. This resync timer is active only after the first successful sync with the server. To prevent periodic resync, set the parameter to 0. The default value is 3600 seconds.
Note: For this example, the entered value is 3665.
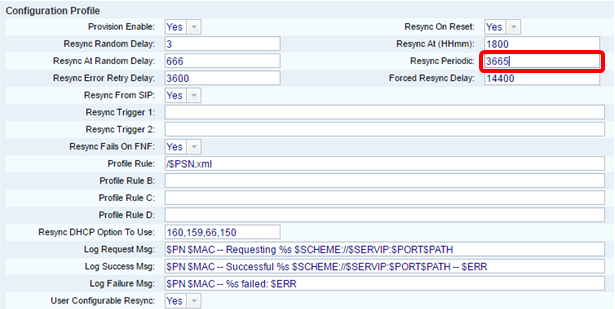
Step 9. In the Resync Error Retry Delay field, enter a time (in seconds) after which the resync is done if the previous resync between the server and device failed. There is an error retry timer which activates if the earlier attempt to resync with the provisioning server failed. If this value is set to 0 then the device instantly retries to sync with the server after a failed attempt. The default value is 3600 seconds.
Note: In this example, the entered value is 3601.
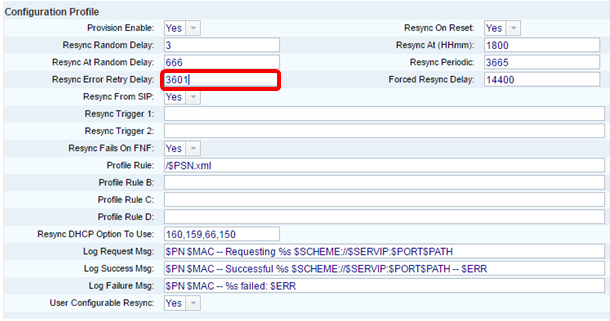
Step 10. In the Forced Resync Delay field, enter a delay time (in seconds). This indicates the maximum delay the IP telephony device waits before it attempts to resync. The device will not resync if any of the phone lines are active, therefore the device will wait this amount of time for the phone lines to become idle before it attempts to resync with the server. This facilitates the user to make calls without any interruption. The timer in the device counts down when the phone lines become idle and waits until the timer counts down to zero. The resync attempts are delayed until then. The default value is 14400 seconds.
Note: For this example, the entered value is 14401.

Step 11. Make sure Yesis chosen from the Resync From SIP drop-down list. This allows a resync to be triggered through a SIP NOTIFY message. The default value is Yes.
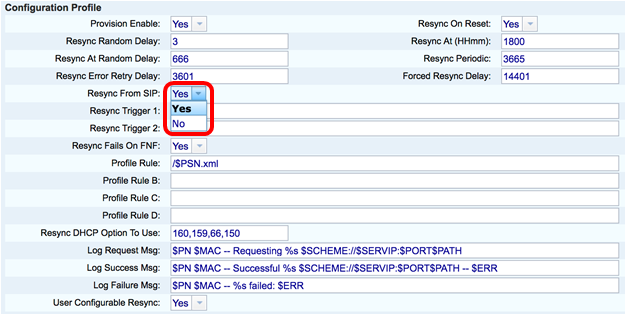
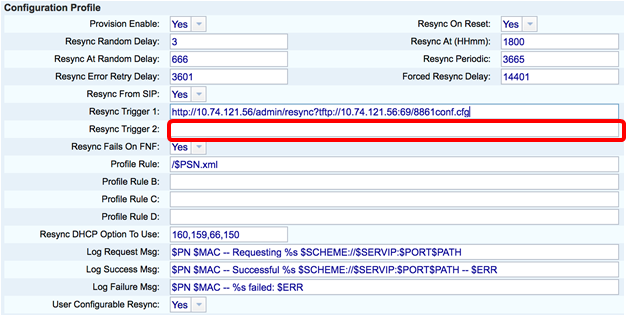
Step 12. In theResync Trigger 1 field, enter a conditional expression for when the resync should be triggered. The resync is triggered when the logic equation in these parameters measures to be TRUE. The default value is empty. The Resync Trigger should be in the following format or syntax: http://phone-ip-addr/admin/resync?protocol://server-name[:port]/profile-pathname
Note: For this example, the syntax is http://10.74.121.56/admin/resync?tftp://10.74.121.56:69/8861conf.cfg

Step 13. (Optional)In the Resync Trigger 2 field, enter a conditional expression for when the resync should be triggered. The resync is triggered when the logic equation in these parameters measures to be TRUE. The default value is empty.
Step 14. Make sure Yesis chosen from the Resync Fails on FNF drop-down list. This will notify the user if the File Not Found response from the provisioning server gives a successful or a failed resync. A failed resync activates the error resync timer. The default value is Yes.
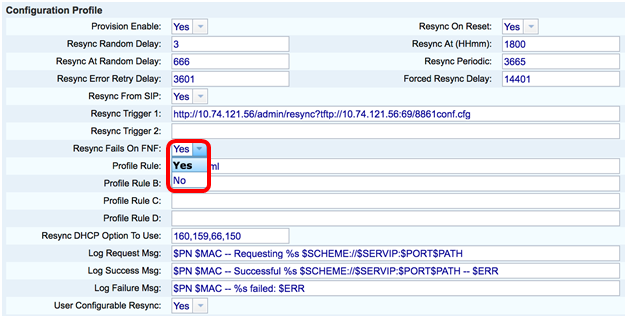
Step 15. In the Profile Rule field, enter the profile script that identifies the protocol and the associated profile URL. Repeat this step for Profile Rules B, C, and D. The default value is /spa$PSN.cfg. The syntax is protocol://server[:port]/profile_pathname.
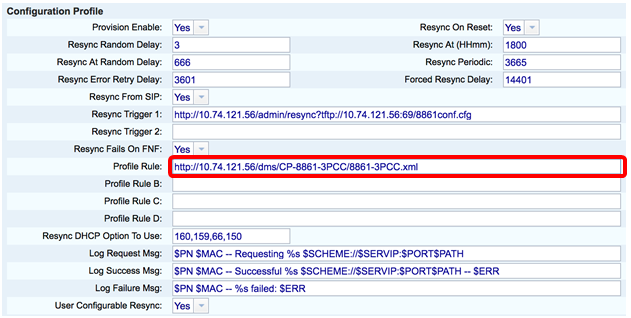
Note: For this example, http://10.74.121.56/dms/CP-8861-3PCC/8861-3PCC.xml is used. If this command is not specified, the TFTP is taken as default and the address of the TFTP server is obtained from the Dynamic Host Configuration Protocol (DHCP) option 66. In the URL, either the IP address or the Fully Qualified Domain Name (FQDN) of the server can be indicated. The file name can have macros such as $MA which allows to expand the Media Access Control (MAC) address of the device.
The profile scripts for Profile Rules B through D are carried out in order after the primary Profile Rule execution is accomplished. If a resync is triggered and the Profile Rule is blank then the remaining Profile Rules B through D are still calculated and executed.
Step 16. Enter the DHCP options in the Resync DHCP Option To Use field to get back the firmware and profile. The defaults are 160, 159, 66, and 150.

Step 17. In the Log Request Msg field, enter the log resync request message. This message is sent to the syslog server at the start of a resync attempt. The default value is $PN $MAC -- Requesting resync $SCHEME:://$SERVIP:$PORT$PATH.
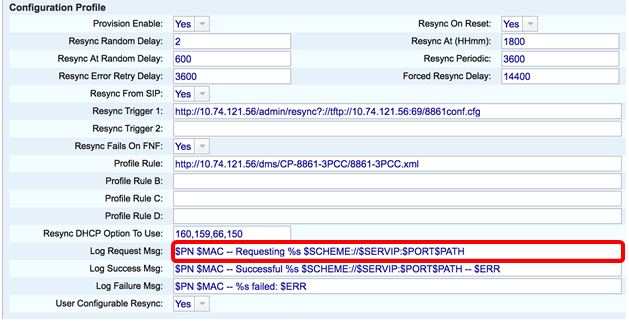
Step 18. In the Log Success Msg field, enter the log resync success message. This message is received upon successful completion of a resync attempt. The default value is $PN $MAC -- Successful resync $SCHEME:://$SERVIP:$PORT$PATH.
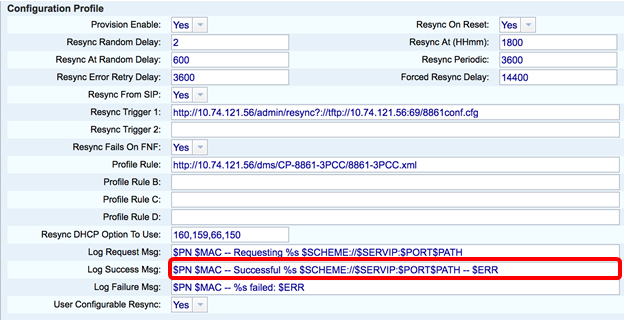
Step 19. In the Log Failure Msg field, enter the log resync failure message. This message is received upon failure of a resync attempt. The default value is $PN $MAC -- Resync failed: $ERR.

Step 20. Make sure Yes is chosen from the User Configurable Resync drop-down list. The default value is Yes.
Step 21. Click Submit All Changes. The changes are configured.
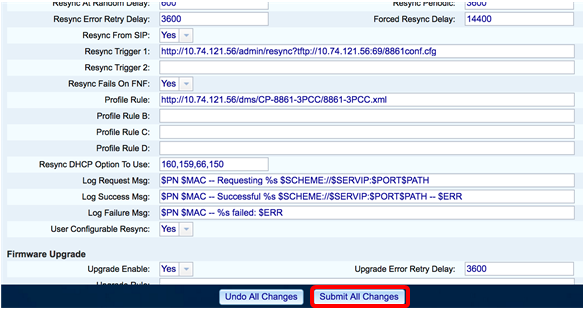
You should now have configured a new profile on Cisco IP Phone 7800 or 8800 Series Multiplatform Phone.
 Feedback