Organization Mapping on the Cisco FindIT Kaseya Plugin
Available Languages
Introduction
Organization Mapping is a step that is required after the installation of the Cisco FindIT Kaseya Plugin in order to map FindIT Network Manager sites to Kaseya organizations or groups. This allows the administrator to easily manage devices and perform actions through the web-based utility of the Kaseya Virtual System Administrator (VSA).
In this scenario, one unmapped FindIT site named Local Probe is detected and is mapped to the kserver Kaseya Group.
Objective
This article aims to show you how to perform organization mapping on the Cisco FindIT Kaseya Plugin.
Applicable Devices
- Cisco FindIT Network Manager
- Cisco FindIT Network Probe
Software Version
- 1.1
Prerequisites
Before configuring Organizational Mapping, verify that the Plugin Settings are configured. This ensures that the connection between the plugin and the FindIT Manager can be established.
It also enables the FindIT sites to come up and appear on the list for mapping to Kaseya organizations.
To configure the plugin settings, follow the steps below:
Step 1. Launch a web browser and enter the IP address of your Kaseya VSA server on the address bar and then click Enter.

Note: In this example, the IP address used is 10.10.0.1
Step 2. Enter your Kaseya account login credentials in the Username and Password fields provided, and then click SIGN IN.

Note: In this example, kaseya is used as the Username.
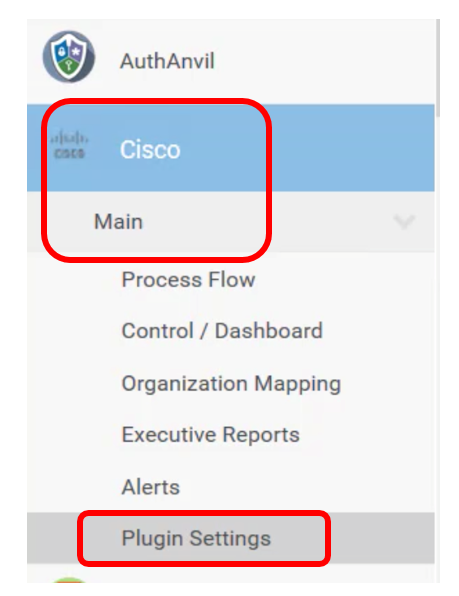
Step 3. Choose Cisco > Main > Plugin Settings in the navigation pane.

Step 4. In the Plugin Settings window, enter the Username and Password of your FindIT Network Manager in their respective fields.

Step 5. Enter the IP address of your FindIT Network Manager in the field provided.

Note: In this example, 10.0.0.122 is used.
Step 6. Click the Test button to test the login credentials you entered and its connection to the FindIT Network Manager.

Step 7. Click on the Save button once the Credentials are correct! message appears.

Step 8. Click Done when the Credentials updated! message appears.

Organization Mapping
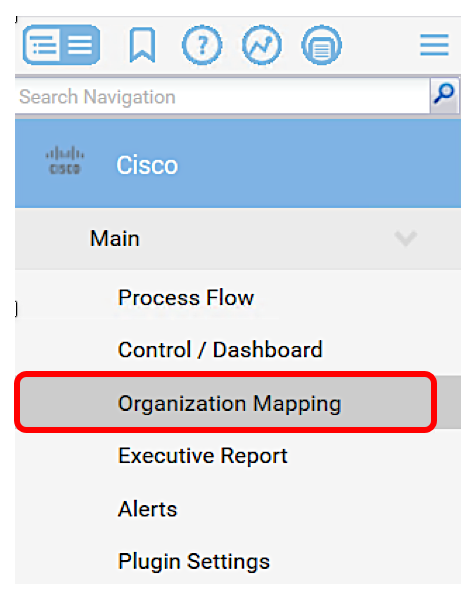
Step 9. In the Navigation Panel, choose Organization Mapping.

Note: The page will then display the sites that your FindIT Manager can see in the network in a table format. The tabs at the top of the table also show the following information:
- Un-mapped shows the number of sites that are detected by the FindIT Manager but are not yet mapped to any Kaseya organization or group.
- Mapped shows the number of sites that are mapped to a Kaseya organization or group.
- Ignored shows the number of sites that are detected by the FindIT Manager but are just ignored for future mapping consideration to any Kaseya organization or group. You can move the site back to the Un-mapped tab by clicking Un-ignore.
- All shows the total number of sites that are detected by the FindIT Manager regardless of their mapping status.
In this example, only one site named as Local Probe is displayed and is labeled as un-mapped.

Step 10. Click the dropdown menu under the Kaseya Org/Group to choose an appropriate organization or group. This would allow network devices to be filtered and searched by organization or group, and Kaseya functions will be properly associated to the correct organization.

Note: In this example, kserver is chosen.
Step 11. Scroll to the right to view and configure more items in this page. The following information is also displayed:
- Kaseya Network Name – This is the network name obtained from the FindIT Network Probe site attached to the FindIT Network Manager that Kaseya was able to detect.
- Kaseya Network Probe – This is a system on the network that has a Kaseya agent that can perform Kaseya Discovery.
- Scan Recurrence – This specifies the frequency of the network scan depending on the configuration of Kaseya Network Probe. If Kaseya Network Probe is not configured, there is no need to configure this setting.
- Scan Date – This specifies the date of the network scan based on the configuration of Kaseya Network Probe. If Kaseya Network Probe is not configured, there is no need to configure this setting.

Step 12. Scroll to the right and click the  button.
You now have successfully mapped the Local Probe FindIT site to the kserver Kaseya organization.

Note: Clicking on the button removes the FindIT site from mapping consideration in the future. The site will then be placed in the Ignored tab.
Contact Cisco
- Open a Support Case

- (Requires a Cisco Service Contract)
 Feedback