Manage Notifications on the FindIT Network Probe
Available Languages
Objective
The FindIT Network Probe generates notifications when events occur in the network. It may be in the form of an email or a pop-up at the bottom-right corner of the FindIT Probe home window. Notifications are color-coded for ease of use.
- Green indicates a Minor event.
- Orange indicates a Major event.
- Red indicates a Critical event.
The Notification Center is represented by a Bell icon at the top-right corner of the FindIT Network Probe window. It may have a number over it, which represents the total number of unacknowledged notifications. The color of the number indicates the nature of the event as enumerated above. All notifications are logged for future review. Notifications can also be customized to show only the logs of your preference.
This article aims to show you how to manage the notifications on the FindIT Network Probe. It also assumes that you have already configured the email settings at the Administration > Email Settings area of the FindIT Network Probe.
Manage Notifications
Access the Notification Center
Step 1. Log in to the FindIT Network Probe.
Step 2. On the Header toolbar of the FindIT Network Probe window, click the Notification Center icon.
Note: In this example, there are 18 unacknowledged notifications. The color of the icon indicates that the highest incident was a Major event.

Filter the Notifications by Severity
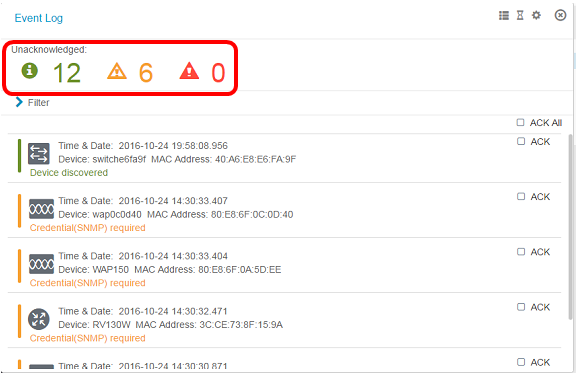
Step 1. Click the numbers to display only the logs of that nature.
Note: In this example, there are 12 Minor events, 6 Major events, and 0 Critical event. When you click 12, it will display only the Minor events. It will also only display Major events when you click 6, and Critical events when you click 0. The numbers will change depending on the number of notifications per severity.
Filter the Notifications by Date
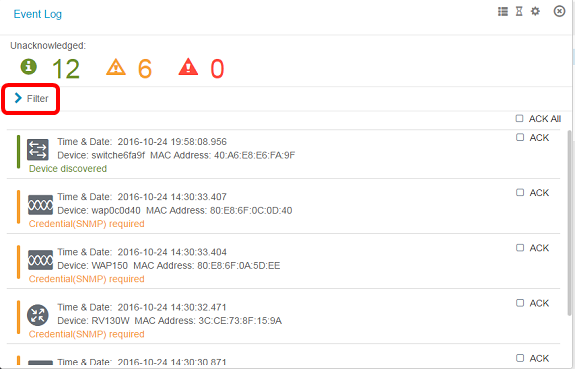
Step 1. (Optional) Click the Filter arrow to specify a range, Severity Level, Event Type, and Device. You can also opt to include previously acknowledged events by checking any of the ACK check boxes or acknowledge all by checking the ACK All check box when viewing logs through the Notification Center.
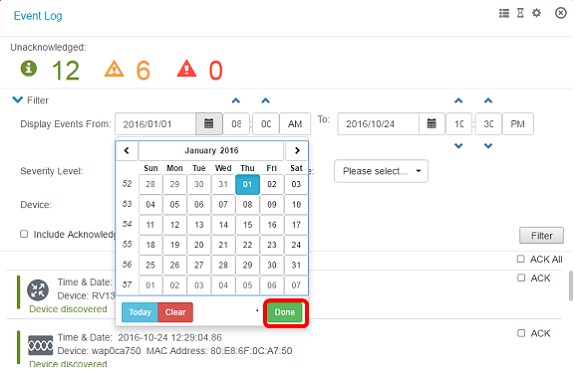
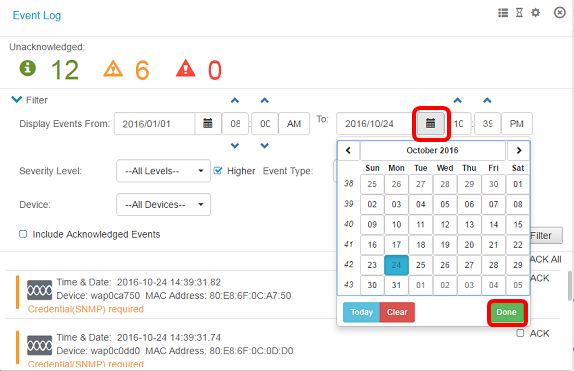
Step 2. (Optional) To filter the date, click the Calendar icon and choose the start date from the Display Events From area. In this example, the start date is January 1, 1916. Alternatively, you can enter the dates manually using the format YYYY/MM/DD then click Done.
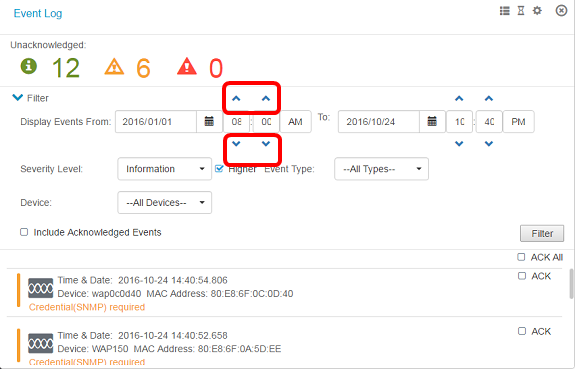
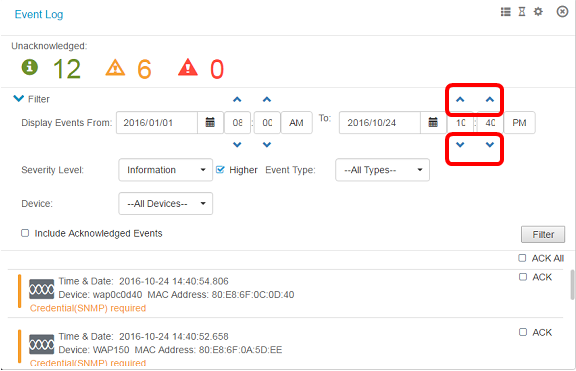
Step 3. (Optional) To adjust the start time, click the up or down arrow to set the hour and minute settings.
Step 4. (Optional) Click the Calendar icon and choose the end date in the To area. In this example, the end date is October 24, 2016. Alternatively, you can enter the dates manually using the format YYYY/MM/DD then click Done.
Step 5. Adjust the end time by clicking the up or down arrow to set the hour and minute settings. In this example, the end time is 10:30PM.
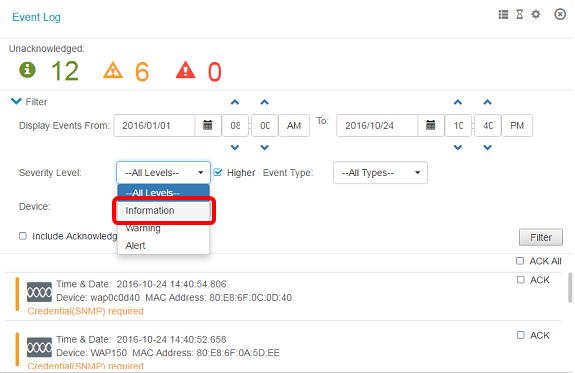
Step 6. Click the Severity Level drop-down list and choose the severity level to be reported. In this example, the information severity level will be reported.
- All Levels — reports events in all severity levels.
- Information — reports events only under the Information severity level.
- Warning — reports events only under the Warning severity level.
- Alert — reports events only under the Alert severity level.
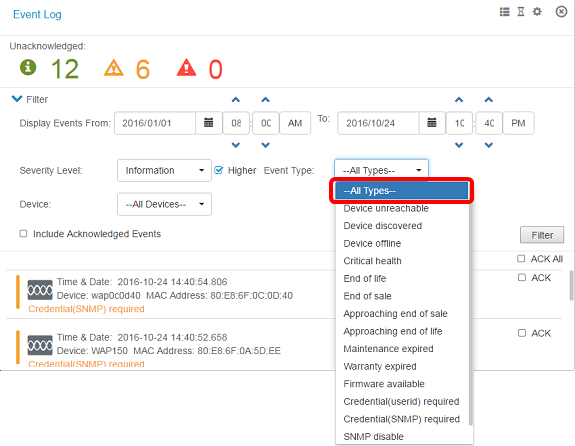
Step 7. Choose the Event Type from the drop-down menu. In this example, All Types is chosen.
- All Types — All types of events will be reported.
- Device unreachable — sends a notification when the FindIT Network Probe is unable to reach a discovered device using its IP address.
- Device discovered — sends a notification when the FindIT Network Probe discovers a new device in the network or an offline device is rediscovered.
- Device offline — sends a notification when the FindIT Network Probe detects a device that is no longer detected on the network.
- Critical health — sends a notification when the FindIT Network Probe detects that a device health level changes to Warning or Alert.
- End of life — sends a notification that an End of Life bulletin is found for the device.
- End of Sale — sends a notification that an End of Life bulletin is found for the device.
- Approaching end of sale — sends a notification that the device is nearing the end of its sale period.
- Approaching end of life — sends a notification that the device is nearing the end of its life cycle.
- Maintenance expired — sends a notification that the device does not have a currently active maintenance contract.
- Warranty expired — sends a notification that the warranty on a device has lapsed.
- Firmware available — sends a notification that a new firmware is available for download.
- Credential (userid) required — indicates that a user ID is needed.
- Credential (SNMP) required — indicates that a device Simple Network Management Protocol (SNMP) credential is needed.
- SNMP disable — indicates that the device SNMP is disabled.
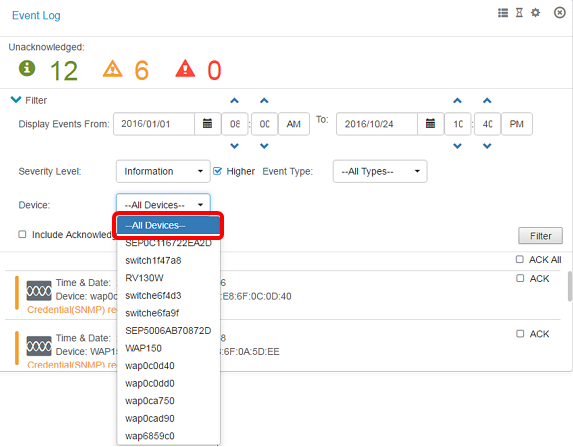
Step 8. Choose the device from the Device drop-down menu. This will generate the log report for the chosen device.
Note: In this example, All Devices is chosen.
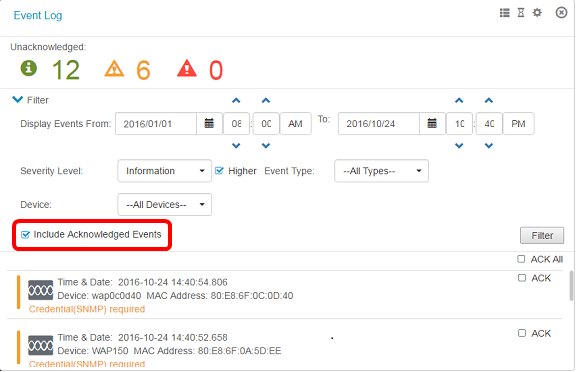
Step 9. Check the Include Acknowledged Events check box to include previously acknowledged events in the filtered logs.
Step 10. Click Filter.
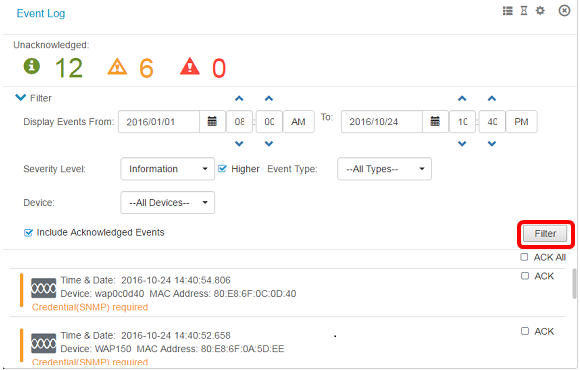
You should now have successfully generated a filtered event log report based on your specified date.
Configure Event Settings
Step 1. Click the Task Status icon.
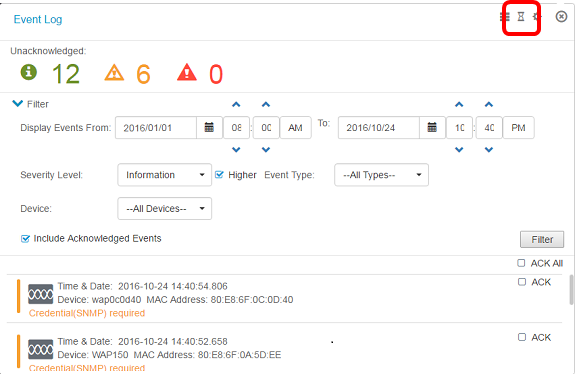
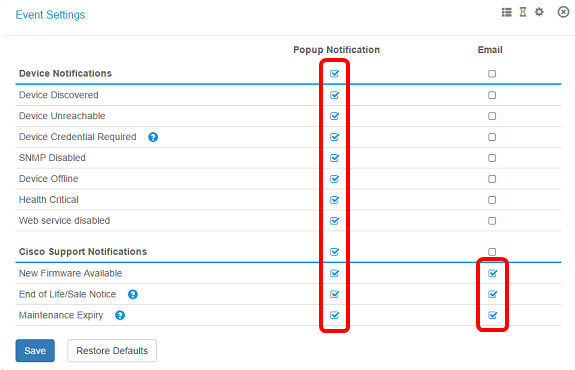
Step 2. Check the corresponding check boxes to enable Popup Notification and Email Notification. Leave the boxes unchecked to disable Notifications for that item.
Note: In this example, all pop-up notifications under Device Notifications and Cisco Support Notifications are activated, but email notifications are activated only for Cisco Support Notifications.
Step 3. Click Save.
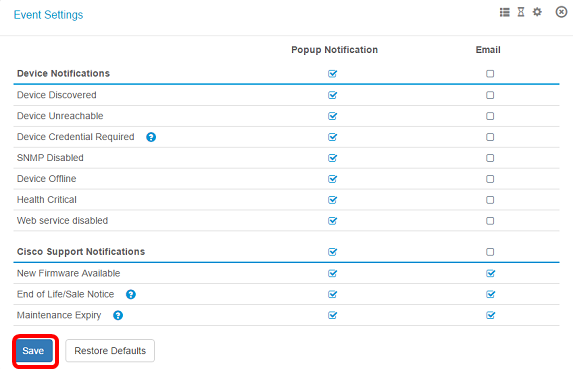
You should now have successfully configured the event settings on the FindIT Network Probe.
Change the Dimensions of the Window
Step 1. Click the Settings icon.
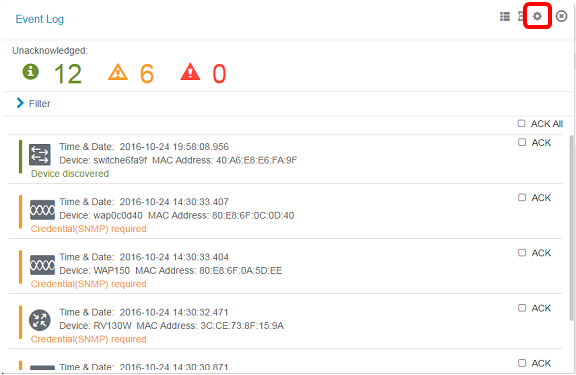
Step 2. Enter a value in the Panel Height field. This will be the height of the Event window in pixels. In this example, the height of the window is 550 pixels.

Step 3. Enter a value in the Panel Width field. This will be the width of the Event window in pixels. In this example, the width of the window is 850 pixels.

Step 4. Click Save.

You should now have successfully changed the dimensions of the Notification Center window on the FindIT Network Probe.
Contact Cisco
- Open a Support Case

- (Requires a Cisco Service Contract)
 Feedback