Introduction
This document describes how to troubleshoot Unpartitioned SD cards error on Flexflash Controller.
Prerequisites
Requirements
There are no specific requirements for this document.
Component Used
The information in this document is based on these software and hardware versions:
- Standalone C series server
- Flexflash Controller FX3S
- Two SD cards of identical size
- CIMC version of 3.X or higher
The information in this document was created from the devices in a specific lab environment. All of the devices used in this document started with a cleared (default) configuration. If your network is live, ensure that you understand the potential impact of any command.
Problem
Error messages and fault code
Fault Code: F1260
Description: Flex Flash Virtual Drive 1 (Hypervisor) Degraded: please check the flash device or the controller
Reason: Equipment_Degraded
Fault Code: F1262
Description: Flexflash controller Flexflash-0 configuration error: Configure the Flexflash controller correctly
Reason: Equipment_Unhealthy
Note: Scenario where the issue is with 1 SD card Present.

After you navigate to Storage > Cisco Flexflash, it is seen that SD card 1 as unpartitioned and Virtual drive Hypervisor degraded as expected

The flexflash controller status is shown in the image here.
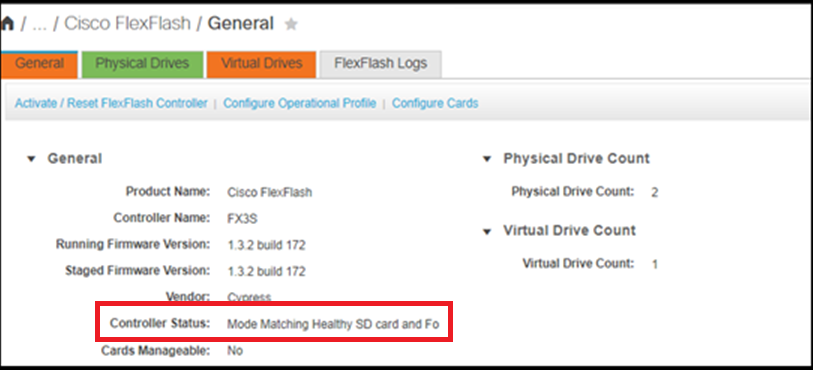
Note: Unpartitioned SD card has been degraded and can proceed with the RMA? No, replacement might not resolve the issue.
Solution
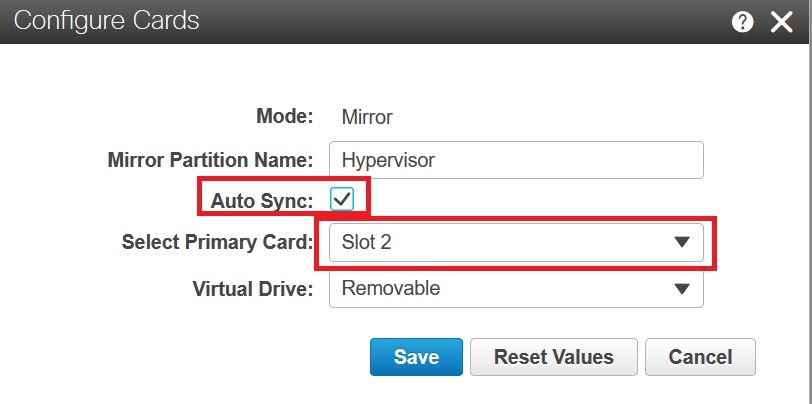
Step 1. Under General Tab, click Configure cards, as shown in this image.

Step 2. Select Primary card as SLOT 2 (because Slot 1 is used for the unpartitioned card and it is assumed that all the data is stored in SD card 2). Check AUTO-SYNC, click SAVE, as shown in this image.
Step 3. After you click on SAVE, a window appears, as shown in this image, click OK.
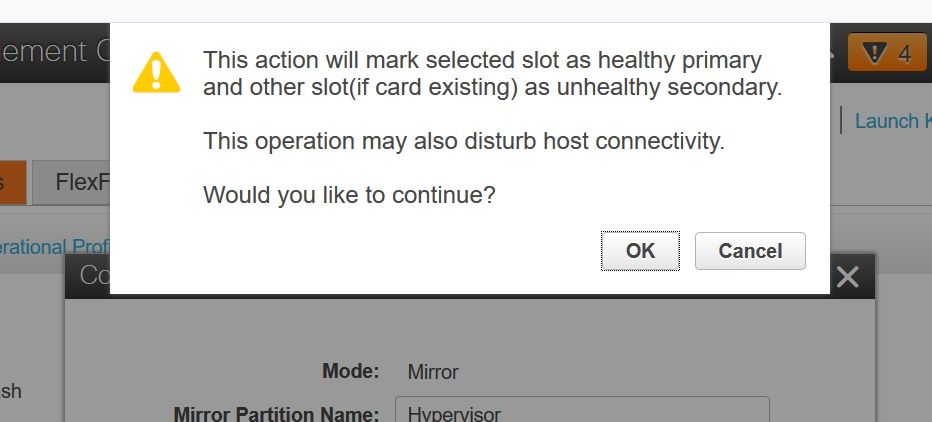
Step 4. After you click OK, notice that in Physical drives Tab, that Slot 1 which had unpartitioned card is to be configured as MIRROR_SECONDARY but UNHEALTHY, this is an expected behavior

Step 5. Under the Virtual Drives tab and you see that Virtual Drive's Auto-Sync is initiated (in step 2, auto-sync is checked). Wait for the auto-sync to complete 100%

Step 6. After Auto-Sync is complete, as shown in this image, you see Virtual drive as Healthy.

The card in Slot no. 1, which is seen healthy in step 4 is now HEALTHY after AUTO-SYNC.

Step 7. The Virtual Drive is still not host-accessible if you observe here, which means you cannot see it in the boot option and cannot boot your OS from there or install the OS on it.

Step 8. In order to make it host accessible, under Virtual drive, click ENABLE VIRTUAL DRIVE.
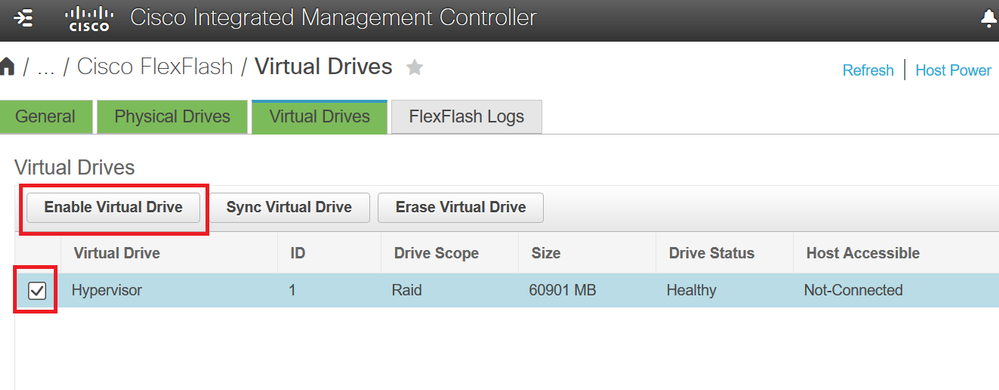
Step 9. Now it is observed that the Virtual drive is connected to the host and visible on the boot menu as shown in this image.

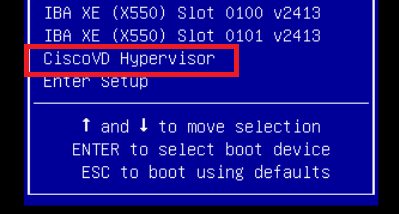
When you Forget to Check AUTO-SYNC in Step 2?
The virtual drive does not sync automatically and SD card 1 continues to show as UNHEALTHY. Under VIRTUAL DRIVES tab, check on the Virtual drive and click SYNC VIRTUAL DRIVE. This is called MANUAL SYNC. Quite self-explanatory.
After Sync is completed, the Virtual drive and SD card 1 becomes healthy as shown in step 6.

Related Information
