Introduction
This video describes the steps to set ISE components to a given level and then generate a Support Bundle.
Transcript Starts
Hi there, my name is Antonio García from the Security TAC Team. In today's video, you are going to go over how to set components to a given level, then generate a Support Bundle. This is ideally a way to quickly inform you how to properly collect data when troubleshooting.
Before we start, please note that the components runtime-aaa, runtime-logging, and runtime-config significantly impact performance. These components must not be kept in DEBUG mode for more than 15 minutes, as doing so could cause performance issues in the nodes.
Steps
There are four main steps you must go over when collecting logs:
Phase 1- Set the components to the required level.
Phase 2- Recreate the issue.
Phase 3- Set components to the default level.
Phase 4- Generate the Support Bundle.
Now let´s cover each of them one by one:
Phase 1- Set the Components to the Required Level
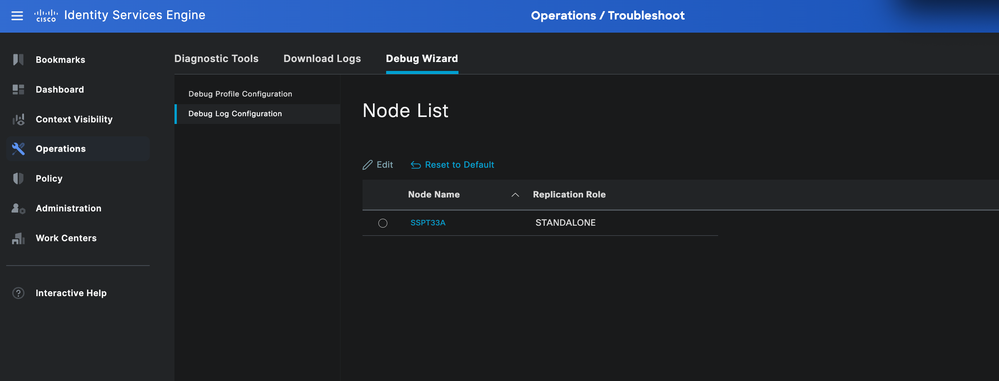
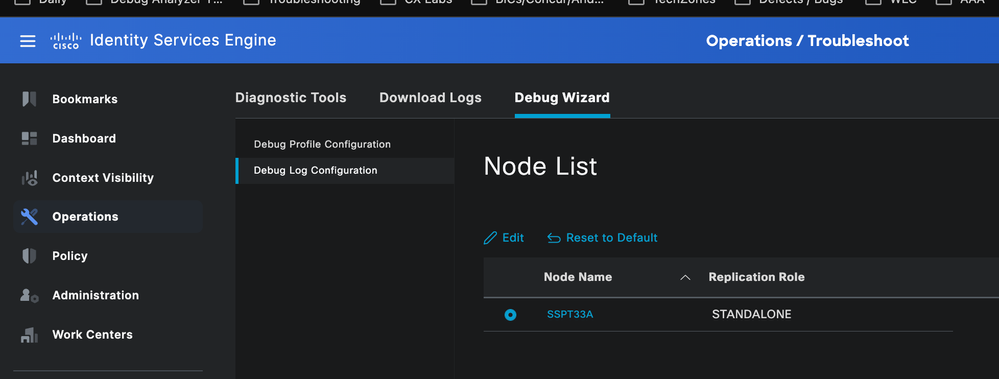
To begin, in the Cisco ISE GUI, click the Menu icon and choose Operations > Troubleshoot > Debug Wizard > Debug Log configuration and Select the node where you want to get logs from. By now you must be able to see a list of components. Each component has specific log files that help you understand what an issue might be.

To modify these components, you must do the following:
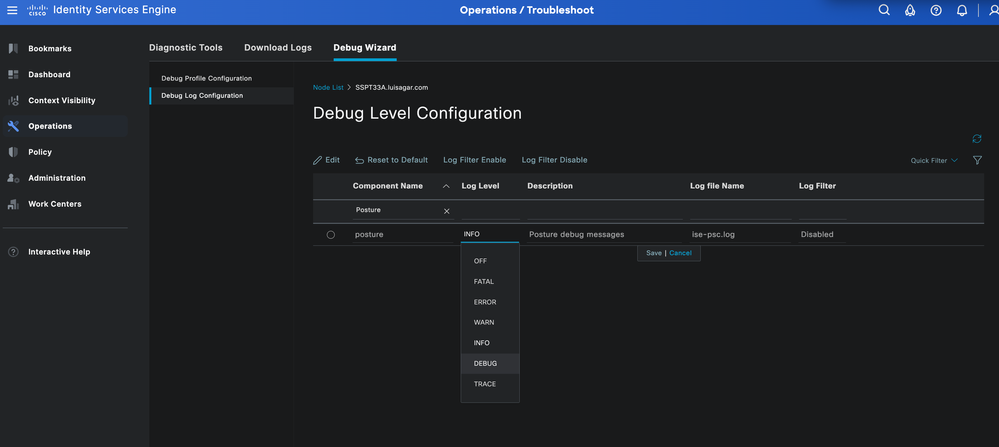
+ Select each component individually to modify its Log Level and collect the data as you were asked to.
+ Click the filter icon so now you can type the component name into the field to quickly find the component
+ Then, click twice on the current Log Level to modify it to any of these components. For example, click debug level >, then click Save.
+ You can repeat the same steps to modify the rest of components as required.

Phase 2- Recreate the Issue
By now, you are ready to recreate the issue to generate logs and capture the data.
You must take into consideration that It is vital to save a timestamp of when the issue occurred so the TAC engineer can review the logs efficiently. This can be done by:
1- Using the show clock command right before you start and when you finish recreating it. Obtain the timestamp from the perspective of ISE.
Or
2-Checking the live log details. I personally recommend to share a live log PDF format which shows MAC address, timestamp, failure reason, IP Adress, and session ID.
Phase 3- Set the Components to the Default Level
It is critical to set the components to the default level, as performance might be impacted. To do this, in the Cisco ISE GUI, click the Menu icon and choose Operations > Troubleshoot > Debug Wizard > Debug Log configuration, then select the node you are working with > Click on Reset to Default.

Phase 4- Generate the Support Bundle
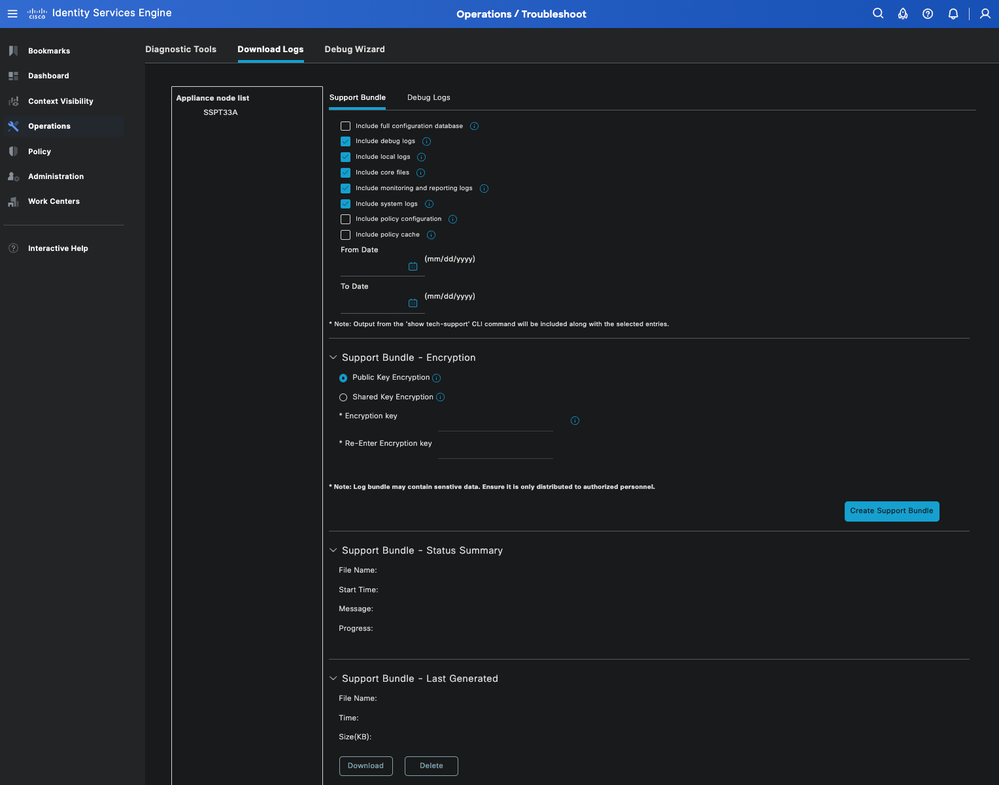
The final phase is to collect the Support Bundle in the Cisco ISE GUI. To do this, click the Menu icon and choose Operations > Troubleshoot > Download Logs, then select the node you are working with. You must select all options except the first one and the last two:
- Include debug logs
- Include local logs
- Include Core files
- Include monitoring and reporting logs
- Include system logs
After selecting the options, select the corresponding dates of when the issue was recreated. If the date is not set, the support bundle is going to include all available logs in the node. This approach is feasible, but the bundle is going to be large in size. If possible, it is preferable to collect logs from specific dates to minimize the bundle size.
So now, In regards to the Support Bundle Encryption, you have 2 options:
1- Public Key: This option uses a public key and does not require you to add an encryption key.
2- Shared Key Encryption: In this option, you must add an encryption key. If selecting a this option, you must upload a .txt file with the encryption key in it so the TAC engineer can decrypted.
Click Create Support Bundle, wait until it is generated, which takes some time. Then, click download to finally upload it to the case.

To upload it to the case, use this link: https://mycase.cloudapps.cisco.com/case


 Feedback