Introduction
This document describes the procedure to integrate APIC with ISE for administrator users authentication with TACACS+ Protocol.
Prerequisites
Requirements
Cisco recommends that you have knowledge of these topics:
- Application Policy Infrastructure Controller (APIC)
- Identity Services Engine (ISE)
- TACACS protocol
Components Used
The information in this document is based on these software and hardware versions:
- APIC version 4.2(7u)
- ISE version 3.2 Patch 1
The information in this document was created from the devices in a specific lab environment. All of the devices used in this document started with a cleared (default) configuration. If your network is live, ensure that you understand the potential impact of any command.
Configure
Network Diagram
 Integration Diagram
Authentication Procedure
Step 1.Log into the APIC application with Admin User Credentials.
Step 2. The authentication process triggers and ISE validates the credentials locally or through Active Directory.
Step 3. Once authentication is successful, ISE sends a permit packet to authorize access to the APIC.
Step 4. ISE shows a successful authentication live log.
Note: APIC replicates TACACS+ configuration to leaf switches that are part of the fabric.
APIC Configuration
Step 1. Navigate to Admin > AAA > Authentication > AAA and choose + icon in order to create a new login domain.
 APIC login admin configuration
Step 2. Define a name and realm for the new Login Domain and click + under Providers in order to create a new provider.
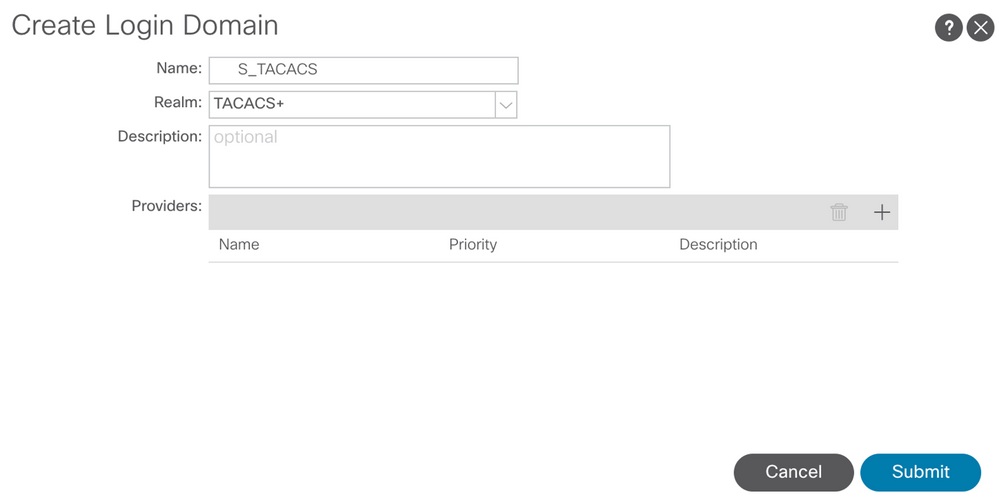 APIC login admin
 APIC TACACS Provider
Step 3. Define the ISE IP address or hostname, define a shared secret, and choose the management Endpoint Policy Group (EPG). Click Submit in order to add TACACS+ Provider to login admin.
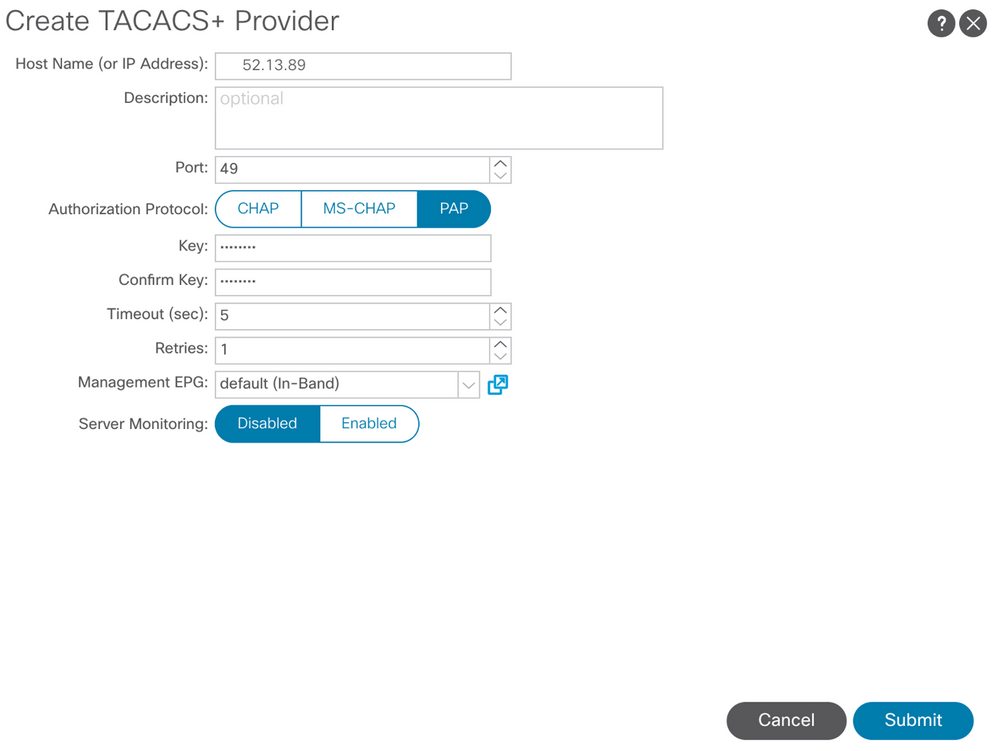 APIC TACACS Provider settings
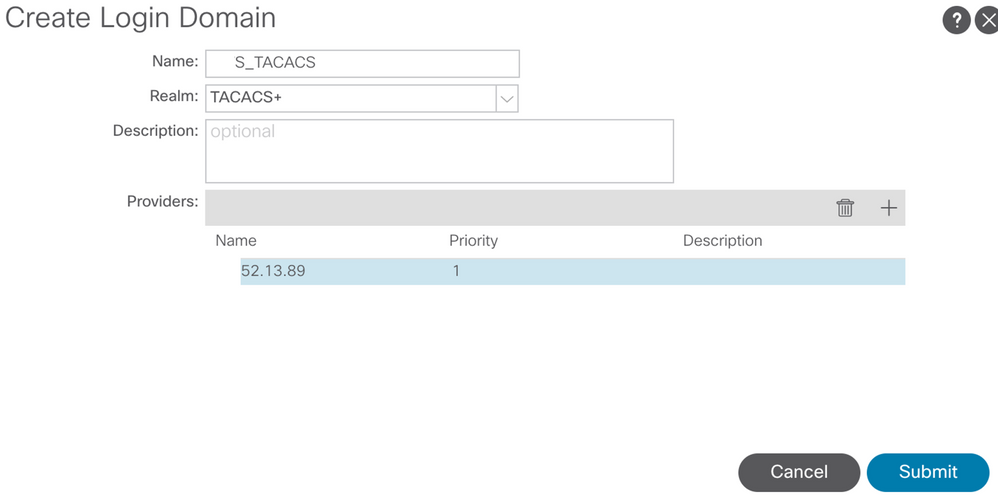
 TACACS Provider view
ISE Configuration
Step 1. Navigate to ☰ > Administration > Network Resources > Network Device Groups. Create a Network Device Group under All Device Types.
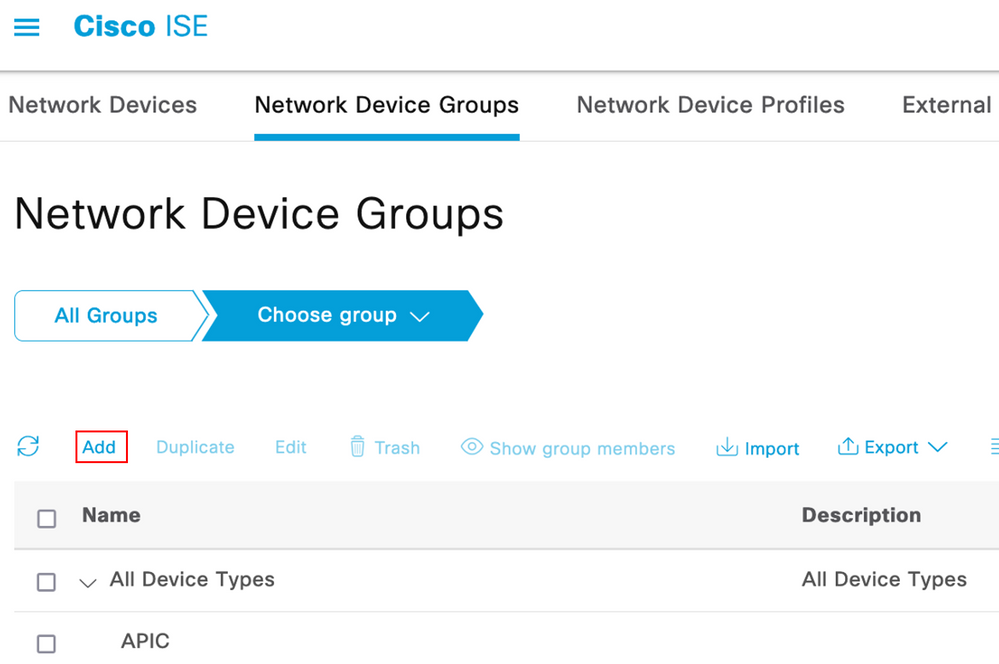 ISE Network Device Groups
Step 2. Navigate to Administration > Network Resources > Network Devices. Choose Add define APIC Name and IP address, choose APIC under Device Type and TACACS+ checkbox, and define the password used on APIC TACACS+ Provider configuration. Click Submit.
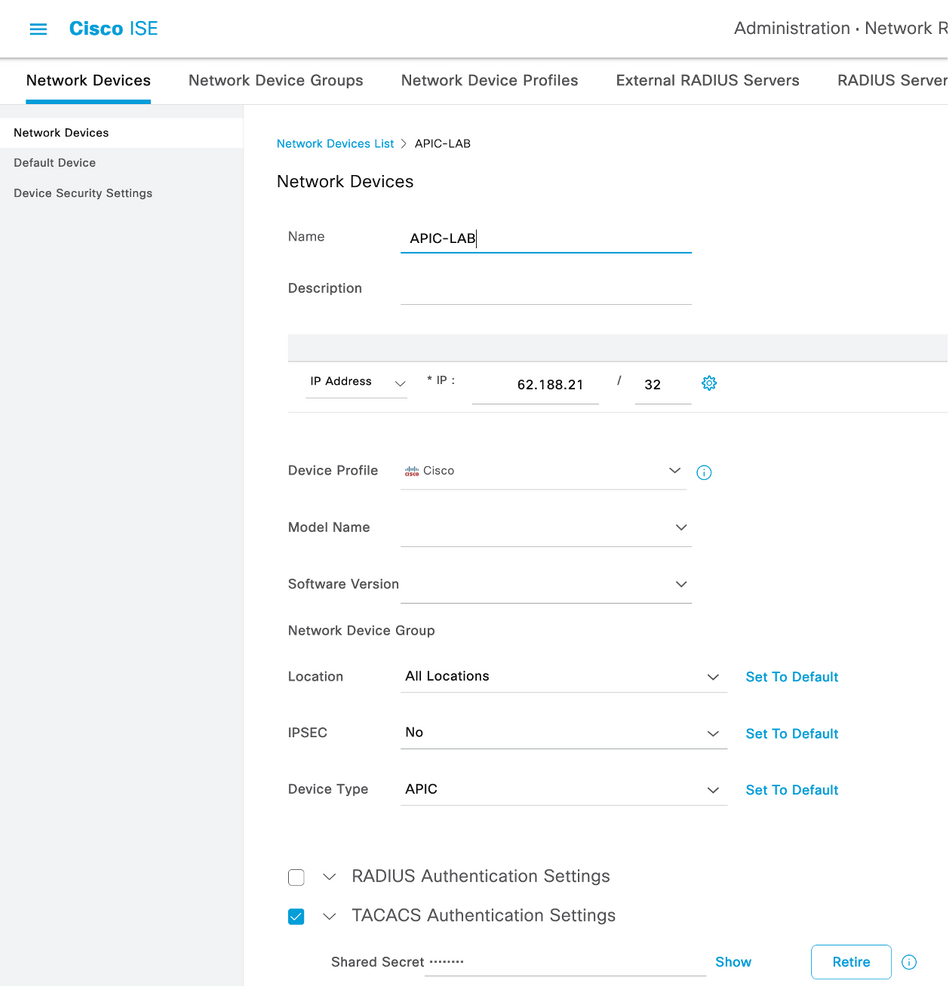
Repeat Step 1. and Step 2. for leaf switches.
Step 3. Use the instructions on this link in order to Integrate ISE with Active Directory;
https://www.cisco.com/c/en/us/support/docs/security/identity-services-engine/217351-ad-integration-for-cisco-ise-gui-and-cli.html.

Note: This document includes both Internal users and AD Administrator groups as identity sources, however, the test is performed with the Identity Source of the internal users. The result is the same for AD groups.
Step 4. (Optional) Navigate to ☰ > Administration > Identity Management > Groups. Choose User Identity Groups and click Add. Create one group for read only Admin users and Admin users.
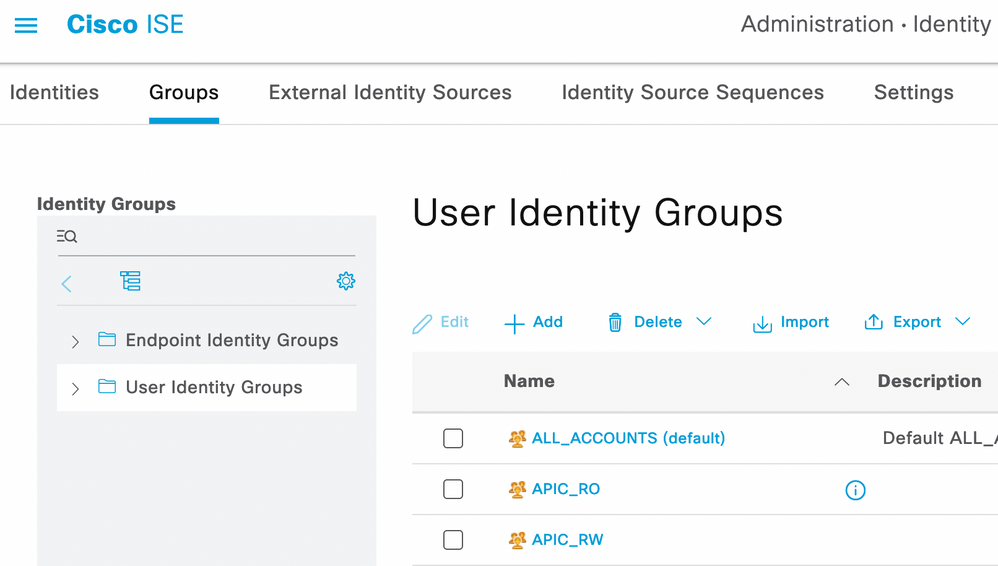 Identity Group
Step 5. (Optional) Navigate to ☰ > Administration > Identity Management > Identity. Click Add and create one Read Only Admin user and Admin user. Assign each user to each group created in Step 4.

Step 6. Navigate to ☰ > Administration > Identity Management > Identity Source Sequence. Choose Add, define a name, and choose AD Join Points and Internal Users Identity Source from the list. Choose Treat as if the user was not found and proceed to the next store in the sequence under Advanced Search List Settings and click Save.
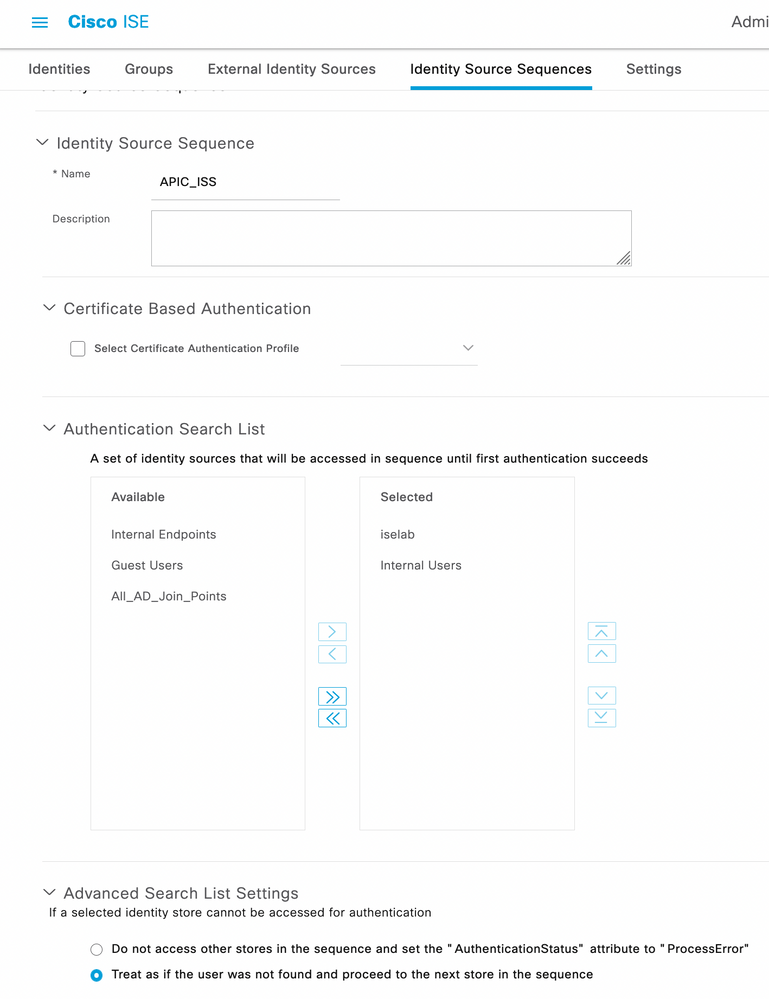 Identity Source Sequence
7. Navigate to ☰ > Work Centers > Device Administration > Policy Elements > Results > Allowed Protocols.
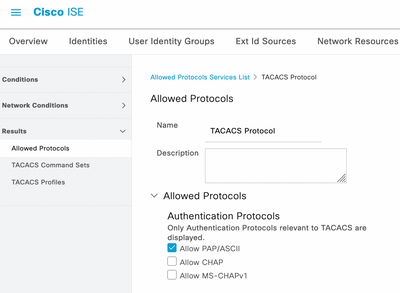 TACACS Allow Protocol
8. Navigate to ☰ > Work Centers > Device Administration > Policy Elements > Results > TACACS Profileadd and create two profiles based on the attributes on the list under Raw View. Click Save.
- Admin User:
cisco-av-pair=shell:domains=all/admin/
- Read Only Admin User:
cisco-av-pair=shell:domains=all//read-all

Note: In case of space or additional characters, the authorization phase fails.
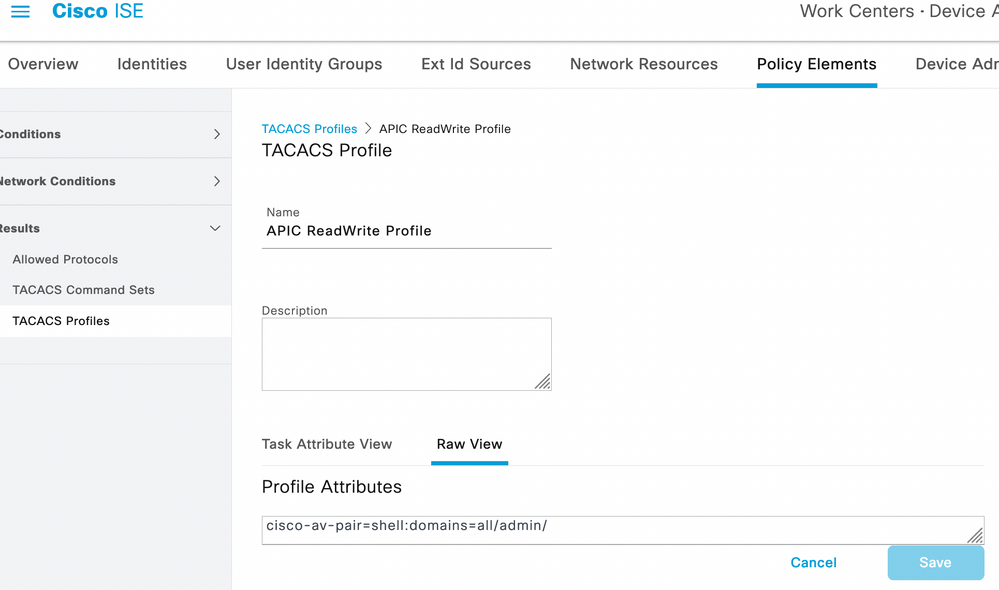 TACACS Profile
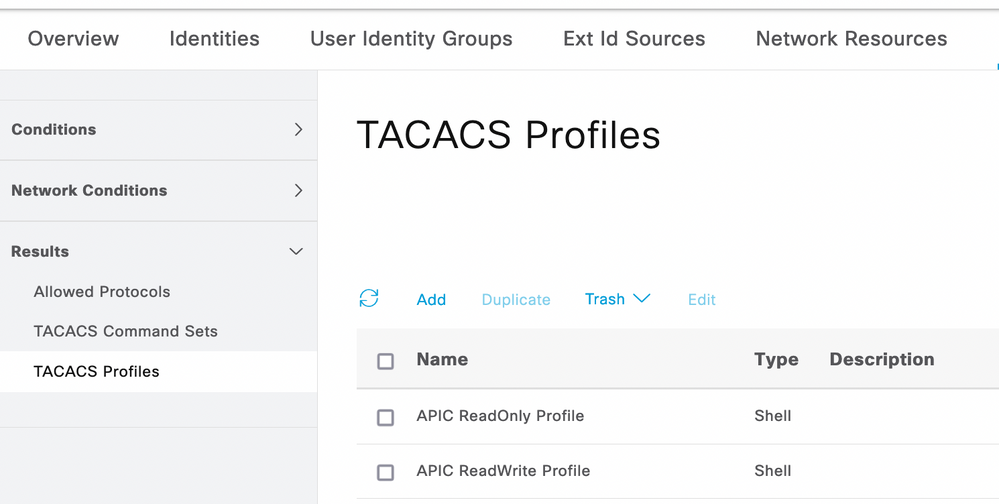 TACACS Admin and ReadOnly Admin Profiles
Step 9. Navigate to ☰ > Work Centers > Device Administration > Device Admin Policy Set . Create a New Policy Set, define a name, and choose the device type APIC created in Step 1. Choose TACACS Protocol created in Step 7. as allowed Protocol, and click Save.
 TACACS Policy Set
Step 10. Under new Policy Set click the right arrow > and create an authentication policy. Define a name and choose the device IP address as the condition. Then choose the Identity Source Sequence created in Step 6.
 Authentication Policy

Note: Location or other attributes can be used as an Authentication condition.
Step 11. Create an Authorization profile for each Admin User type, define a name, and choose an internal user and/or AD user group as the condition. Additional conditions such as APIC can be used. Choose the proper shell profile on each authorization policy and click Save.
 TACACS Authorization profile
Verify
Step 1. Log in on APIC UI with User Admin credentials. Choose the TACACS option from the list.
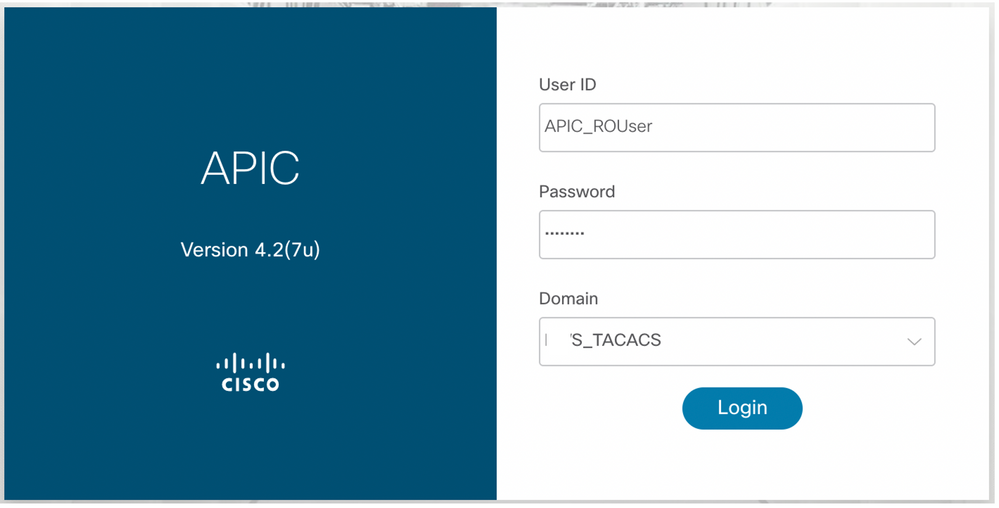 APIC Log in
Step 2. Verify the access on APIC UI and proper policies are applied on TACACS Live logs.
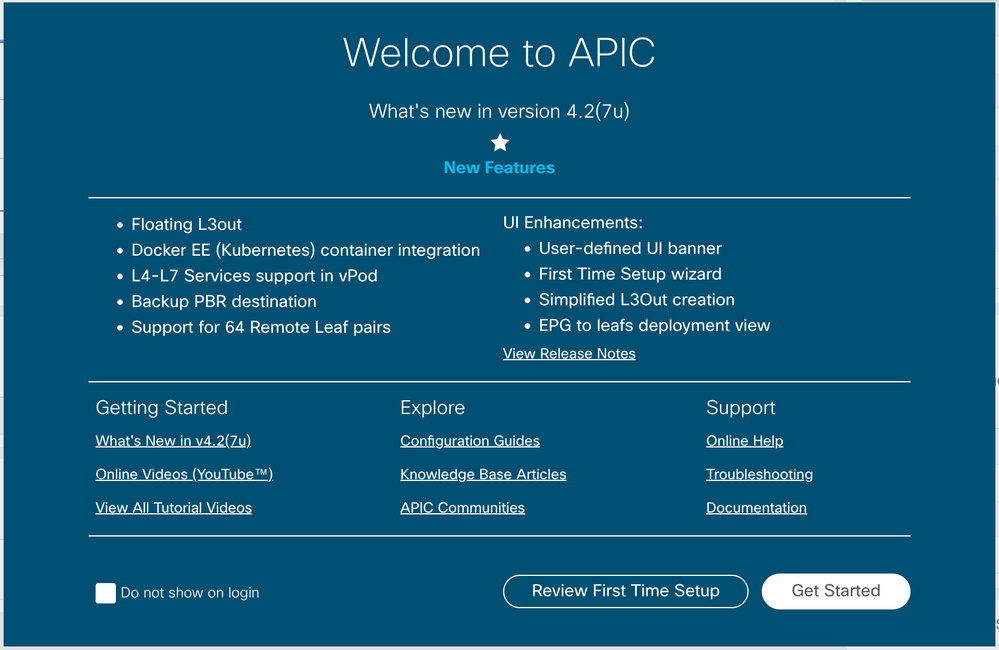 APIC Welcome message
Repeat Steps 1 and 2 for Read Only Admin users.
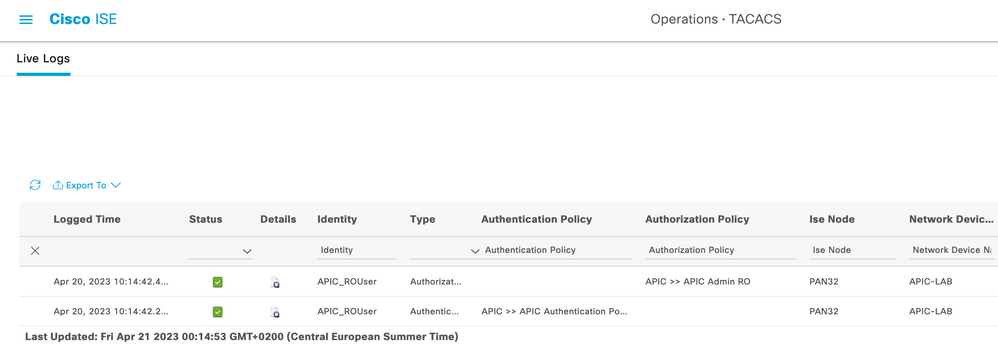 TACACS+ Live Logs
Troubleshoot
Step 1. Navigate to ☰ > Operations > Troubleshoot > Debug Wizard. Choose TACACS and click Debug Nodes.
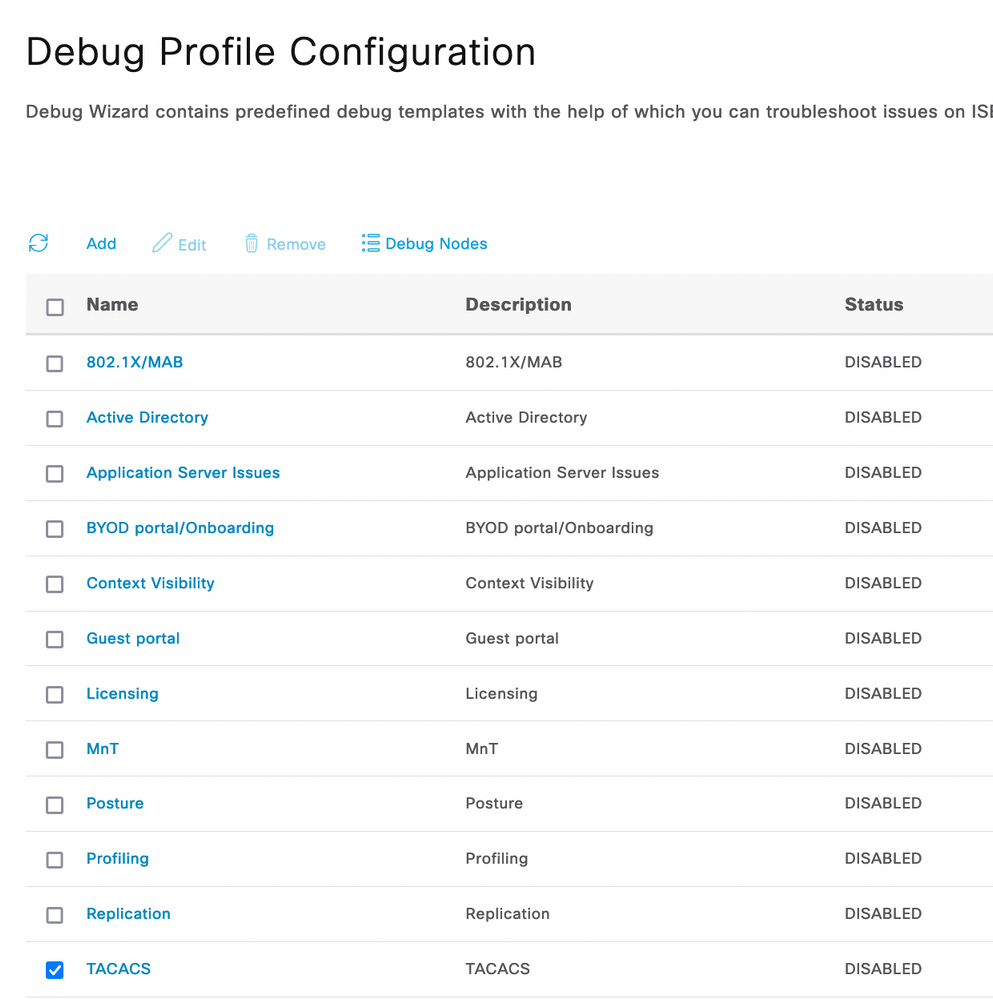 Debug Profile Configuration
Step 2. Choose the node that receives the traffic and click Save.
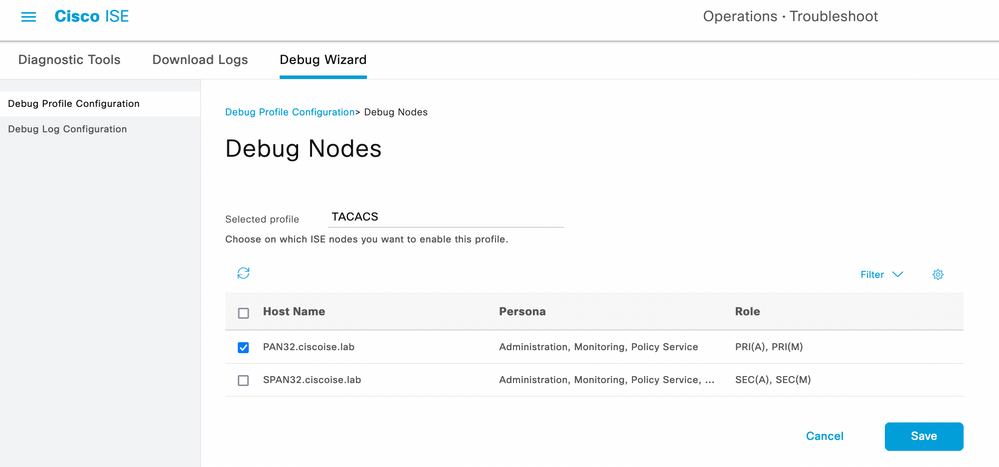 Debug Nodes Selection
Step 3. Perform a new test and download the logs under Operations > Troubleshoot > Download logs as shown:
AcsLogs,2023-04-20 22:17:16,866,DEBUG,0x7f93cabc7700,cntx=0004699242,sesn=PAN32/469596415/70,CPMSessionID=1681058810.62.188.2140492Authentication16810588,user=APIC_RWUser,Log_Message=[2023-04-20 22:17:16.862 +00:00 0000060545 5201 NOTICE Passed-Authentication: Authentication succeeded, ConfigVersionId=122, Device IP Address=188.21, DestinationIPAddress=13.89 , DestinationPort=49, UserName=APIC_RWUser, Protocol=Tacacs, NetworkDeviceName=APIC-LAB, Type=Authentication, Action=Login, Privilege-Level=1, Authen-Type=PAP, Service=Login, User=APIC_RWUser, Port=REST, Remote-Address=202.208, NetworkDeviceProfileId=b0699505-3150-4215-a80e-6753d45bf56c, AcsSessionID=PAN32/469596415/70, AuthenticationIdentityStore=Internal Users, AuthenticationMethod=PAP_ASCII, SelectedAccessService=TACACS Protocol, SelectedShellProfile=APIC ReadWrite, Profile, IsMachineAuthentication=false, RequestLatency=230, IdentityGroup=User Identity Groups:APIC_RW, Step=13013, Step=15049, Step=15008, Step=15048, Step=15041, Step=15048, Step=22072, Step=15013, Step=24430, Step=24325, Step=24313, Step=24318, Step=24322, Step=24352, Step=24412, Step=15013, Step=24210, Step=24212, Step=22037, Step=15036, Step=15048, Step=15048, Step=13015, SelectedAuthenticationIdentityStores=iselab
In case debugs do not show authentication and authorization information, validate this:
- The Devices Administration service is enabled on the ISE node.
- The right ISE IP address has been added to the APIC configuration.
- In case a firewall is in the middle, verify port 49 (TACACS) is permitted.


 Feedback