Introduction
This document describes how to create and manage Logical Devices in Cisco Firepower 4100/9300 FXOS using Firepower Chassis Manager.
Prerequisites
Requirements
Cisco recommends that you have knowledge of these topics:
- Firepower 4100/9300 Initial Chassis configuration.
- Firepower 4100/9300 FXOS CLI configuration.
Components Used
The information in this document is based on these software and hardware versions:
The information in this document was created from the devices in a specific lab environment. All of the devices used in this document started with a cleared (default) configuration. If your network is live, ensure that you understand the potential impact of any command.
Additional Information
Choose the FTD Product Version
Before starting, consider upgrading to the latest FPR4145 FXOS version or a compatible version with your target FTD logical instance version.
The target FTD version for this document is 7.2.5-208. Hence, the recommended FXOS version for the FPR4145 chassis is 2.12.0-519.
Configure
Access Cisco FCM GUI
Log into the Firepower Chassis Manager, and enter the URL in the address bar (from a supported browser):
https://<chassis_mgmt_ip_address>
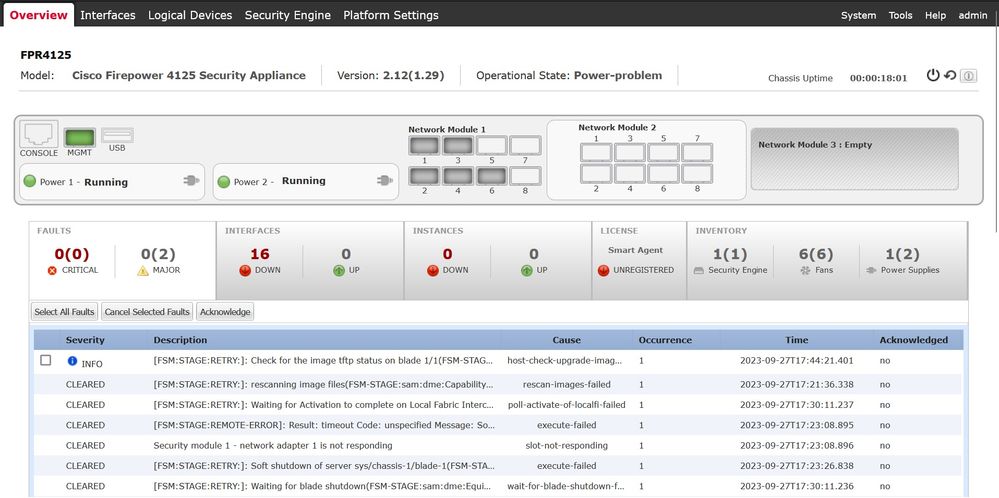 Access FMC GUI
Download the corresponding Secure FTD install package for the Firepower 4100/9300 series from https://software.cisco.com/.
The image name is cisco-ftd.7.2.5.208.SPA.csp.
Upload Package
Upload the FTD install package to the FXOS chassis. Navigate to System > Updates.
Choose Upload image, then browse and upload:
 Upload FTD image

Tip: Once the image is uploaded, the End User License Agreement is displayed, and you can accept by selecting 'I understand and accept the agreement'.
The FTD install package is successfully uploaded to the chassis:
 FTD image uploaded succesfully to Chassis
Creating a Logical Device
Now you can create a Logical Device by navigating to the Logical Devices tab and clicking Add:
 Select Add Logical Instance
Next, choose Standalone.
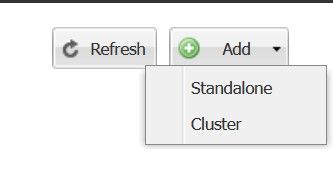 Add Standalone Instance

Warning: Choose Standalone for Logical Devices in HA or standalone. For multiple containers in cluster mode, choose Cluster. Note that if choosing Cluster, all modules created within the cluster must have the same Type.
Specify the Device Name and Instance Type (Native or Container):
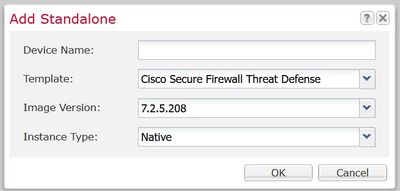 Specify Device Name and Instance Type

Note: The Instance Type can be elected as Native or Container. Creating a Native Instance allocates all the available resources in the chassis and Security Modules such as CPU, RAM, and disk space. Container Instance Type uses a fraction of the available resources. This enables the capability of installing multiple container FTD instances in the same chassis.

Caution: Multi-instance capability is only supported for the FTD using FMC; it is not supported for the Adaptive Security Appliance (ASA) or the FTD using Firepower Device Manager.
The provisioning screen is loaded afterwards:
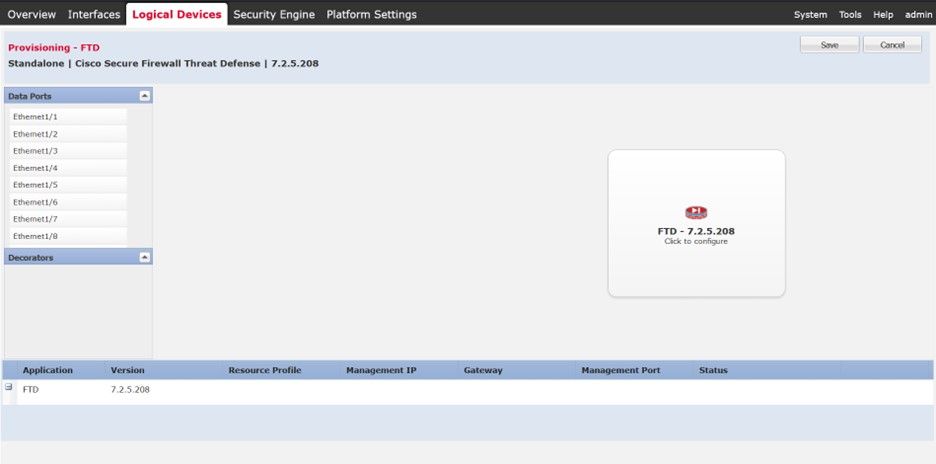 Logical Device Provisioning

Caution: Ensure there is at least one Management Interface for the FTD Logical instance you are creating. You can validate this by navigating to the Interfaces Tab > Edit Interface > Type . Change the type to management.
From the Data Ports panel, you can choose all the management and data interfaces in order to allocate for this instance by clicking on Ethernet 1/1. Such interface is allocated to the FTD instance:
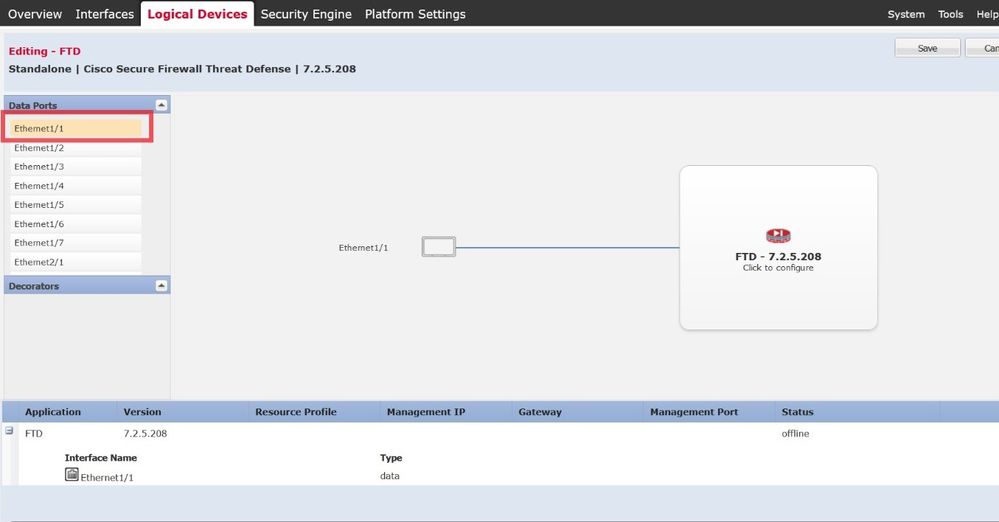
You can choose as many interfaces as required. In this example, you can see Interfaces Ethernet 1/1 to Ethernet 1/6 are allocated to this FTD instance:
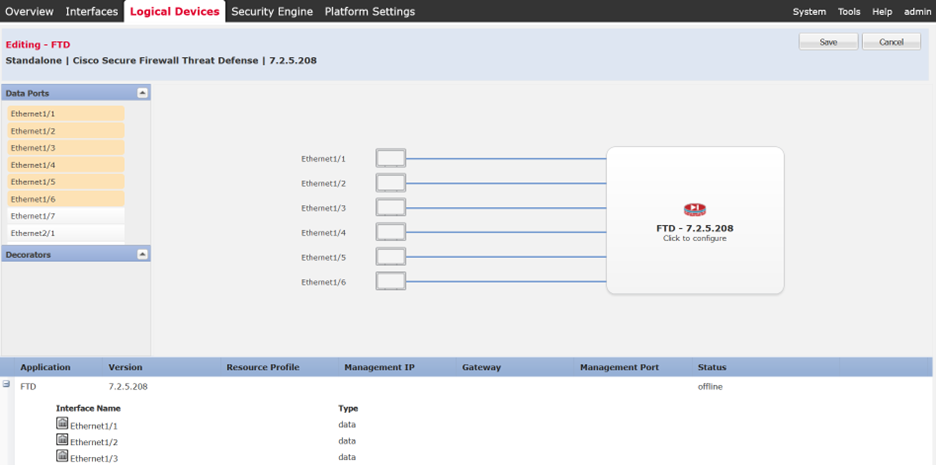 Interfaces Eth1/1 to Eth1/6 allocated to FTD instance
Moving forward, choose Click to configure. Bootstrap configuration is shown next with the General Information.
Specify the Management Interface, Address Type, Management IP, Network Mask and Gateway:
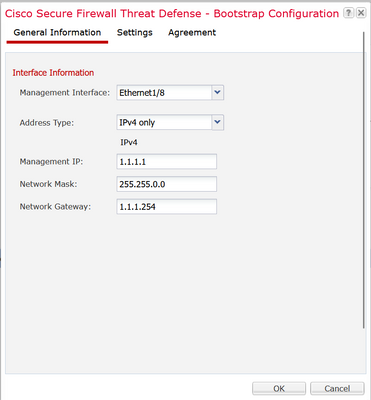 Bootstrap General Information
Choose Ok and you can configure the Bootstrap settings using these:
- Management type of application instance
- Search domains
- Firewall Mode
- DNS Servers
- Password
- Confirm Password
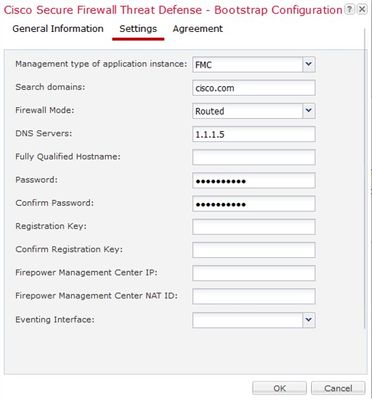 Bootstrap Configuration Settings.

Note: You can configure FMC settings and register the FTD at this stage or later using the FTD CLI initial configuration.
Choose Ok, and Save:
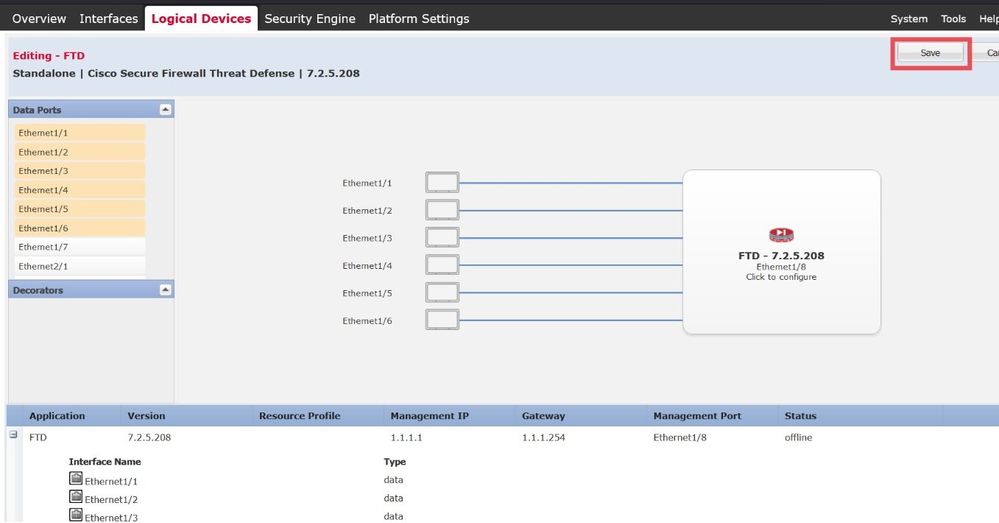
The Logical Device List page is displayed automatically, and your Application Status is shown as Starting:
 Logical Device List with Application Status as Starting.
You can also confirm and track the Logical instance status using the CLI. Connect via SSH or console to FPR4125 Chassis:
FPR4125# scope ssa
FPR4125 /ssa # show app-instance
Admin State is Enabled and Operational State shows Starting:
 Operational State is Starting.
After a few minutes, the Operational State displays Started:
 Operational state progressed to Started
App-Instance Operational State is switched to Online. At this point, the FTD Native logical instance has been completely installed in the FPR4125 Chassis and you can perform the initial configuration of FTD.
 Operational State is switched to Online
 FCM shows FTD Logical instance is Online.
Verify
Finally, you can validate that the access to the FTD Logical Device is successful from FXOS CLI with these commands:
FPR4125# connect module 1 console
Firepower-module1>connect ftd
Connecting to ftd(FTD) console... enter exit to return to bootCLI
> show version
 FTD Show version output
Manage Logical Instance
The Edit and Options icons are available within the Logical Device List tab on the right side.
Choosing options displays:
- Delete
- Set version
- Enable Link State
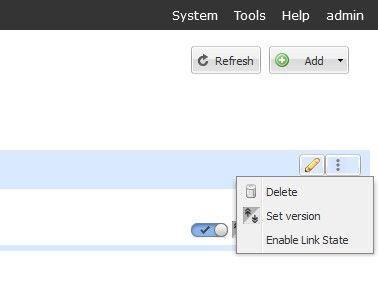 Select Options Icon.
With the Delete option, you can completely remove the FTD Logical device instance from the chassis and release all resources dedicated to the FTD instance. This also causes the Security Module to restart.
Choosing the Set Version icon shows the Update Image version banner and you can choose the New Version to update FTD. Note that you are required to upload the FTD image file to the FPR4125 chassis beforehand.
Enable Link State is used when FTD is configured with an inline set interface and can enable link state propagation.
Now, you can see the Disable, Set Version, Restart Instance, and Reinstall Instance icon options as shown in this image:
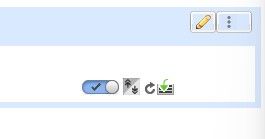 Disable, Set Version, Restart and Reinstall Icons

Warning: During normal operation of the FTD device Disable, Restart, and Reinstall options are not advised. If you are planning to perform an FTD reboot or restart, the recommended approach is to perform the said actions from the Cisco Secure Firewall Management Center or FTD CLI (graceful restart).
 Disable Icon.
This option disables and shuts down the FTD logical instance without removing any configuration. When you choose Disable, you see the confirmation banner as shown in this image:
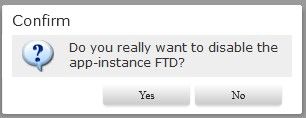 Confirm Disable.
The Logical Instance Status is changed to Stopping:
 Operational state is Stopping.
The FTD Logical Instance Status is switched to Offline:
 Operational State is Offline.
 Restart Instance Icon.
This option is used to immediately restart the application instance and oftentimes can be used after modifying the bootstrap settings of a logical device.
 Reinsall.
Choosing this option removes all application configurations and resets the factory settings on the FTD logical instance software. A confirmation banner is shown before proceeding:
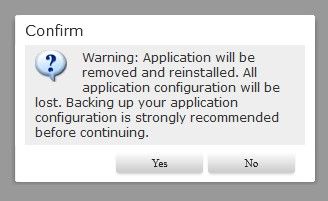 Confirm Reinstall.
Troubleshoot
During abnormal operations, ungrateful or unexpected reboots of the device, the Operational Status of the logical instance can show abnormal states like 'Security Module not responding':
 Operational State is Not Responding.
Navigate to the Security Engine tab. Service State of the Security engine shows Not-responding.
 Security Engine state is Not-responding.
You can validate the app-instance operational status from FXOS CLI by issuing this command:
# show app-instance detail
Security Engine can be reset in case no critical or major security module faults are observed and the operational state of app instance is in Starting. Choose Reinitialize Security Engine.

Warning: Ensure that you have a FTD configuration backup before proceeding.
 Reinitialize Security Engine
After 3-5 minutes, the Security Engine Service State is back to the Online State:
 Security Engine State is Online.
Finally, the FTD Logical Instance is back to the Online state as well:
 Logical Instance State is back to Online

Note: If the reason or scenario of the degraded operational state matches to the described example, use these steps to fix the issue. For other reasons, it is recommended that you contact TAC.


 Feedback