Introduction
This document describes how to customize the Cisco Email Security Reporting and Encryption Plug-In buttons in Outlook.
Prerequisites
Requirements
Cisco recommends that you have knowledge of these topics:
Components Used
The information in this document is based on these software and hardware versions:
- Windows 10 64 bit, Outlook 2016 (64 bit) and Cisco Email Encryption Plug-in 1.2.1
The information in this document was created from the devices in a specific lab environment. All of the devices used in this document started with a cleared (default) configuration. If your network is live, ensure that you understand the potential impact of any command.
Background Information
You want to customize buttons that appear in the Cisco Email Reporting and Encryption section in your Outlook interface when you install the Cisco Email Security Plug-In.
Note: Contact Cisco Support if you do not have a CRES administrator account.
Configure
Reporting
Step 1. Microsoft Outlook is installed and closed.
Step 2. Install Cisco Email Security Plug-In manually to your PC.
Step 3. Navigate to CRES portal (https://res.cisco.com/admin/) and download BCE config file, as shown in the image.

Step 4. Modification on the BCE.xml file depends on your business needs.
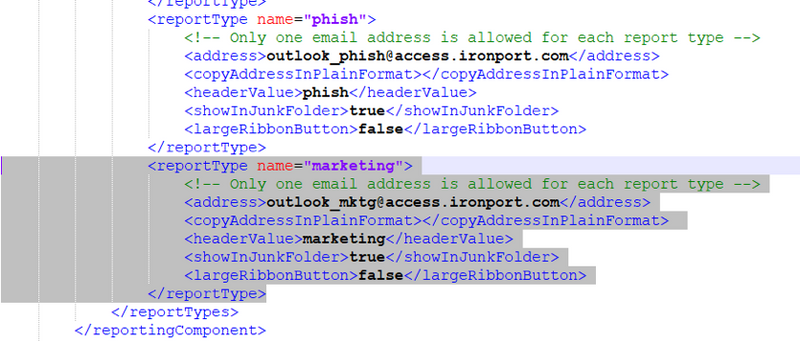
For example: In order to remove the Marketing button, you need to navigate to reportType name="marketing" section and delete this section, as shown in the image.


Step 5. Complete the changes to the BCE.xml file and save it.
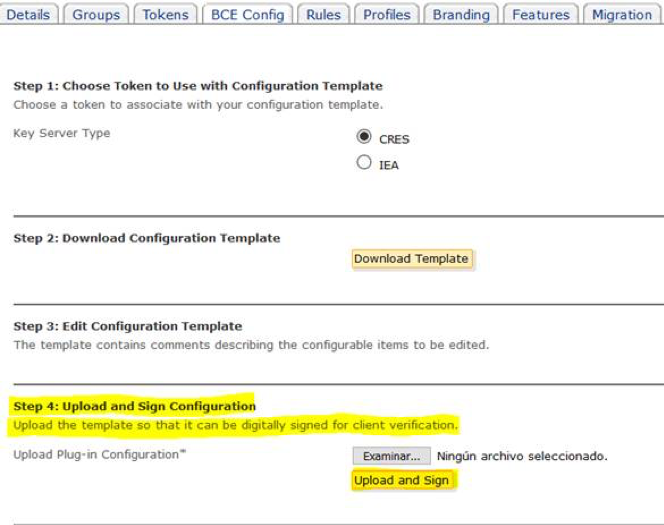
Step 6. On the CRES administrator portal, navigate to the BCE Config tab to upload the file as provided.
Step 7. Click on Upload and Sign, as shown in the image.

Step 8. Copy the new signed file generated called BCE_Config_signed.xml to C:\ProgramData\Cisco\Cisco Email Encryption Plug-In\Common and rename it as config_1.xml as shown in the image.

Step 9. Open the file named as CommonComponentsConfig.xml under CommonComponentsConfiguration tag and add these strings, as shown in the image.
<accountFileNames>
<accountFileName filePath="config_1.xml" emailAddressAndKeyServer="*"/>
</accountFileNames>

Step 10. Open Microsoft Outlook and verify that customization is set as desired.
Encryption
Plugin software adds another section called Cisco Email Encryption which contains two more buttons, as shown in the image:

Manage Messages button is disabled when you change from true to false the value in the file named as config_1, in this line:
<showManageMessageButton>false</showManageMessageButton>
Plugin Options button is disabled when you change from true to false the value in the file named as config_1, in this line:
<showPluginOptions>false</showPluginOptions>
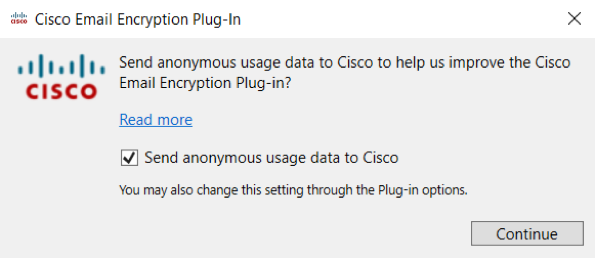
Call Home pop-up window looks as shown in the image:

This setting is disabled when you change from true to false the value in the file named as config_1, in this line:
<callHome>
<callHomeAdminEnabled>false</callHomeAdminEnabled>
</callHome>
Note: Lines for the callHome pop-up window cannot appear in the config_1 file if this is the case you need to add the above lines and change the value to false in order to avoid discrepancies.
After you modify these three last options ensure that you follow the steps 5-10 in order to save the changes properly.
Verify
Ensure you do the proper process and verify the results in Outlook client. You can close and open Outlook in order to make the client to load the new changes.
Related Information


 Feedback