Introduction
This document describes how to install metadata file on the Microsoft Active Directory Federation Services (ADFS).
Prerequisites
Requirements
Cisco recommends that you have knowledge of these topics:
- ADFS
- Security Assertion Markup Language (SAML) integration with Security Management Appliance
Components Used
The information in this document is based on these software and hardware versions:
The information in this document was created from the devices in a specific lab environment. All of the devices used in this document started with a cleared (default) configuration. If your network is live, ensure that you understand the potential impact of any command.
Background Information
Before the Metadata file is installed in the ADFS, ensure that these requirements are addressed:
Configure
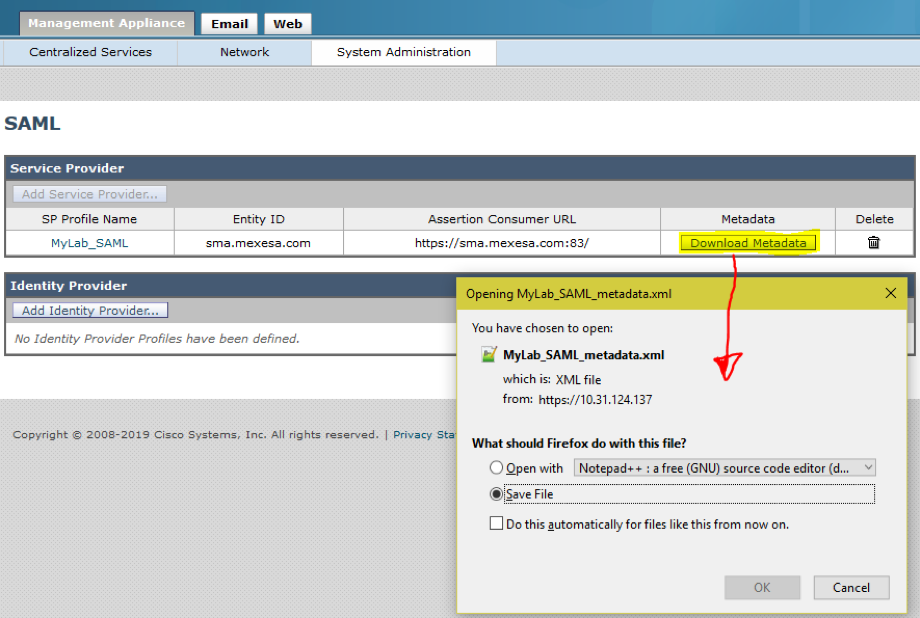
Step 1. Navigate to your SMA and select System Administration > SAML > Download Metadata, as shown in the image.
Step 2. The Identity Provider Profile fills out automatically when the Customer uploads his ADFS Metadata file. Microsoft has a default URL: https://<ADFS-host>/FederationMetadata/2007-06/FederationMetadata.xml.
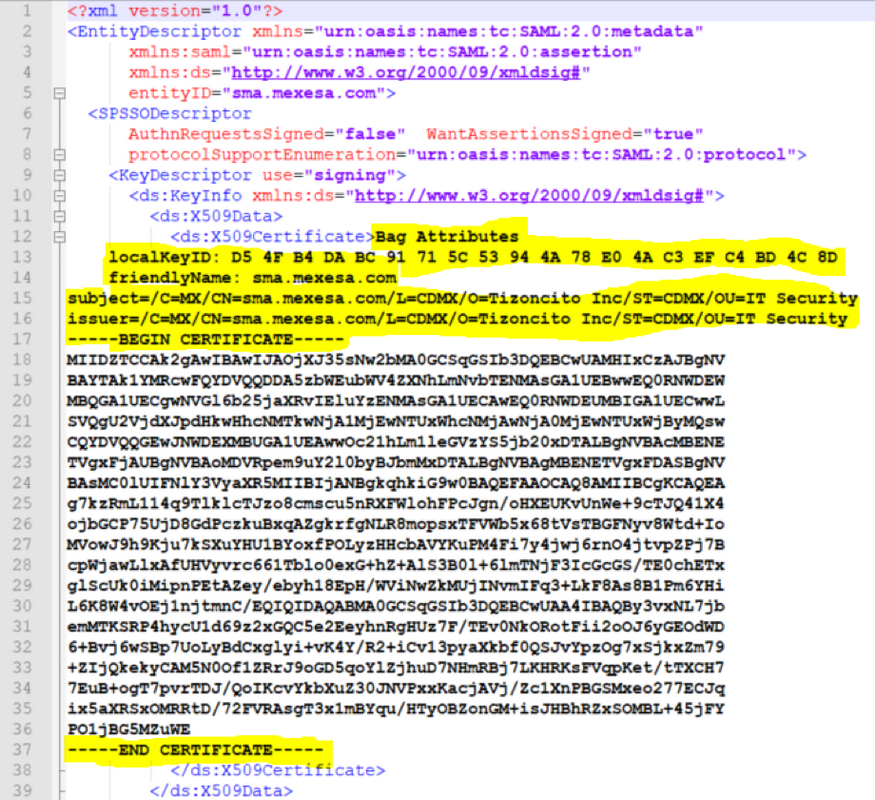
Step 3. Once both profiles are setup, the SP Profile Metadata must be edited, as per bug CSCvh30183.. Metadata file looks as shown in the image.
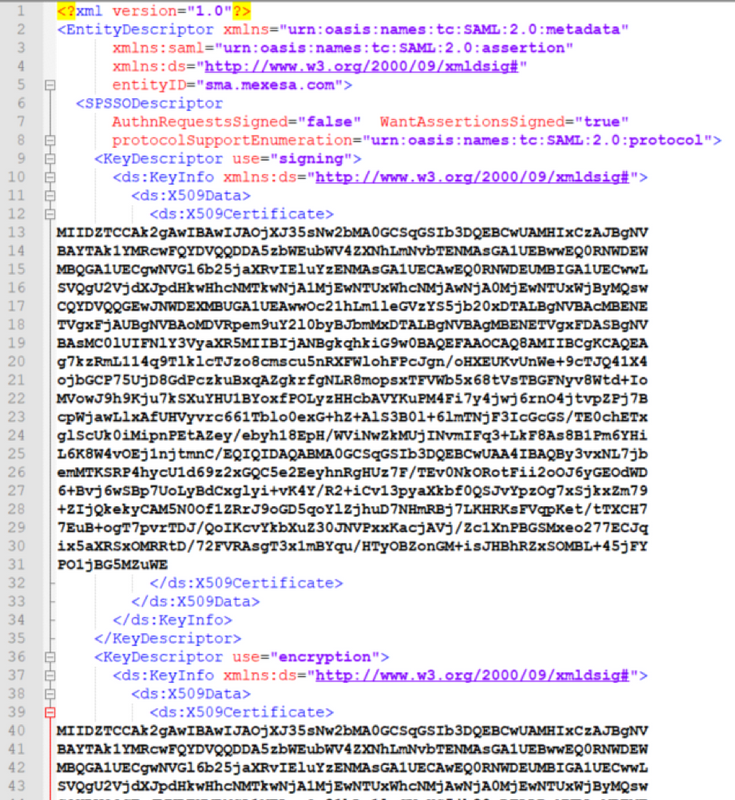
Step 4. Remove the highlighted information, at the end Metadata file must be as shown in the image.
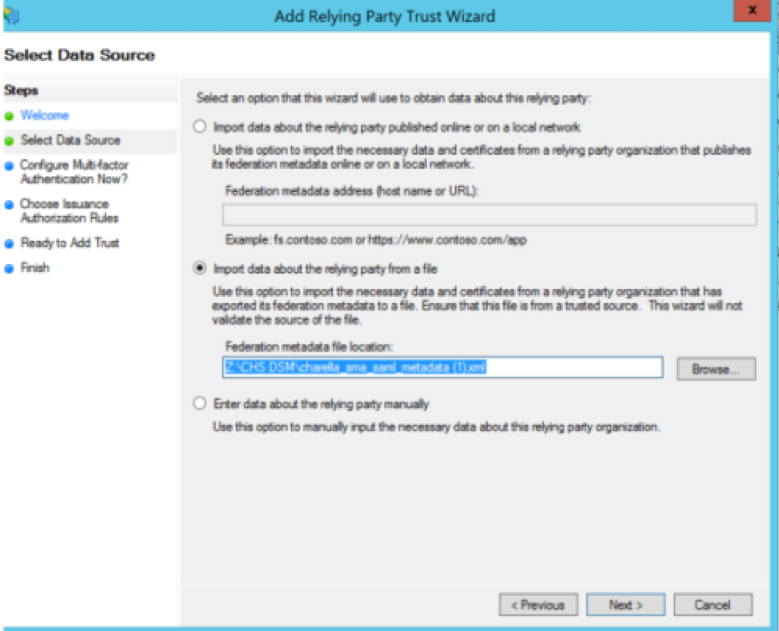
Step 5. Navigate to your ADFS and import the edited Metadata file in the ADFS Tools > AD FS Management > Add Relying Party Trust, as shown in the image.
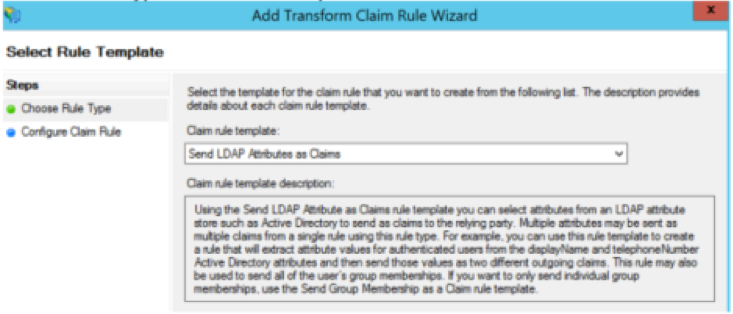
Step 6. After you successfully import the Metadata File, configure the Claim Rules for the newly created Relying Party Trust, select Claim rule template > Send LDAP Attributes, as shown in the image.
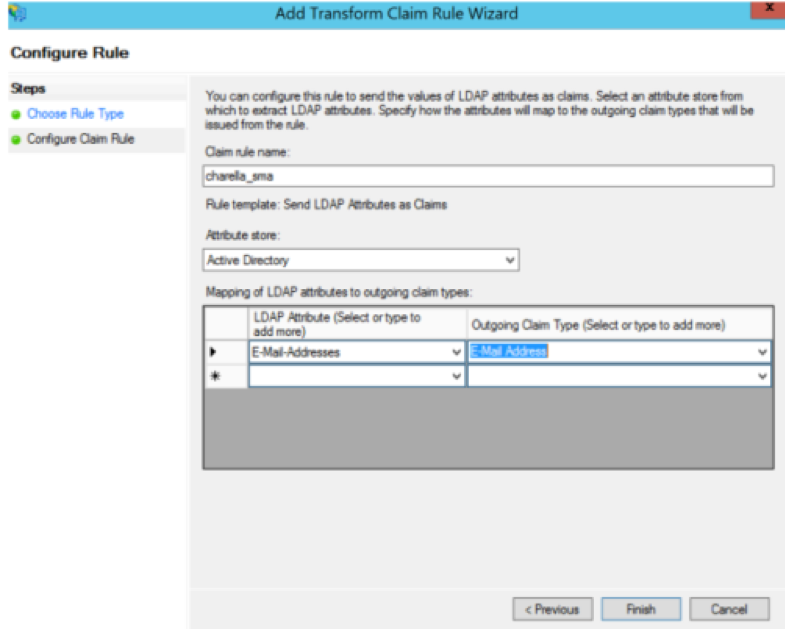
Step 7. Name the Claim rule name, and select Attribute Store > Active Directory.
Step 8. Map LDAP Attributes, as shown in the image.
- LDAP Attribute > E-Mail-Addresses
- Outgoing Claim Type > E-Mail-Address
Step 9. Create a new Custom Claim rule with this information, as shown in the image.
This is the custom rule that needs to be added to the Custom Claim rule:
c:[Type == "http://schemas.xmlsoap.org/ws/2005/05/identity/claims/emailaddress"] =>
issue(Type = "http://schemas.xmlsoap.org/ws/2005/05/identity/claims/nameidentifier", Issuer
= c.Issuer, OriginalIssuer = c.OriginalIssuer, Value = c.Value, ValueType = c.ValueType,
Properties["http://schemas.xmlsoap.org/ws/2005/05/identity/claimproperties/format"] =
"urn:oasis:names:tc:SAML:1.1:nameid-format:emailAddress",
Properties["http://schemas.xmlsoap.org/ws/2005/05/identity/claimproperties/spnamequalifier
"] = "https://<smahostname>:83");
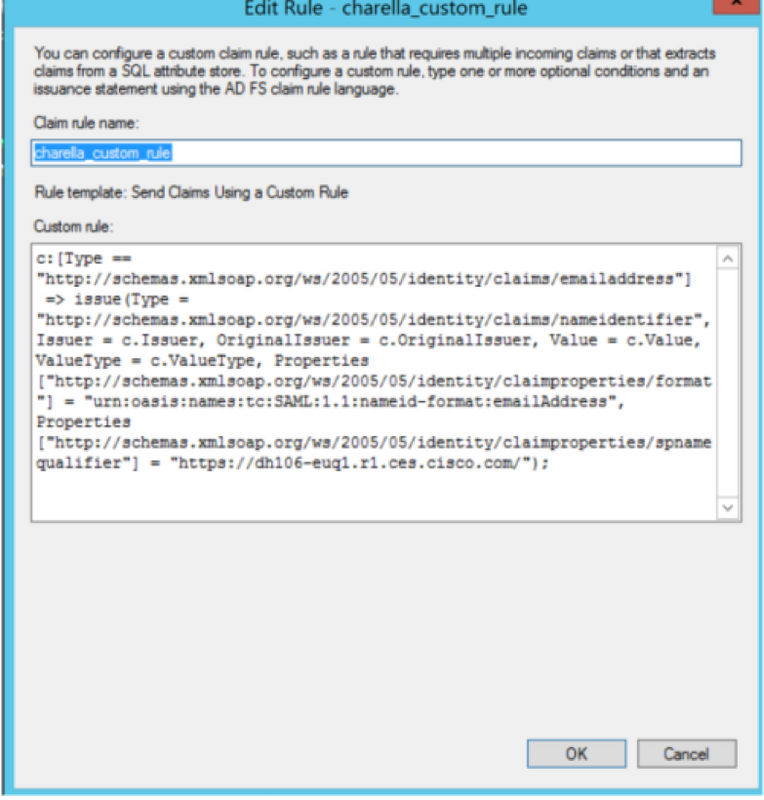
- Modify the highlighted URL with the SMA hostname and port (if you are on a CES environment, a port is not required but it must point to euq1.<allocation>.iphmx.com)
Step 10. Ensure that the Claim rule order is: LDAP claim rule first and Custom Claim rule second, as shown in the image.

Step 11. Log in to the EUQ, it must redirect to the ADFS host.
Verify
There is currently no verification procedure available for this configuration.
Troubleshoot
There is currently no specific troubleshooting information available for this configuration.
Related Information
