Introduction
This document describes how to troubleshoot the error "Error occurred while retrieving metadata information" for Security Assertion Markup Language (SAML) in the Security Managment Appliance (SMA).
Prerequisites
Requirements
Cisco recommends that you have knowledge of these topics:
- ADFS (Active Directory Federation Services)
- SAML integration with SMA
- OpenSSL installed
Components Used
The information in this document is based on these software and hardware versions:
- SMA AsyncOs version 11.x.x
- SMA AsyncOs version 12.x.x
The information in this document was created from the devices in a specific lab environment. All of the devices used in this document started with a cleared (default) configuration. If your network is live, ensure that you understand the potential impact of any command.
Background Information
Cisco Content Security Management Appliance now supports SAML 2.0 Single Sign-On (SSO) so that the end-users can access the Spam Quarantine and use the same credentials that are used to access other SAML 2.0 SSO enabled services within their organization. For instance, you enable Ping Identity as your SAML identity provider (IdP) and has accounts on Rally, Salesforce, and Dropbox which have SAML 2.0 SSO enabled. When you configure the Cisco Content Security Management appliance to support SAML 2.0 SSO as a Service Provider (SP), end-users can sign in once and have access to all these services including Spam Quarantine.
Problem
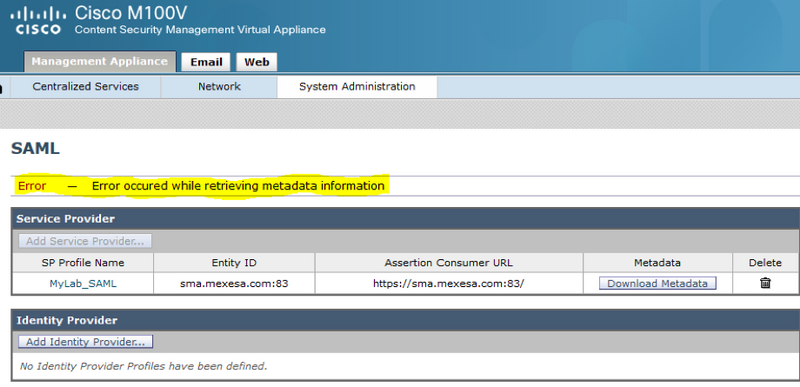
When you select Download Metadata for SAML you get the error "Error occurred while retrieving metadata information", as shown in the image:

Solution
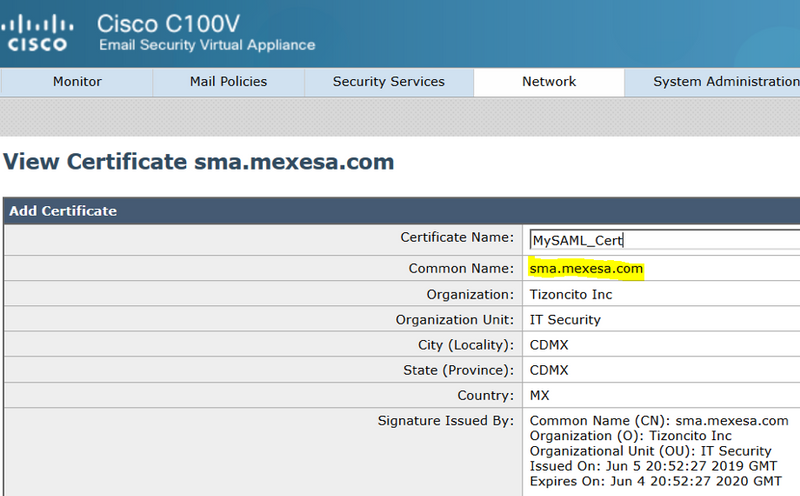
Step 1. Create a new self-signed certificate on the Email Security Appliance (ESA).
Ensure the common name is the same as the Entity ID URL, but without the port number, as shown in the image:

Step 2. Export the new certificate with a .pfx extension, type in a passphrase, and save it in your machine.
Step 3. Open a windows terminal and input these commands, provide the passphrase on the previous step.
- Run the this command to export the private key:
openssl pkcs12 -in created_certificate.pfx -nocerts -out certificateprivatekey.pem -nodes
- Run this command to export the certificate:
openssl pkcs12 -in created_certificate.pfx -nokeys -out certificate.pem
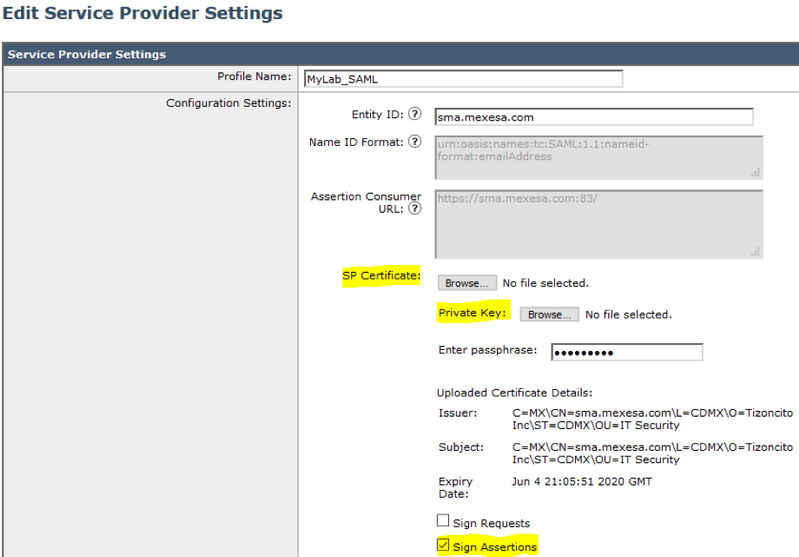
Step 4. At the end of this process, you must have two new files: certificateprivatekey.pem and certificate.pem. Upload both files in the Service Provider Profile and use the same passphrase you use to export the certificate.
Step 5. The SMA requires both files to be in .PEM format for it to work, as shown in the image.

Step 6. Ensure you select the Sign Assertions checkbox.
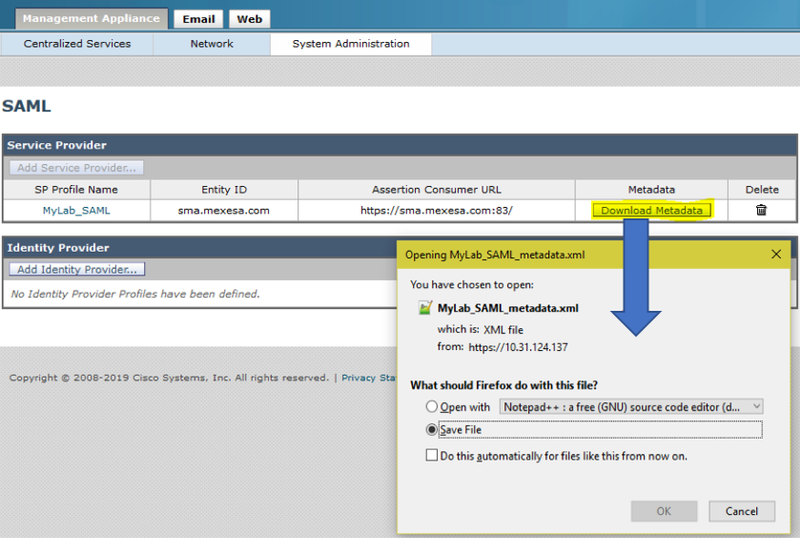
Step 7. Submit and commit the changes, you must be able to download the Metadata, as shown in the image.

Related Information


 Feedback