Introduction
This document describes the process of 3-node vManage cluster if configuration or db upgrade is not needed or new code is in the same software train.
Prerequisites
- Snapshots of the 3 VM per vManage Node taken by the vManage administrator if the solution is On-Prem or taken by Cisco CloudOps Team if the solution is hosted in Cisco.
- Take a backup of the configuration-db with the command request nms configuration-db backup path path/filename
- Copy the configuration-db backup file out of the vManage node.
Components Used
- vManage cluster of 3 nodes on 20.3.4 version.
- The 20.3.4.1 vManage image.
The information in this document was created from the devices in a specific lab environment. All of the devices used in this document started with a cleared (default) configuration. If your network is live, ensure that you understand the potential impact of any command.
Background Information
The process described on this document refers to upgrades that do not need a configuration-db upgrade.
Check the Cisco vManage Upgrade Paths document that is located on the Release Notes of each code to verify if configuration-db upgrade is needed.
Note: The configuration-db must be upgraded when the upgrade is from a Cisco vManage Release 18.4.x/19.2.x to Cisco vManage 20.3.x /20.4.x or from a Cisco vManage Release 20.3.x/20.4.x to Cisco vManage Release 20.5.x/20.6.x. Refer to Upgrade Cisco vManage Cluster.
Upgrade Process
- Ensure in each vManage cluster node that:
- Control Connections are up between each vManage node.
- Network Configuration Protocol (NETCONF) is stable
- Out-of-band interfaces are reachable between each vManage node.
- Data Collection Agent (DCA) is in
RUN state on all nodes in the cluster.
To check NETCONF status, navigate to Tools > SSH Session and login on each vManage node. If the login is a success, the NETCONF is good.
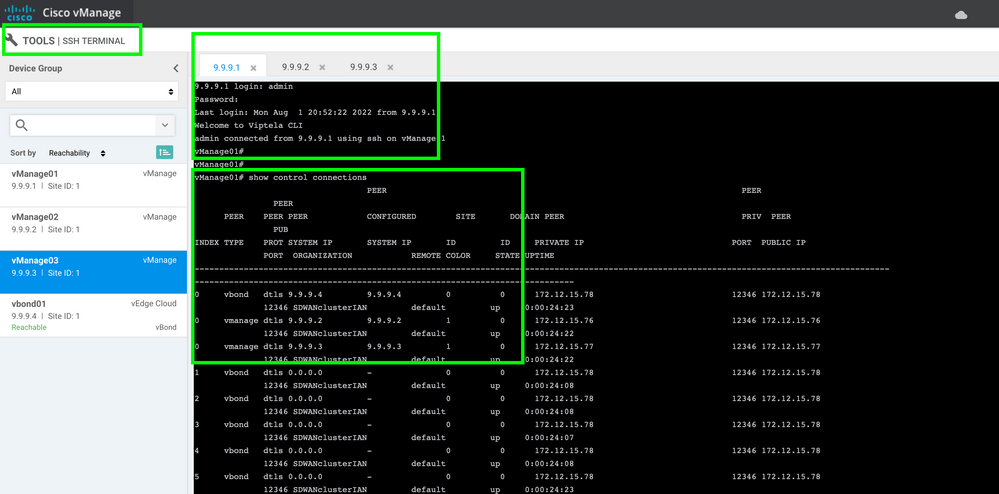
The show control connections shows if there is control connections between the vManage nodes, as shown in the image.
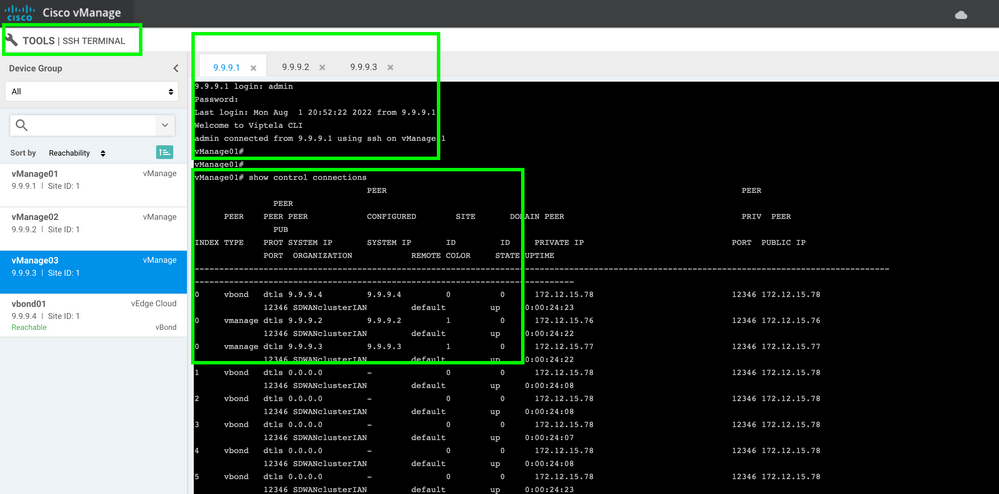
To check the conectivity, ping the remote out-of-bands ips and source the interface out-of-band from any vManage node .
Use the request nms data-collection-agent status command to check the status of the DCA.
2. Upload the new Cisco Viptela vManage code on the vManage Software Repository on one node.
3. Navigate to Maintenance > Software Upgrade.
4. Check the box of the 3 vManage nodes, click Upgrade, and choose the new version.
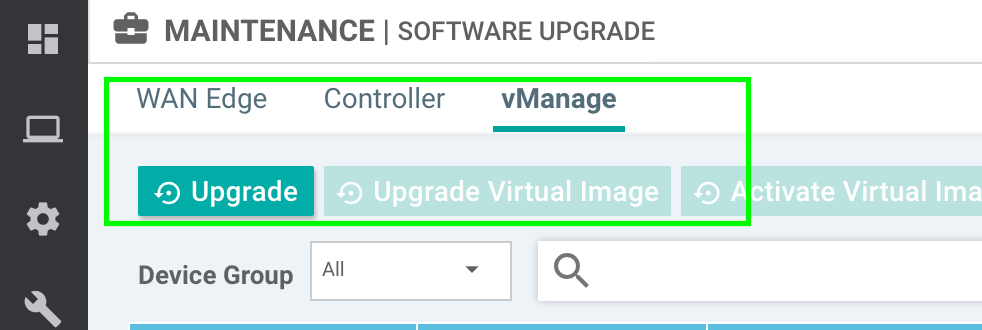
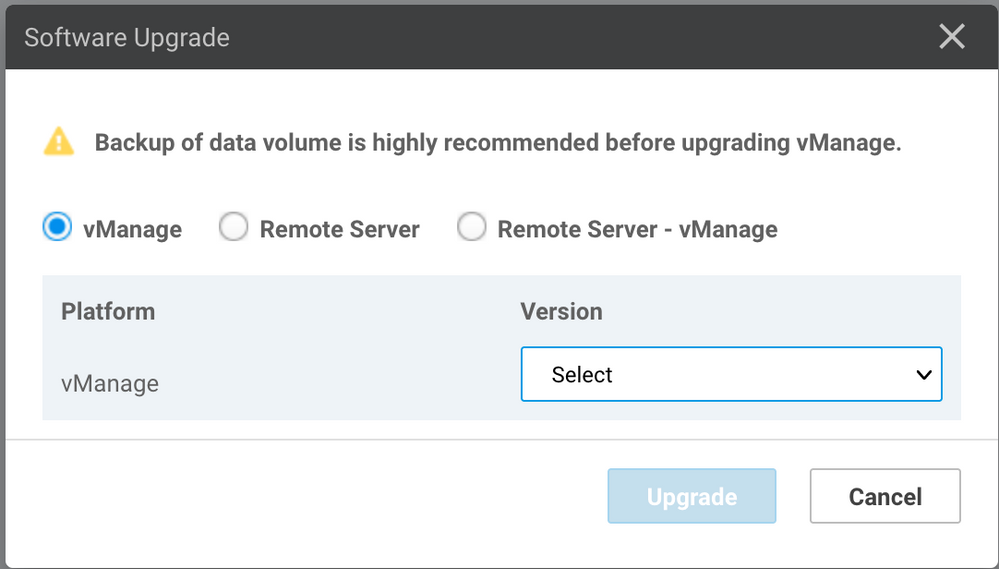
5. Select Upgrade option and check vManage as the plataform.
6. Select the new code from the dropdown menu and click Upgrade..
7. The software installation is performed node by node. While the first vManage node starts with the new code installation, the other nodes are in Scheduled status.
After the first node is successful, it starts to install the new code on the next vManage node until the three (3) nodes have the image installed succesfully.

Note: The upgrade action for vManage cluster is not the same as that in a standalone vManage or any other device in the overlay. The upgrade action by GUI installs the image on the vManage nodes only. It does not activate the new code on the vManage nodes..
The new code activation is done manually by request software activate <code> command.
Note: The installation of the new code fails if the NETCONF sessions are not healthy; either there are no Control connections between vManages nodes or the out-of-band interfaces have reachability issues between them.
8. After the new code is downloaded and installed on each vManage node, activate the new code manually.
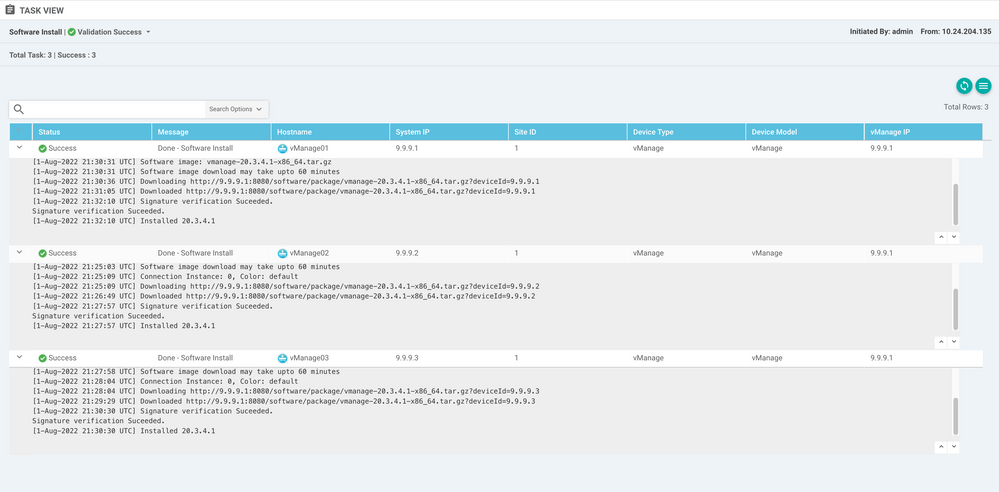
The show software output confirms that the new code was installed. Check the show software command on each node and verify that each node installed the image succesfully.

9. Run the request nms all status command to get the output for each vManage node and determine which services are enabled prior to the upgrade.
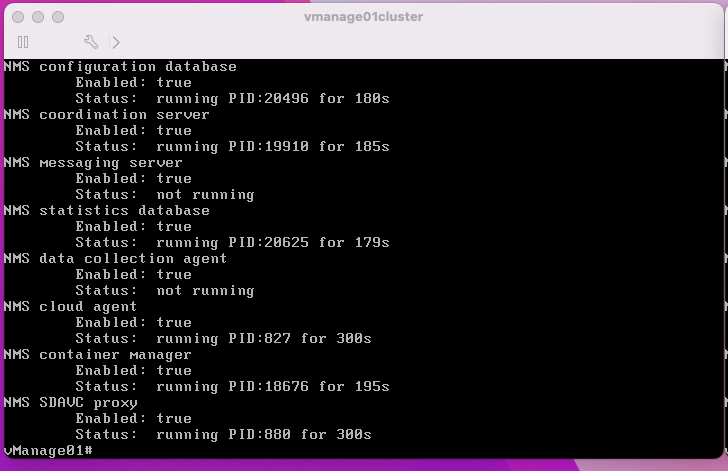
10. Use the request nms all stop command to stop all the services on each vManage node.

Tip: Do not interact with the CLI session until all nms services are stopped in order to avoid any unexpected issue.
11. Prepare the request software activate <code> command and keep it ready on each CLI session per vManage node.


12. Enter the request software activate command on each vManage node and confirm the activation for the new code.

After the activation, each node is rebooted to boot with new partition code. The vManage GUI is temporarily unreachable, as shown in the image.
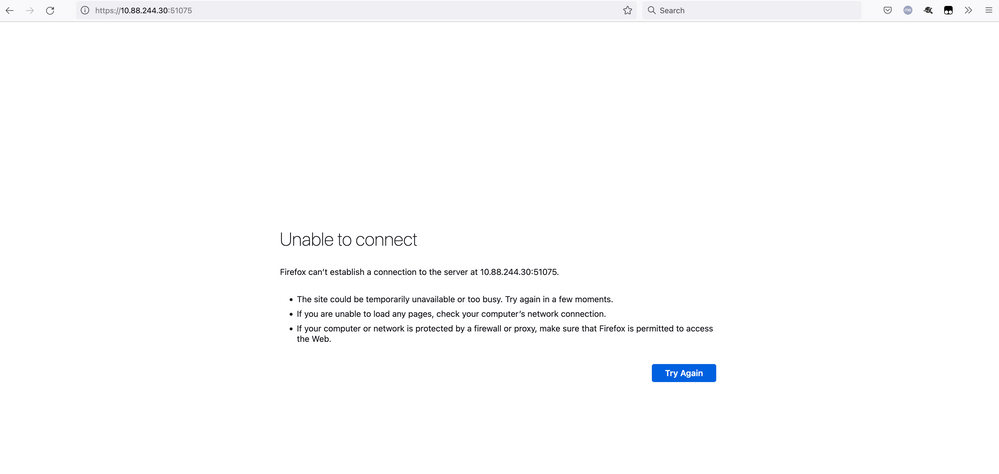
13. When the system is ready, it allows you to log in on each vManage node and shows the new version of the vManage.
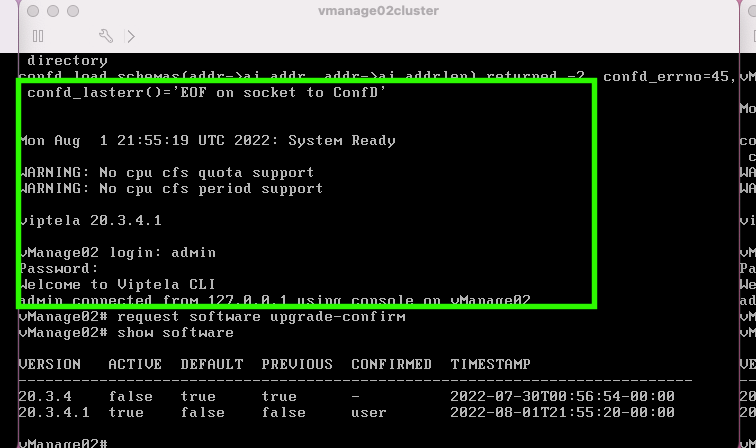
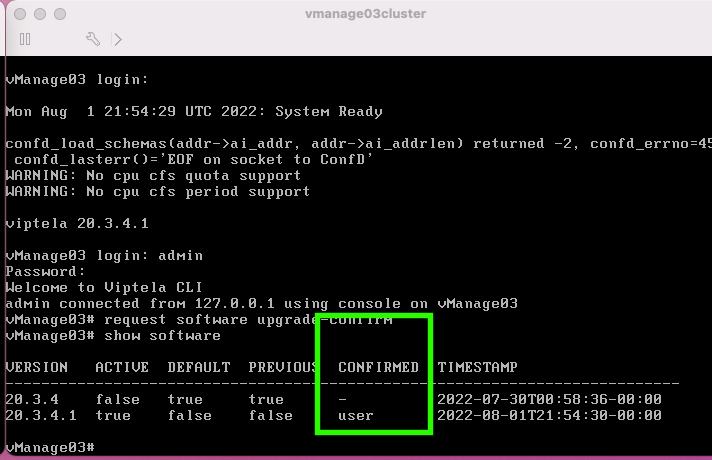
Use the request software upgrade-confirm to confirm the upgrade on each vManage node.
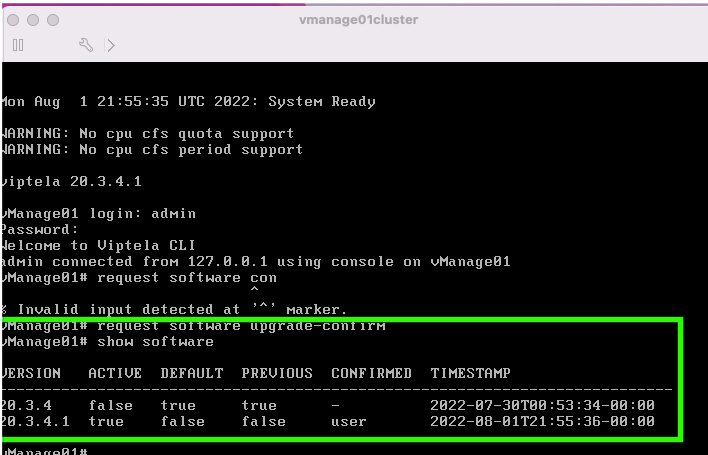
Verify whether the status is confirmed by user or auto
14. Once the activation is done, all NMS eventually start independently.
If some services did not start, stop all services on ecah vManage node again after the activation, and restart the NMS manually node by node, service by service.
Follow the sequence documented on Manually Re-Start vManage Processes.
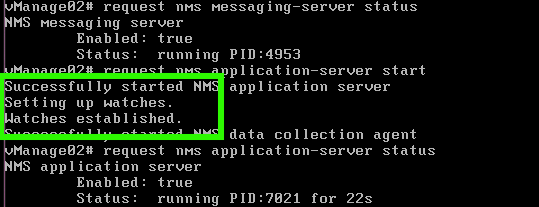
When the application server starts, observe that watches are established log on each node.
Verify
Use the request nms all status output to verify all services that functioned prior to the upgrade are in RUN state after the new code activation.

Join to any of the Cisco vManage GUI nodes and check that 3 vManage nodes are in good status in the vManage Dashboard.

Navigate to Administration > Cluster Management to verify that each vManage node is on ready status and the services function properly (only SD-AVC as optional).

Verify that all nodes are reachable via SSH tool form vManage GUI. If you can login and see control connections for each vManage node cluster and cedges/vedges, the cluster is in a good state and NETCONF sessions are established between nodes.
Related Information
vManage Cluster Guide
Technical Support & Documentation - Cisco Systems


 Feedback