Introduction
This document describes how to enable blur or virtual background on Cisco WebApp calls.
Prerequisites
Requirements
Cisco recommends that you have knowledge of Cisco Meeting Server (CMS) and API programming.
Components Used
The information in this document is based on CMS Version 3.6 and onwards.
The information in this document was created from the devices in a specific lab environment. All of the devices used in this document started with a cleared (default) configuration. If your network is live, ensure that you understand the potential impact of any command.
Background Information
WebApp participants can now blur their backgrounds in WebApp meetings. When you blur the background, it makes the background appear hazy and hides the details behind the users. Users can blur their background only after they have joined the meeting and not on the preview page. A new option Blur is included in the WebApp in the camera settings.
Note: It is recommended to disable HD when background blur is enabled. There can be audio and video sync issues if HD is enabled with background blur. Background blur works best with systems that have a Graphic Processing Unit (GPU).
This is the minimum system configuration required to use the Background blur feature:
For Windows systems: Memory - 16 GB and CPU - 1.60 GHz
For Mac systems: Memory - 16 GB and CPU - 2.30 GHz
Configure
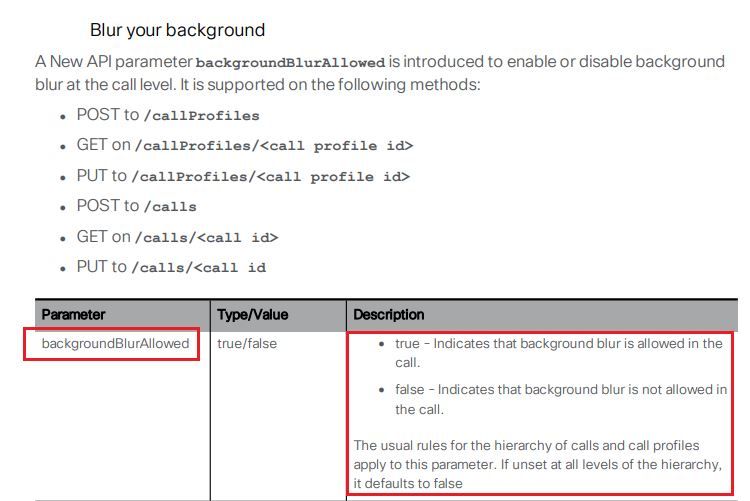
API parameter backgroundBlurAllowed is introduced to enable or disable background blur at the call level. It is supported by these methods:
Test scenario:
1. Assign a callProfile which has backgroundBlurAllowed enabled on a test Space.
2. Test WebApp call to test space.
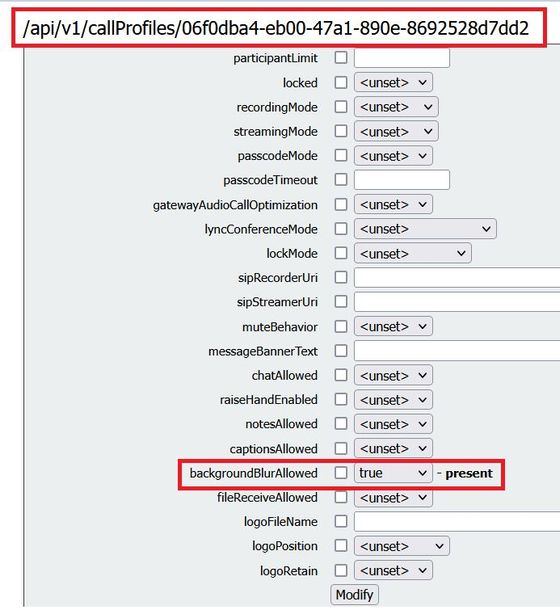
Step 1. Create a callProfile and enable parameter backgroundBlurAllowed to true as shown in the image.
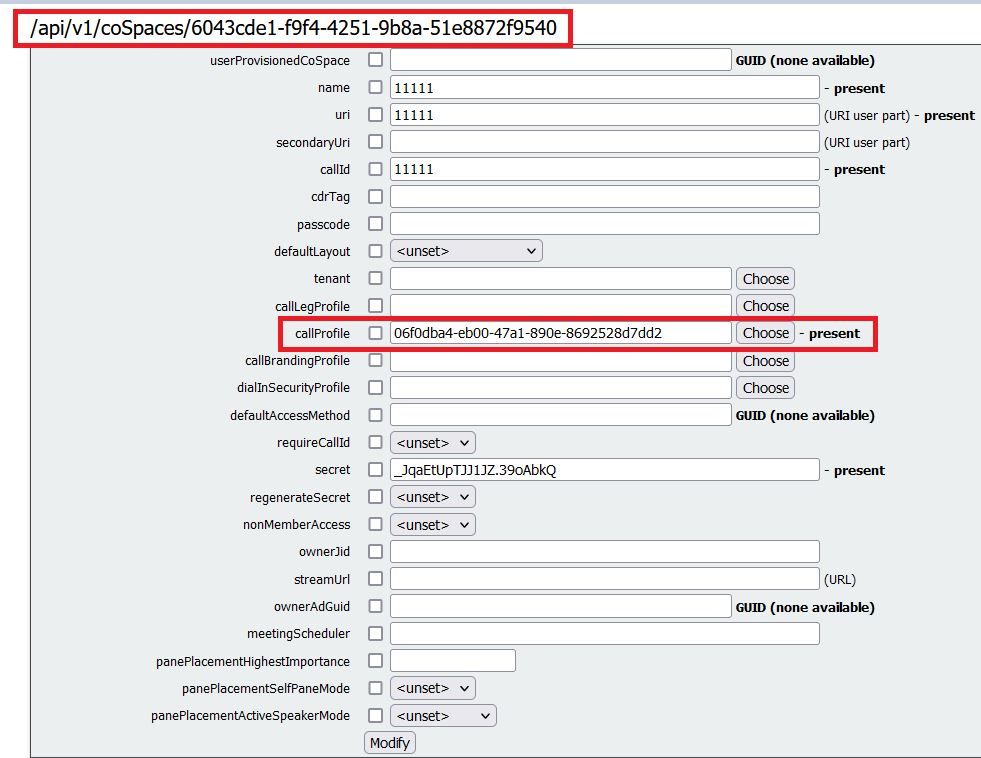
Assign the CallProfile to a CoSpace as shown in the image.
Verify
Use this section in order to confirm that your configuration works properly.
Test a WebApp call with blur background or imaged background.
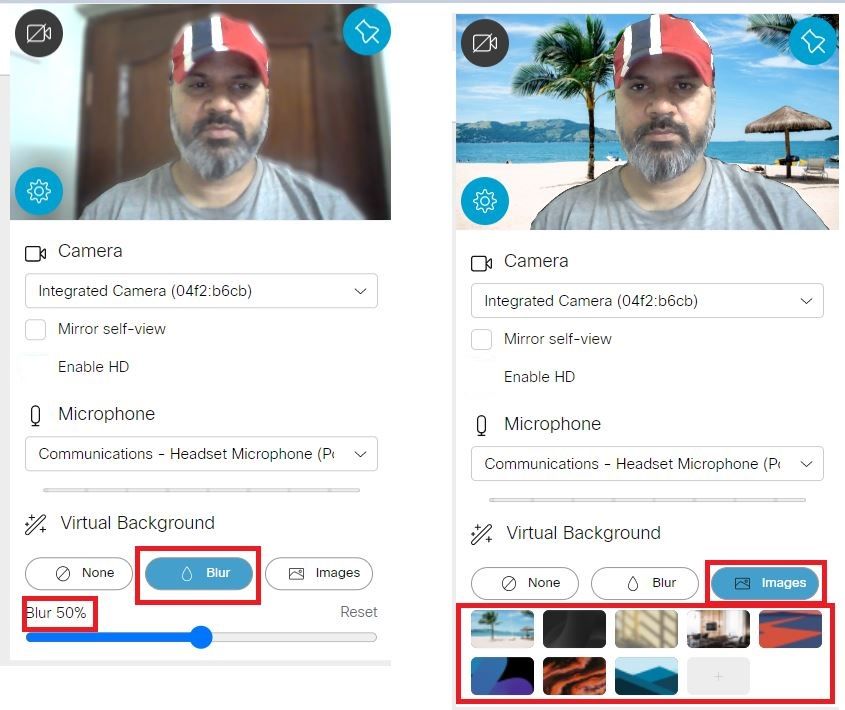
Step 1. Make a test call from the WebApp client into space where the callProfile with backgroundBlurAllowed is enabled. Click on the gear icon as shown in the image.
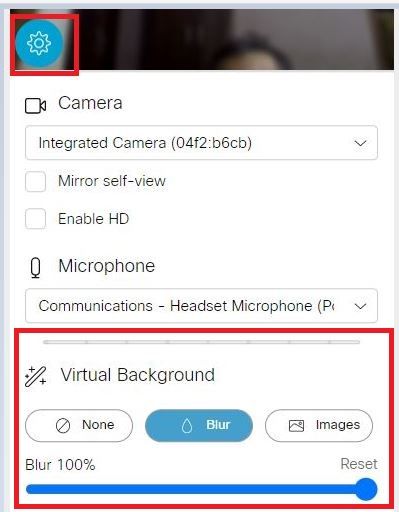
Step 2. You can choose either to Blur the background or you can select from the available background images as shown in the image.
Troubleshoot
There is currently no specific troubleshooting information available for this configuration.


 Feedback