Introduction
This document describes the process to expand the subnet on an existing IP Pool on Cisco DNA Center.
Problem
When the design phase of our network is taking place, one of the most difficult tasks is defining the network subnets.
Usually, the scalability is not planned as needed, and the current configurations cannot match the business needs.
On Cisco DNA Center, you can configure IP addresses and allocate them per site, assigning a specific subnet. In this document, the steps on how you can reconfigure that subneting are presented.
Solution
For this document, a change of an IP pool with subnet /24 to an IP Pool with subnet /22 is used to demonstrate the process.
The correct process to fix this and avoid any DB disruption is to delete, and recreate the pool.

Tip: Save the current configurations on notes or screen captures to reconfigure the pools after deletion.
Remove Existing Pool
Step 1. Remove the VLAN that is assigned to the pool for each interface where it is used.
From the Cisco DNA Center menu, navigate to Provision > SD-Access > Fabric Sites.
Select the Fabric ID where the issue is present and navigate to Host Onboarding > Port Assignment.
You can filter the subnet like this example:
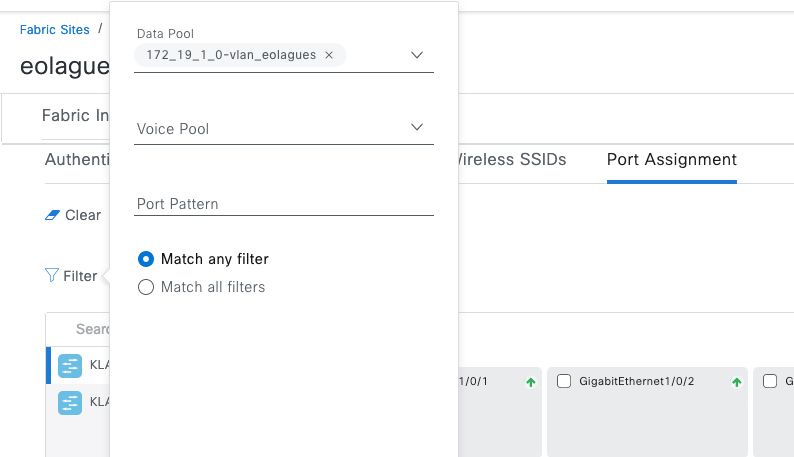 Filter under Host Onboarding
The result of the filter is:
 Hostonboarding Filtered
Select the interfaces, use the clear option, and click deploy.
This removes the information from the interfaces.
Step 2. Remove the IP Pool from the Virtual Network.
From the Cisco DNA Center menu, navigate to Provision > SD-Access > Fabric Sites.
Select the Fabric ID where the issue is present and navigate to Host Onboarding > Virtual Networks.
Step 2.1 Select the Virtual Network that has assigned the IP pool.
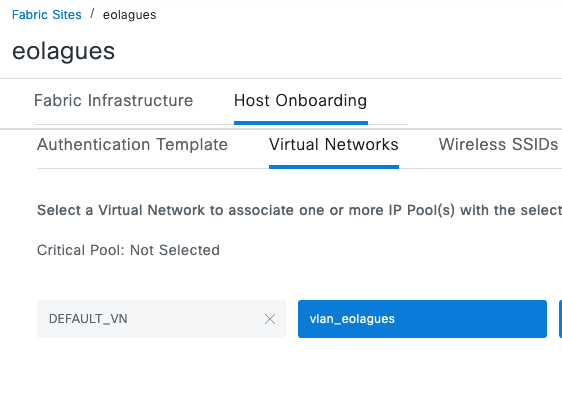 Select the VN
Step 2.2 Select the Vlan that is assigned the IP Pool.
Step 2.3 Select Actions, then Delete, and Deploy.
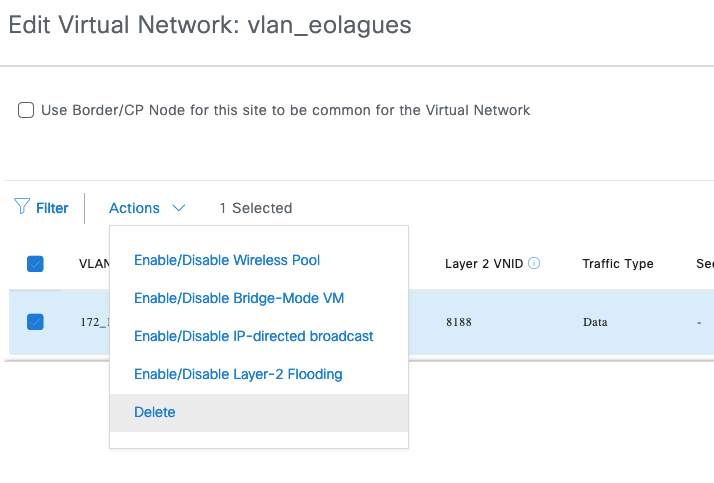 Delete the Selected VN
At this point, the VLAN is removed from all the network devices.
Step 3. Release the IP Pool from the Area or Building.
From the Cisco DNA Center menu, navigate to Design > Network Settings.
Select the Building or Area affected and click IP Address Pools.
Select the IP pool, then More Actions and the option Release.
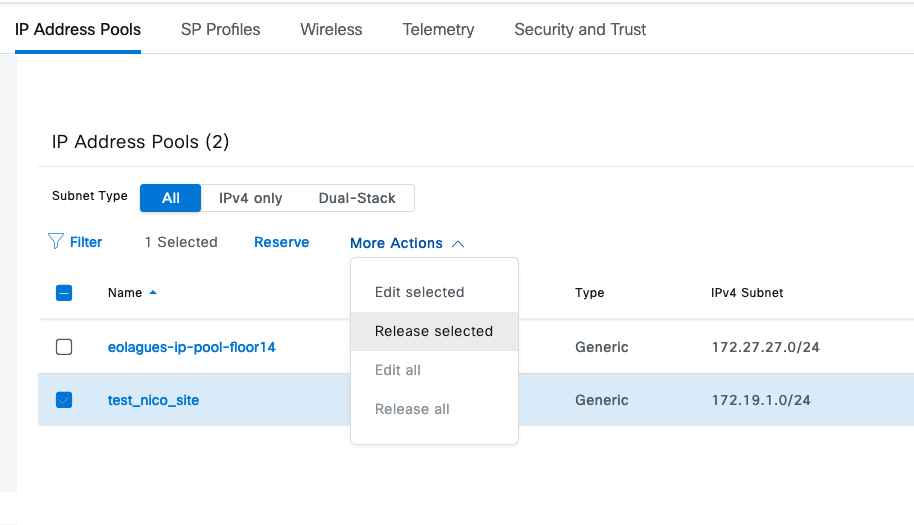 Release Pool
Step 4. Delete the IP Pool from the Global site.
From the Cisco DNA Center menu, navigate to Design > Network Settings > Global > IP Address Pools.
Select the IP pool and click More Actions, then select the option Delete Selected.
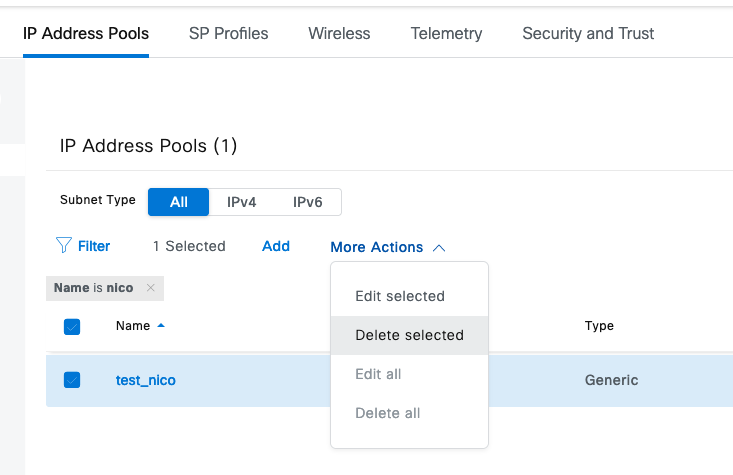 Delete Pool from Global
Create the New Pool
Step 1. Add the IP Pool to the Global site.
From the Cisco DNA Center menu, navigate to Design > Network Settings > Global > IP Address Pools.
Select the Add option and fill the blanks with the information from the old pool.
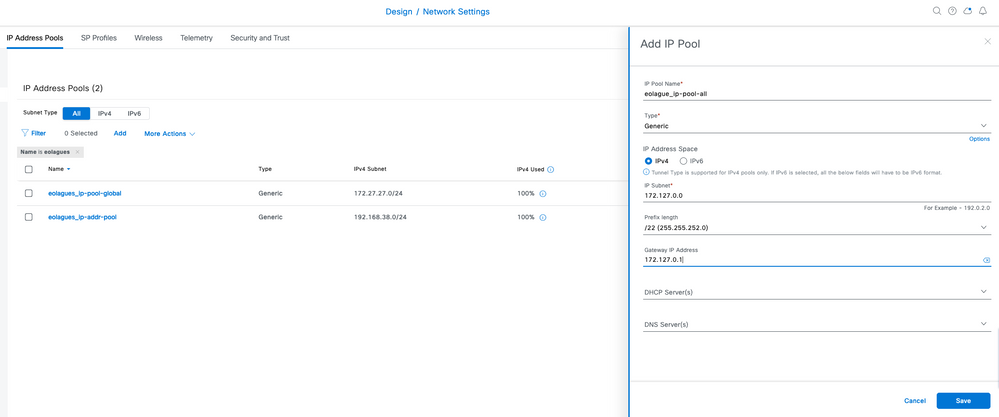 New Global Pool
Step 2. Add the IP Pool to the Area or Building
From the Cisco DNA Center menu, navigate to Design > Network Settings.
Select the Building or Area affected and select IP Address Pools.
Select the Reserve option and add the network or subnetwork.
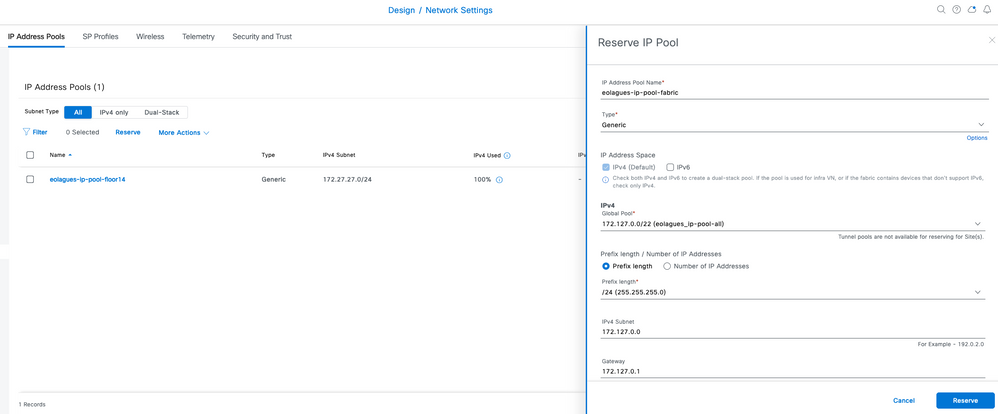 Reserve Pool on Area/Building
Step 3. Add the IP Pool from the Virtual Network.
From the Cisco DNA Center menu, navigate to Provision > SD-Access > Fabric Sites.
Click the Fabric ID where the issue is present and navigate to Host Onboarding > Virtual Networks.
Step 3.1 Select the Virtual Network the IP Pool needs to be added to.
Step 3.2 Click the Add option.
Step 3.3 Select the IP Address Pool that you assigned in step 2 of this section.
Step 3.4 Add the mandatory options.
VLAN ID
VLAN Name
Traffic
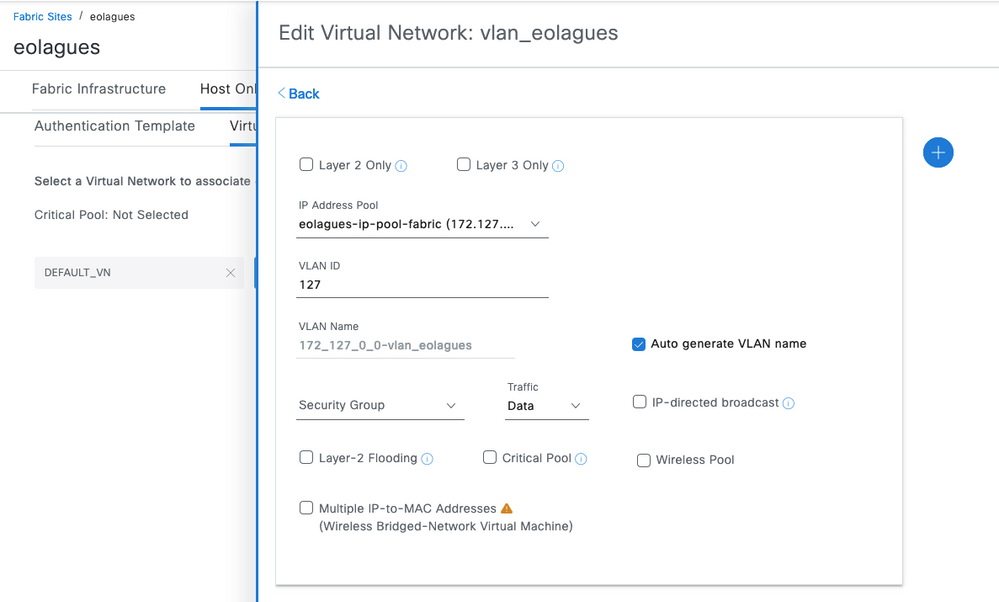 Adding Pool to VN
Step 3.5 After you add all the options, select deploy.
Step 3.6 This adds the VLAN to all the devices.
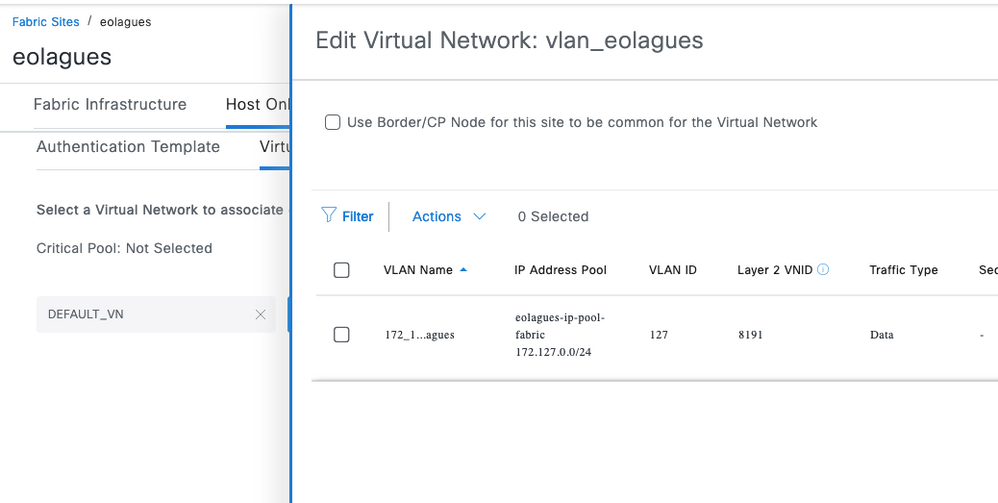 Pool Added to VN
Step 4. Assign the VLAN to the interfaces.
From the Cisco DNA Center menu, navigate to Provision > SD-Access > Fabric Sites.
Select the Fabric ID where the issue is present, and navigate to Host Onboarding > Port Assignment.
Select the interface or interfaces that you want to assign the VLAN to.
Select the type and the VLAN.
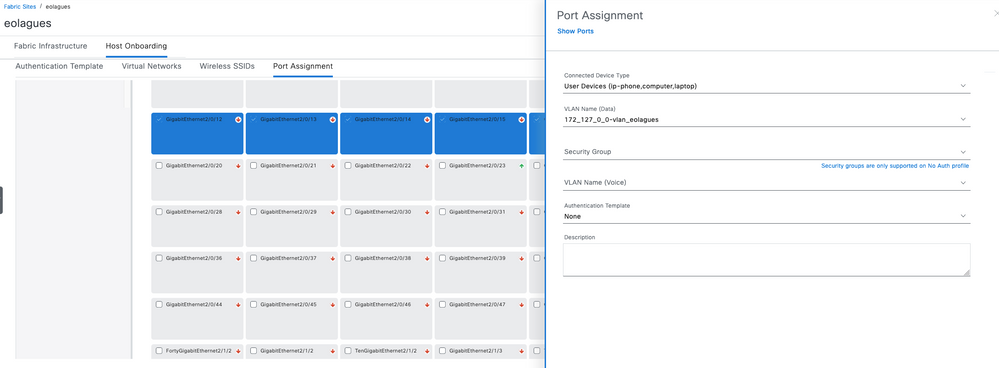 Hostonboarding Configuration
Finally, click Deploy.


 Feedback