Introduction
This document describes how to configure RADIUS External Authentication on Cisco DNA Center using a Cisco ISE server running 3.1 release.
Prerequisites
Requirements
Cisco recommends that you have knowledge of these topics:
- Cisco DNA Center and Cisco ISE already integrated and integration is on Active Status.
Components Used
The information in this document is based on these software and hardware versions:
- Cisco DNA Center 2.3.5.x release.
- Cisco ISE 3.1release.
The information in this document was created from the devices in a specific lab environment. All of the devices used in this document started with a cleared (default) configuration. If your network is live, ensure that you understand the potential impact of any command.
Configure
Step 1. Login to the Cisco DNA Center GUI and navigate toAuthentication and Policy Servers.
Verify RADIUS protocol is configured and the ISE status is Active for the ISE Type server.
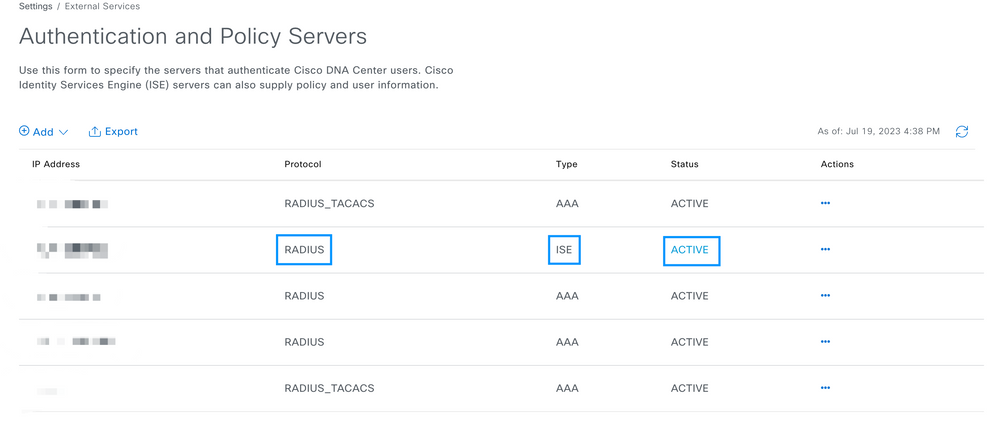

Note: RADIUS_TACACS Protocol type works for this document.

Warning: In case the ISE server is not on Active Status, you must need to fix the integration first.
Step 2. On ISE Server navigate to Administration > Network Resources > Network Devices, click on the Filter icon, write the Cisco DNA Center IP Address and confirm if an entry exist. If it does, proceed to the Step 3.
If the entry is missing, you must see the No data available message.

In this case, you must create a Network Device for Cisco DNA Center, so click on the Add button.

Configure the Name, Description and IP Address (or Addresses) from Cisco DNA Center, all other settings are set to Default values and are not needed for the purpose of this document.
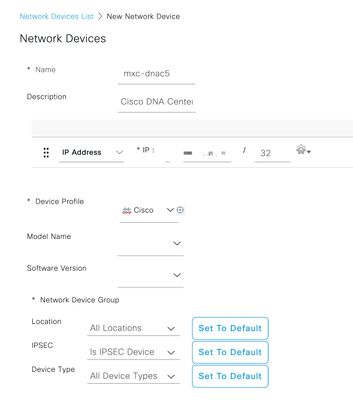
Scroll down and enable the RADIUS Authentication Settings by click on its check box and configure a Shared Secret.
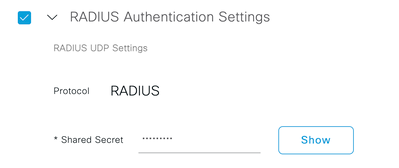

Tip: This Shared Secret is going to be needed later, so save it somewhere else.
Only then, click on Submit.
Step 3. On ISE Server navigate to Policy > Policy Elements > Results, to create the Authorization Profile.
Make sure you are under Authorization > Authorization Profiles, then select the Add option.

Configure Name, add a Description just to keep a record of the new Profile and make sure that the Access Type is set to ACCES_ACCEPT.
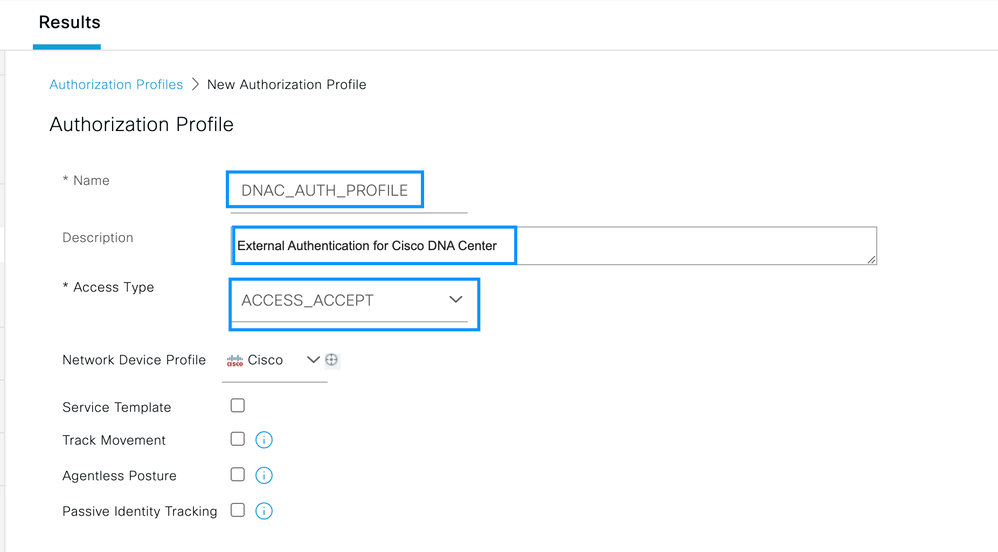
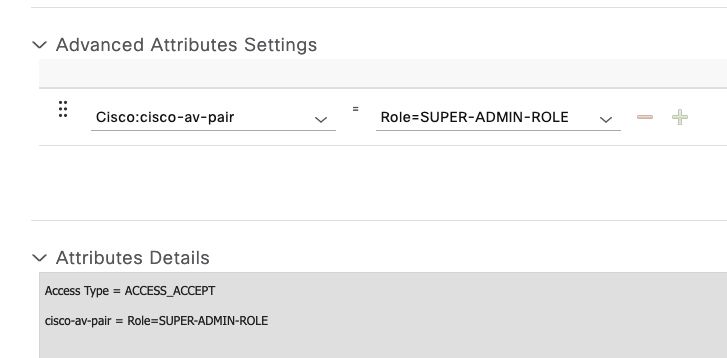
Scroll down and configure the Advanced Attributes Settings.
On the left column search for the cisco-av-pair option and select it.
On the right column manually type Role=SUPER-ADMIN-ROLE.
Once it looks like the image below, click on Submit.
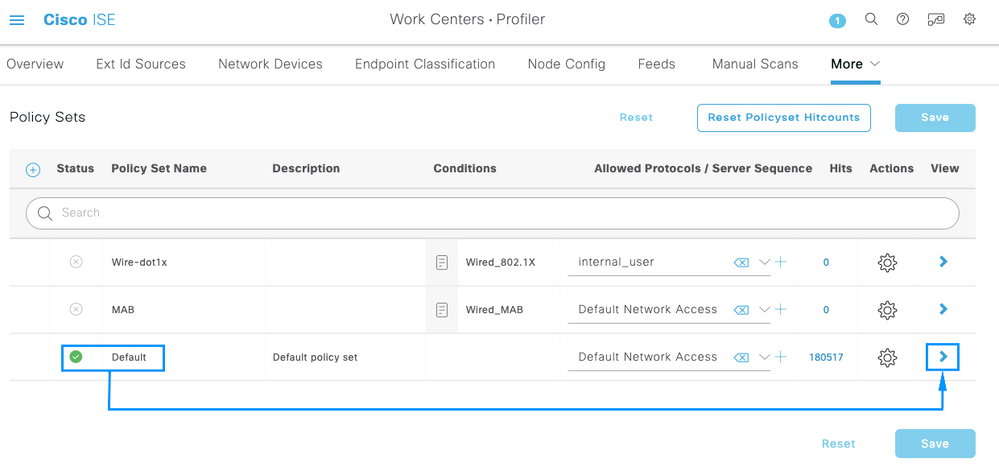
Step 4. On ISE Server navigate to Work Centers > Profiler > Policy Sets, to configure the Authentication & Authorization Policy.
Identify the Default policy and click on the blue arrow to configure it.
Inside the Default Policy Set, expand the Authentication Policy and under the Default section, expand the Options and make sure that they match the configuration bellow.
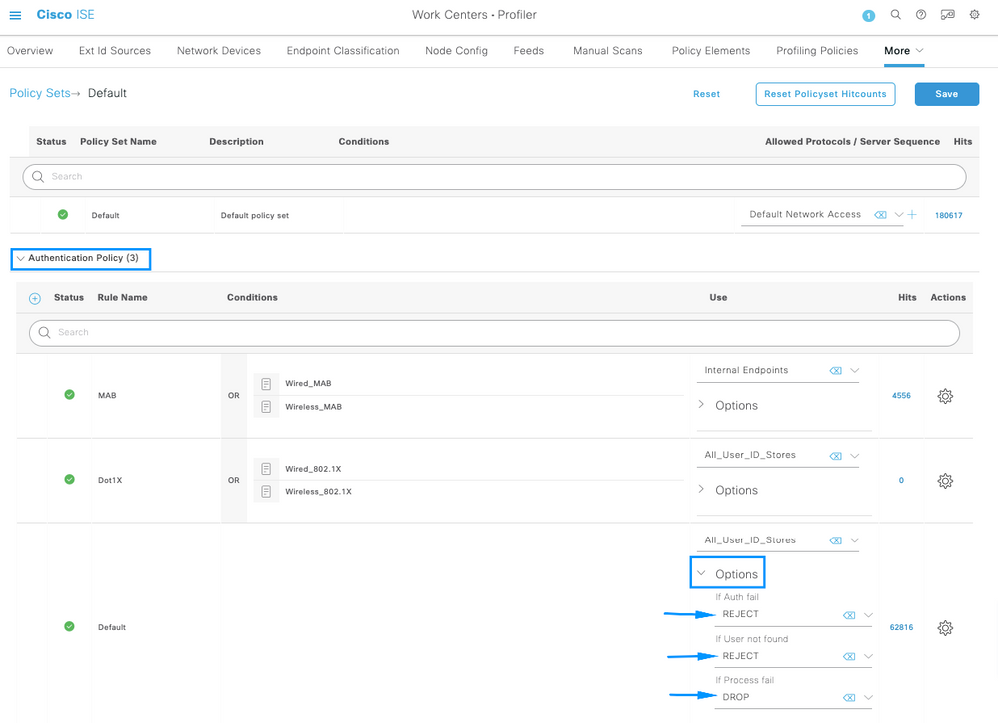

Tip: REJECT configured on the 3 options also works
Inside the Default Policy Set, expand the Authorization Policy and select the Add icon to create a new Authorization Condition.
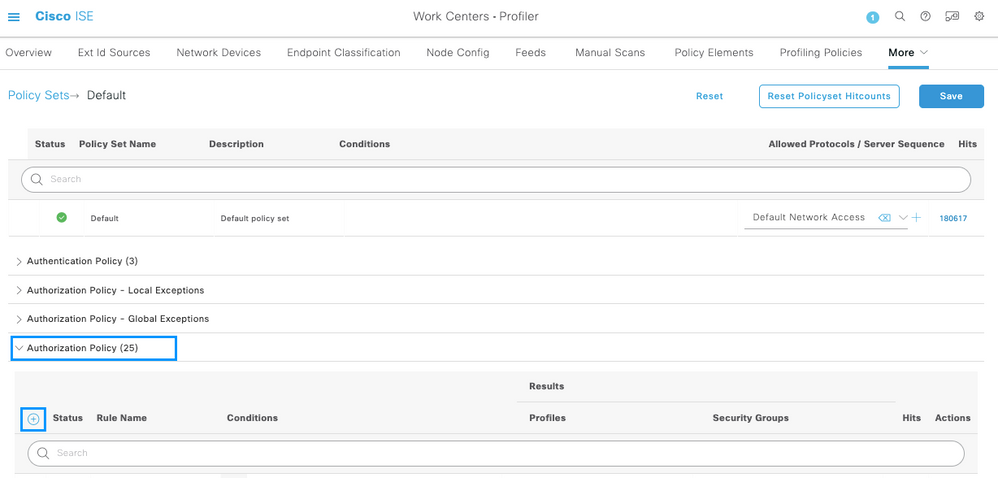
Configure a Rule Name, and click on the Add icon to configure the Condition.
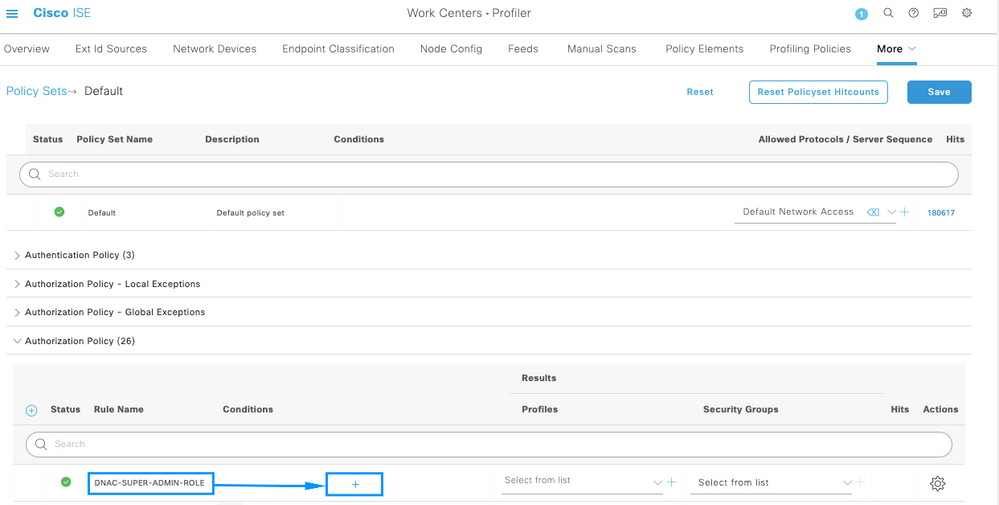
As part of the Condition, associate it to the Network Device IP Address configured on Step 2.
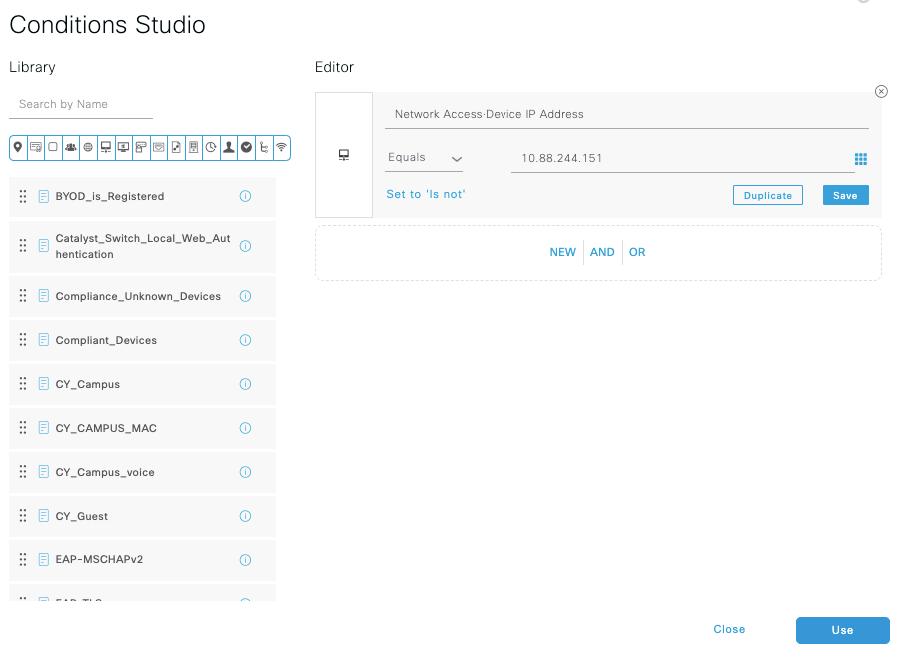
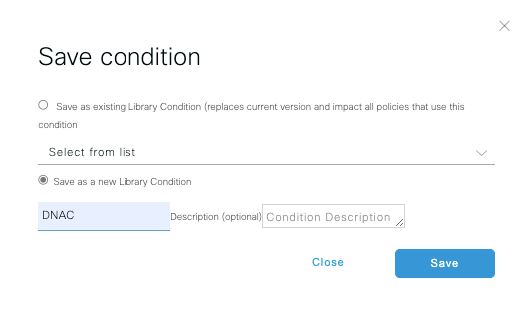
Click on Save.
Save it as a new Library Condition, and named it as you wish, on this case it is named as DNAC.
Finally, configure the Profile created on Step 3.
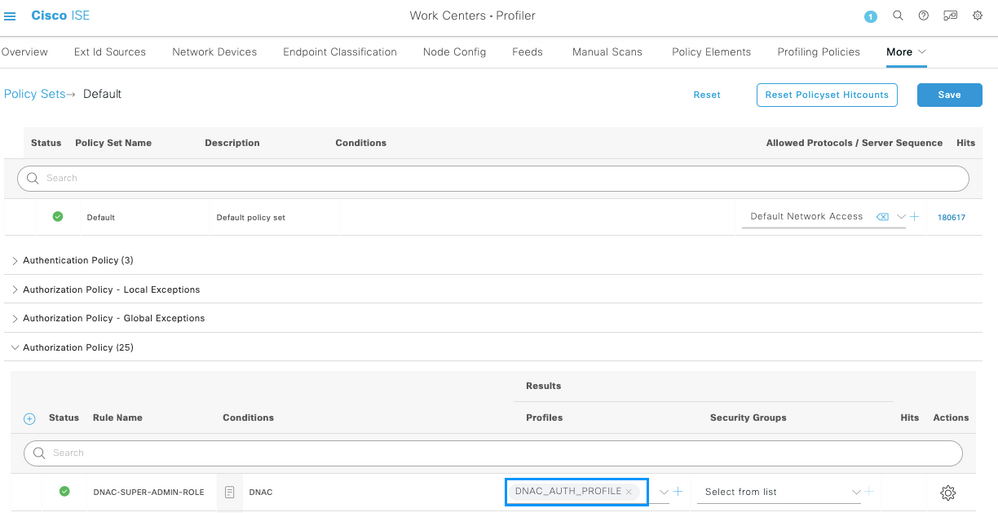
Click on Save.
Step 5. Login to the Cisco DNA Center GUI and navigate toExternal Authentication.
Click on the Enable External User option and set the AAA Attribute as Cisco-AVPair.
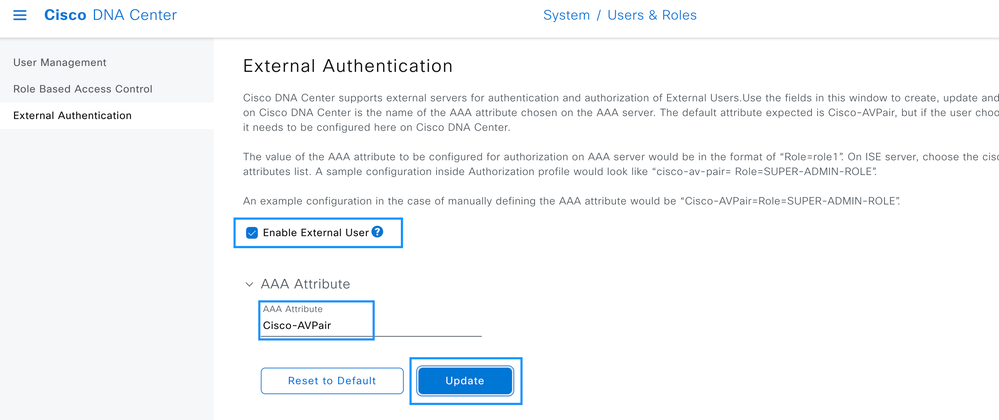

Note: ISE Server use the attribute Cisco-AVPair on the backend, so the configuration on Step 3 is valid.
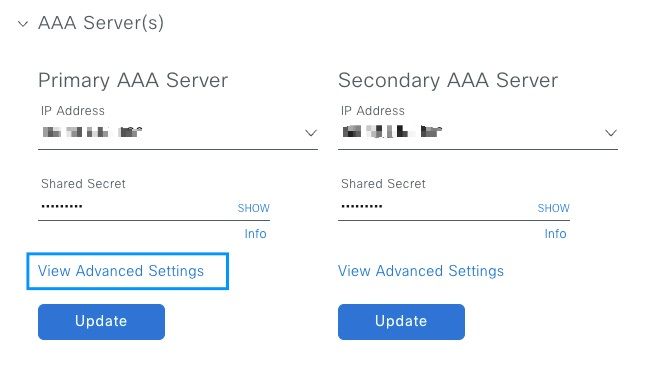
Scroll down to see the AAA Server(s) configuration section. Configure the IP Address from ISE Server on Step 1 and the Shared Secret configured on Step 3.
Then click on View Advanced Settings.
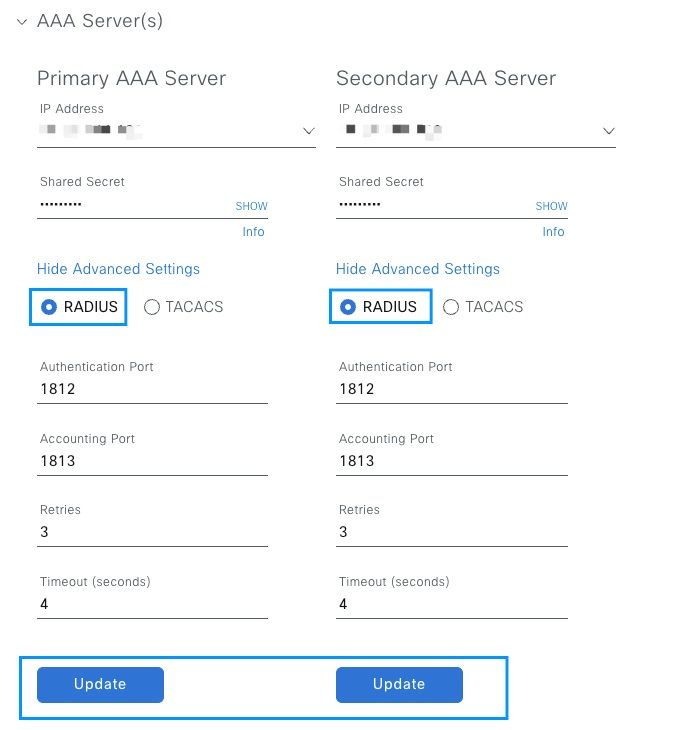
Verify that RADIUS option is selected and click the Update button on both Servers.
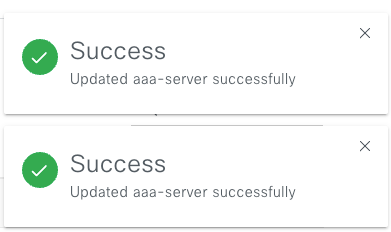
You must see a Success message for each.
Now you are be able to login with any ISE Identity created under ISE menu > Administration > Identity Management > Identities > Users.
In case you don't have any created, login to ISE, navigate to above path, and add a new Network Access User.

Verify
Load the Cisco DNA Center GUI and Log in with a User from ISE identities.
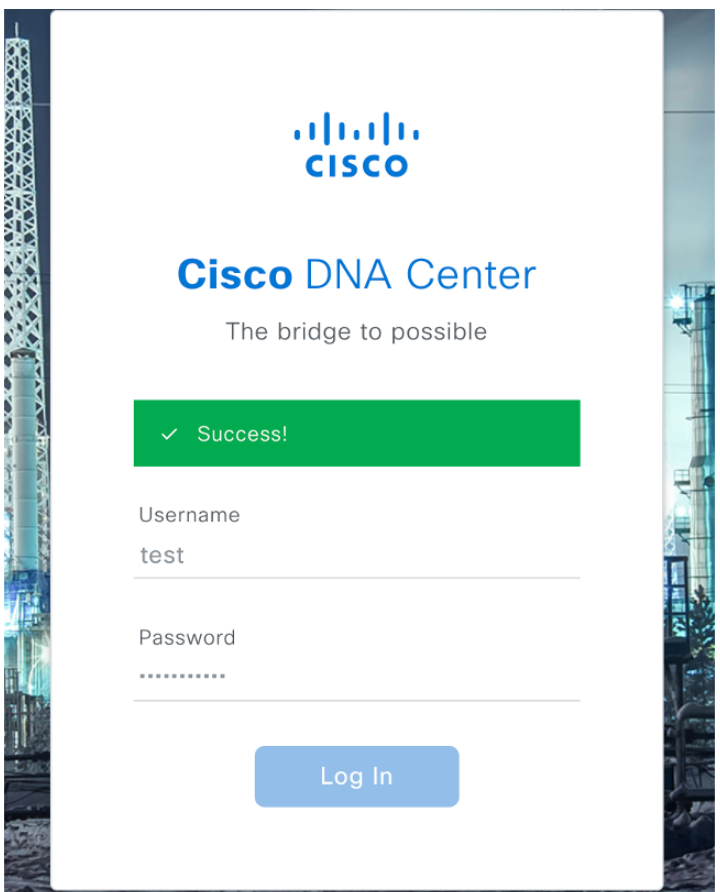 DNA Center Log In

Note: Any user on ISE identities is able to login now. You can add more granularity to the Authentication rules on ISE Server.
After the login Succeed the Username is displayed on the Cisco DNA Center GUI
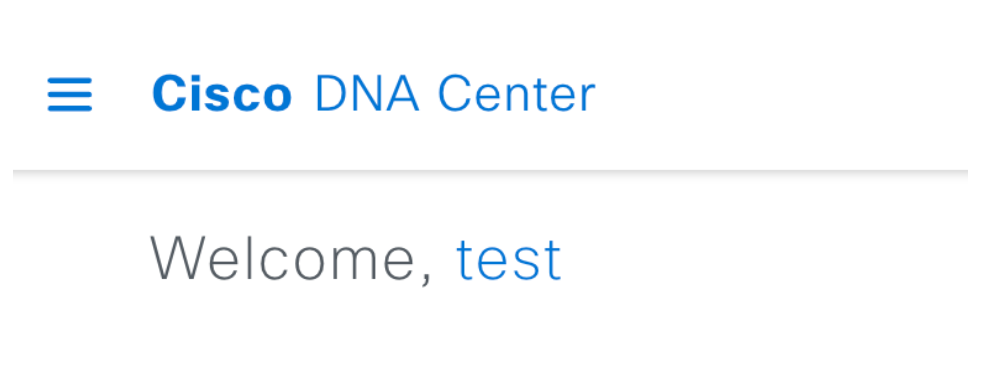 Welcome Screen
More Roles
You can repeat these steps for every role on Cisco DNA Center, as default we have: SUPER-ADMIN-ROLE, NETWORK-ADMIN-ROLE and OBSERVER-ROLE.

On this document we use the SUPER-ADMIN-ROLE role example, nevertheless, you can configure one Authorization Profile on ISE for every role on Cisco DNA Center, the only consideration is that the Role configured on Step 3 needs to match exactly (case sensitive) the Role name on Cisco DNA Center.




 Feedback